Arduino WiFi Shield Available, Costs $85 USD

Over on the Arduino blog, the release of the official Arduino WiFi shield was just announced. On the spec page for this WiFi shield. we can see this new board isn’t a slouch; it’s powered by a 32-bit ATMega 32UC3 microcontroller, has provisions for WEP and WPA2 encryption, and supports both TCP and UDP with the Arduino WiFi library. It also costs €69/$85/£55 from the Arduino store.

Now that the announcement of the Arduino WiFi shield is over with, we’ll take this opportunity to go through a few other WiFi adapters for the Arduino that don’t cost an arm and a leg.

The WiFly shield – available from Sparkfun – is a WiFi adapter with the same form factor as the ever popular XBee modules. Of course, it’s possible to make your own breakout board; the WiFly only needs a TX, RX, power and ground connection to connect your Arduino project to the Internet.

We’ve seen a few projects use the WiShield from async labs. It’s a WiFi module packaged in the familiar Arduino shield form factor, and costs $55 USD.

For the hardcore hackers out there, you could always get a bare Microchip WiFi module and get it to work with an AVR as [Quinn Dunki] attempted to. In all fairness, [Quinn] was trying to de-Arduinofy the WiFi library; if you’re cool with Arduino code swimming around in your project, this method will probably work.

There’s also the very, very cool Electric Imp. Basically, it’s an SD card with a built-in WiFi module. After configuring the Imp by holding it up to patterns flashing on your smartphone screen, this device serves as a transparent bridge to the magical ‘cloud’ we’ve been hearing about. The Electric Imp was supposed to have been released in late July/early August, and we’ll put a post up when this cool device actually launches.

Of course we’re neglecting the simplest solution to getting WiFi running on an Arduino project: just use a wireless router. Really, all you need is a pair of TX and RX pins and a copy of OpenWRT. Easy, and you probably have the necessary hardware lying around.

We’re missing a few methods of Arduinofying a WiFi connection (or WiFying an Arduino…), but we’ll let our readers finish what we started in the comments.

tft-with-arduino

Use A Nokia N82 TFT Panel With Your Arduino

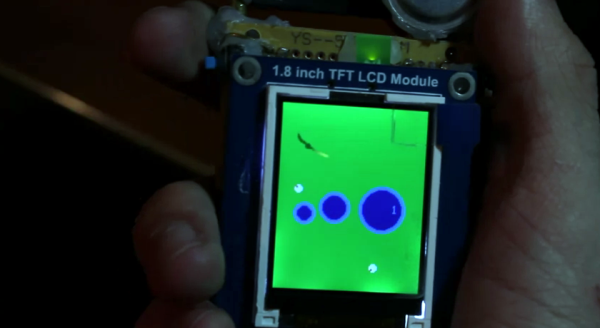
[Andy] has been hard at work reverse-engineering the Nokia N82 2.4 inch cell phone display for use with an Arduino. As pointed out in the article, this same 2.4 inch display can be found in at least seven other Nokia products, so they are readily available. The panels can be found for as low as 3 pounds (or a little less than 5 dollars) on Ebay.

The results are quite good and can be seen in the videos after the break. The first demo displays a simulated weather report, and the second displays some JPEG images. Although an Arduino Mega was used in this demonstration, a standard Arduino can be used as well. Schematics as well as a bill of materials is included in the article, however if you’d rather just buy a board, he’s selling the rest of what he’s built on a first come first served basis. No word on how many he has in stock though!
Continue reading “Use A Nokia N82 TFT Panel With Your Arduino”

Lite Brites Fade, But LED Clocks Are Forever

litebrite-clock

Ahh, the Lite Brite.

What could be more fun than pushing dozens of little plastic pegs through a piece of black paper in order to create a pixelated, though colorful image? Well, I can think of quite a few things more engaging than that, and luckily so can [Lonnie Honeycutt] over at MeanPC.

While contemplating what to build with a pile of LEDs, his daughter came into the room with her portable Lite Brite. He thought that the pegs she was using looked awfully similar to the LEDs on his desk, so he did some test fitting and was surprised to see that they fit almost perfectly.

[Lonnie] thought that the toy would make an excellent clock, and his daughter happily agreed to let Dad do some tinkering. A few hours, an Arduino, and some Charlieplexing later, he had a nice looking clock that his kids were sure to enjoy.

If you’re interested in seeing more about how constructed, be sure to check out his YouTube channel and Instructable, where he happily provides all of the build details.

Making The Arduino Sleep The Long Sleep

Earlier this week, I showed you [Naim Busek’s] kickstarter for his turn signal helmet. In that article I explained that, while the helmet is a neat idea, I was really interested in what [Naim] had told me about his power consumption.  To put it the shortest way, he has made his arduino sleep so efficiently, it can be waiting for input longer than the battery’s optimum shelf life.

After that article, [Naim] wrote in to give me the details on what he did to achieve such an efficient system. You can read his entire explanation, un altered here.

Continue reading “Making The Arduino Sleep The Long Sleep”

Turn Signals On Your Head

Several weeks ago, I was in Culver City L.A., and happened to find a hackerspace nearby. It was a pleasant coincidence that the night I chose to randomly show up, was their public meeting which focused more on projects people were doing. The place was packed, I was barely able to squeeze in the door and actually stood outside for part of the meeting, just listening to people talk about what they’re making.

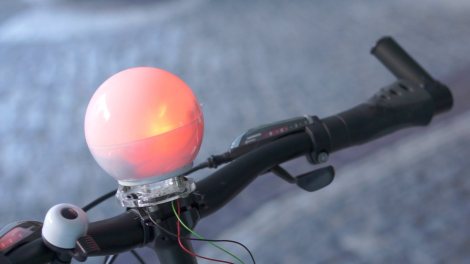
One of the projects I did get to see was this bike helmet built by [Naim]. At first I was amused at the idea, but the idea of putting lights and an accelerometer on a helmet wasn’t that groundbreaking. But as [Naim] kept talking, he caught my attention. For one thing, the one he was showing at the hackerspace seemed to have some built in correction for natural head movement. In this video he does look around a bit without false positives. At the hackerspace he explained the way he monitors the motion to avoid natural movements causing the lights to initialize.

The part I was really interested in was his power. He spent tons of time reducing the power consumption on the base arduino. I believe the number he used was 10 years of standby without causing the battery to vent or die. If you pick up the helmet at any point during that time period, it automatically turns itself on based on the accelerometer’s motion. While the bike helmet itself was a fairly cute idea, I was really trying to get him to send me the information on how he’s saving power. I believe he had to cut the traces to the arduino’s native power management. Hopefully we’ll still hear from him on the details.

Arduino Voltage Measurement Tricks

We think it’s a great learning experience to tear back the veil of abstraction and learn a bit more about the hardware found on an Arduino board. This project is a great example. [Scott Daniels] takes a look at the other voltage measurement options available to AVR chips used by Arduino.

If you’ve used the analogRead() function then you’ve already measured a voltage using the Arduino. But do you know what is going on behind the scenes to make this happen? The Analog to Digital converter on the AVR chip is being used to measure an incoming voltage by comparing it to a known voltage reference. That reference is by default the supply voltage line for the chip. This should be 5V but will only be as accurate as the regulator supplying it. [Scott] looks at the other voltage references that may be used. An external reference can be used by adding hardware, but that’s not the focus of his article. Instead he looks at using the 1.1V internal reference. He’s written some short example code that let’s you measure the incoming line voltage based on that internal reference. This is a very handy trick that can let you detect when the chips is running from a battery and how much juice is left in the cell.

Donation Meter Raises Alarm When Not Plugged With Coins

This is something of a mandatory donation meter. If you don’t feed it with coins it sounds a very loud alarm continuously.

[Piet De Vaere] built the device for a free festival in Ghent, Belgium. The intent is to help raise awareness that although free of an admission price, the success of the event depends on donations. It works much like a parking meter. When you feed it coins time is added to the meter. When it runs all the way down that large loudspeaker on the right side of the case sounds the alarm.

In the video after the break [Piet] walks us through a demonstration, followed by a tour of the hardware. The pointer on the meter is a piece of cardboard connected to a servo. An Arduino board controls the servo, adding time in two-minute intervals whenever a coin enters the chute and passes by an optical sensor. There is no distinction between types of coins.

The use of a pizza box as a prototyping board shows that you don’t have to be fancy to build something neat.

Continue reading “Donation Meter Raises Alarm When Not Plugged With Coins”