In many parts of the world the COVID-19 pandemic is causing shortages in hospital space, staff, medical supplies, and equipment. Severe cases may require breathing support, but there are only so many ventilators available. With that in mind, MIT is working on FDA approval of an emergency ventilator system (E-Vent). They have submitted the design to the FDA for fast track review. The project is open source, so once they have approval the team will release all the data needed to replicate it.
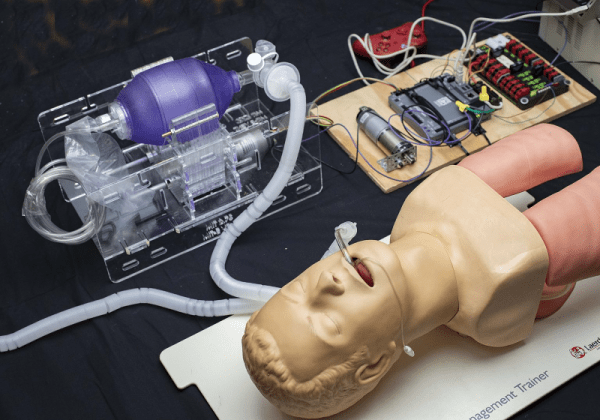
The design is actually made simple by using something that is very common: a manual resuscitator. You have doubtlessly seen these on your favorite medical show. It is the bag someone squeezes while the main character struggles valiantly to save their patient. Of course, having someone sit and squeeze the bag for days on end for thousands of people isn’t very practical and that’s where they’ve included an Arduino-controlled motor to automate the process.