Hydrogen Generation With Seawater, Aluminum, And… Coffee?

A team at MIT led by [Professor Douglas Hart] has discovered a new, potentially revelatory method for the generation of hydrogen. Using seawater, pure aluminum, and components from coffee grounds, the team was able to generate hydrogen at a not insignificant rate, getting the vast majority of the theoretical yield of hydrogen from the seawater/aluminum mixture. Though the process does use indium and gallium, rare and expensive materials, the process is so far able to recover 90% of the indium-gallium used which can then be recycled into the next batch. Aluminum holds twice as much energy as diesel, and 40x that of Li-Ion batteries. So finding a way to harness that energy could have a huge impact on the amount of fossil fuels burned by humans!

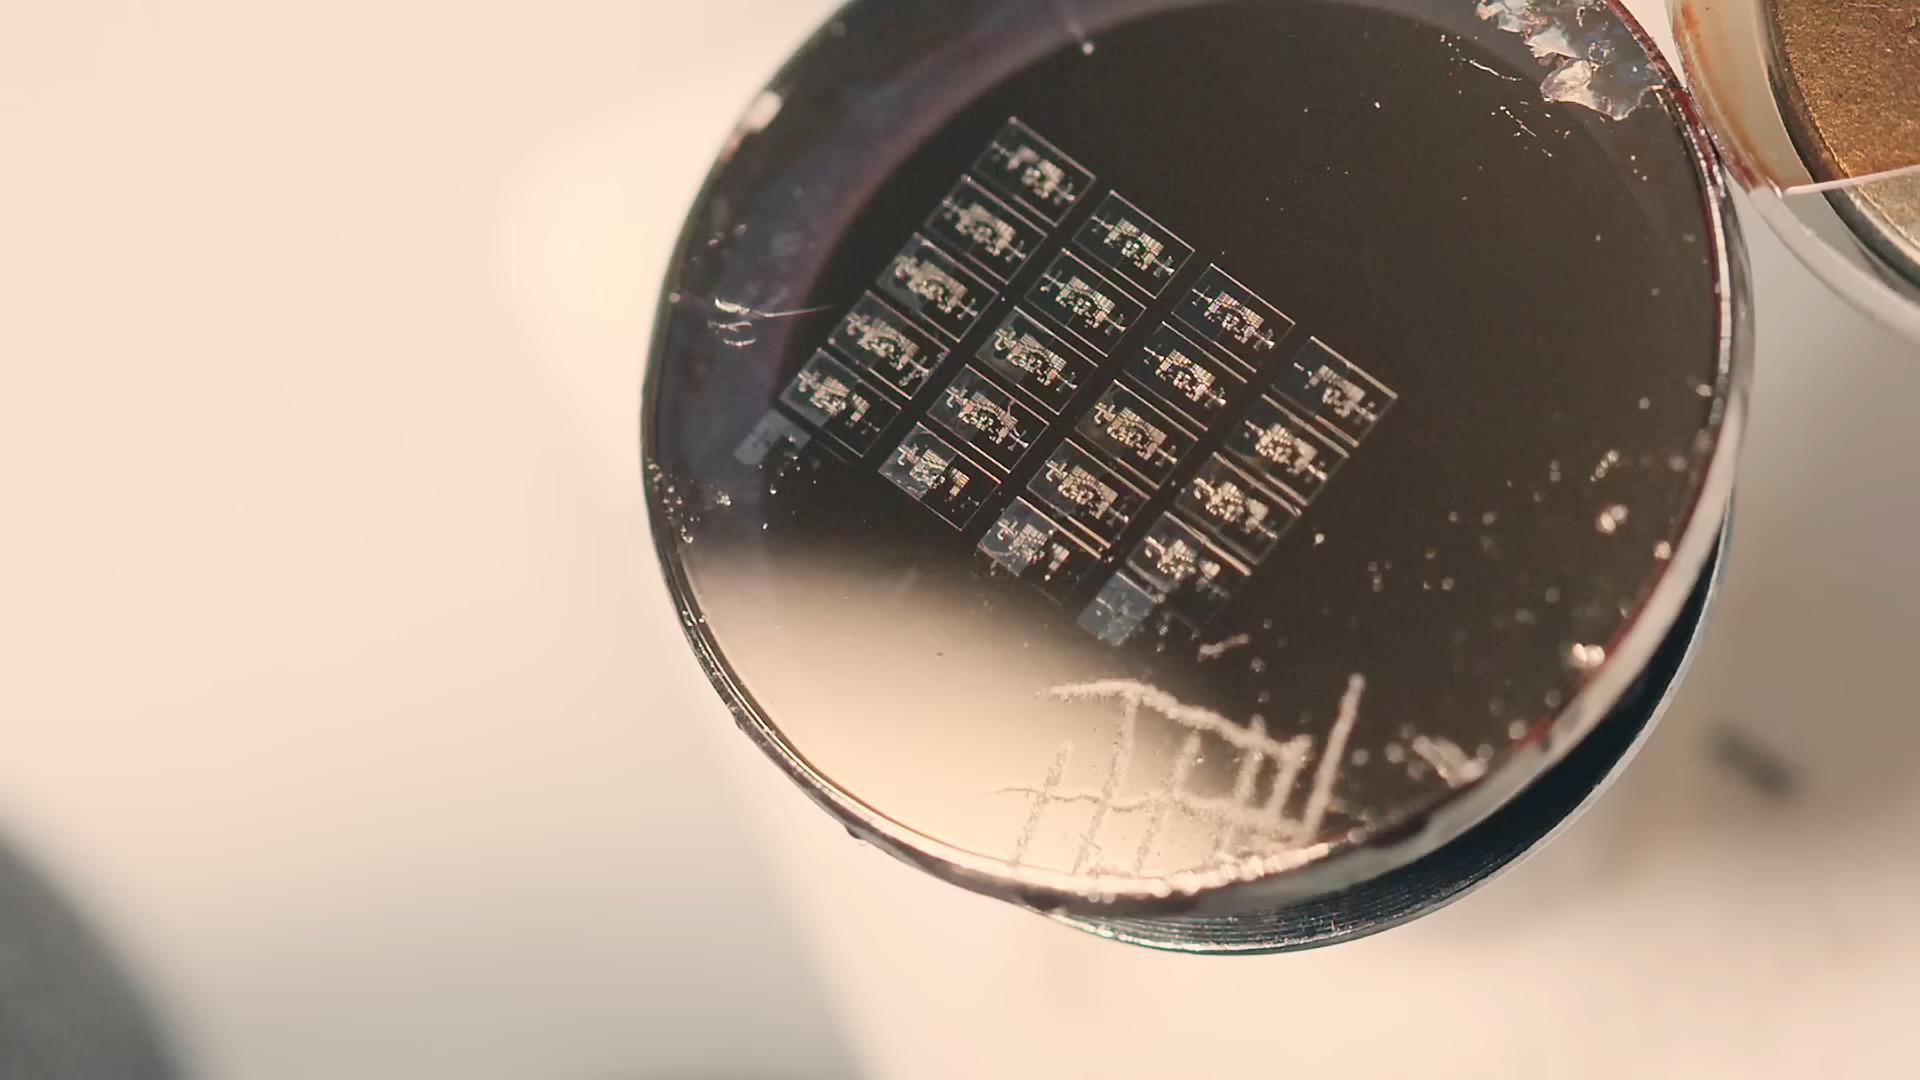
Pure, unoxidized aluminum reacts directly with water to create hydrogen, as well as aluminum oxyhydroxide and aluminum hydroxide. However, any aluminum that has had contact with atmospheric air immediately gets a coating of hard, unreactive aluminum oxide, which does not react in the same way. Another issue is that seawater significantly slows the reaction with pure aluminum. The researchers found that the indium-gallium mix was able to not only allow the reaction to proceed by creating an interface for the water and pure aluminum to react but also coating the aluminum pellets to prevent further oxidization. This worked well, but the resulting reaction was very slow.

Apparently “on a lark” they added coffee grounds. Caffeine had already been known to act as a chelating agent for both aluminum and gallium, and the addition of coffee grounds increased the reaction rate by a huge margin, to the point where it matched the reaction rate of pure aluminum in deionized, pure water. Even with wildly varying concentrations of caffeine, the reaction rate stayed high, and the researchers wanted to find out specifically which part of the caffeine molecule was responsible. It turned out to be imidazole, which is a readily available organic compound. The issue was balancing the amount of caffeine or imidazole added versus the gallium-indium recovery rate — too much caffeine or imidazole would drastically reduce the recoverable amount of gallium-indium.

Continue reading “Hydrogen Generation With Seawater, Aluminum, And… Coffee?”

Creating 1 Um Features The Hacker Way

[Breaking Taps] has done some lithography experiments in the past, including some test patterns and a rudimentary camera sensor. But now, it’s time to turn it up a notch with 1µm garage semiconductor ambitions.

The e-beam lithography he’s done in the past can achieve some impressive resolutions, but they aren’t very fast; a single beam of electrons needs to scan over the entire exposure area, somewhat like a tiny crayon. That’s not very scalable; he needed a better solution to make 1µm semiconductors.

Test patterns from the first attempt

In his quest, he starts by trying to do maskless photolithography, using a literal projector to shine light on the target area all at once. After hacking a projector devkit apart, replacing blue with ultraviolet and adding custom optics, it’s time for a test. The process works for the most part but can’t produce fine details the way [Breaking Taps] needs. Unfortunately, fixing that would mean tearing the whole set-up apart for the umpteenth time.
Continue reading “Creating 1 Um Features The Hacker Way”

Spin Your Own Passive Cooling Fibres

When the temperature climbs, it’s an eternal problem: how to stay cool. An exciting field of materials science lies in radiative cooling materials, things which reflect so much incoming heat that they can cool down from their own radiation rather than heating up in the sun. It’s something [NightHawkInLight] has been working on over a series, and he’s dropped a very long video we’ve placed below. It’s ostensibly about spinning radiative cooling fibers, but in fact provides a huge quantity of background as well as a bonus explanation of cotton candy machines.

These materials achieve their reflectivity by creating a surface full of microscopic bubbles. It’s the same process that makes snow so white and reflective, and in this case it’s achieved by dissolving a polymer in a mixture of two solvents. The lower boiling point solvent evaporates first leaving the polymer full of microscopic bubbles of the higher boiling point solvent, and once these evaporate they leave behind the tiny voids. In the video he’s using PLA, and we see him experimenting with different solvents and lubricants to achieve the desired result. The cotton candy machine comes in trying to create fibers by melting solid samples, something which doesn’t work as well as it could so instead he draws them by hand with a small rake.

When he tests his mat of fibers in bright sunlight the effect is almost magical if we didn’t already know the mechanism, they cool down by a few degrees compared to ambient temperature and the surrounding control materials. This is a fascinating material, and we hope we’ll see more experimenters working with it. You won’t be surprised to hear we’ve featured his work before.

Continue reading “Spin Your Own Passive Cooling Fibres”

Lab-grown diamonds in 'cake' form -- before they are processed and polished.

Is It Time For Synthetic Diamonds To Shine?

The process of creating a diamond naturally takes between 1 and 3.3 billion years. Conversely, a lab-grown diamond can now be created in 150 minutes. But despite being an ethical and environmentally-friendly alternative to the real thing, the value of lab-grown diamonds has plummeted in recent years. Manufacturers are doing various things to battle the stigma and increase their value by being carbon neutral and using recycled metals.

About halfway through is where this article gets really interesting. Swiss jeweler LOEV has partnered with lab growers Ammil to produce a line of Swiss-made jewelry by relying on renewable energy sources. 90% comes from hydroelectric power, and the rest comes from solar and biomass generation. Now, on to the process itself.

A lab-grown diamond 'cake' before the excess carbon is lasered away.
You can have your cake and heat it, too.

Growing a diamond starts with a seed — a thin wafer of diamond laser-shaved off of an existing stone, and this is placed in a vacuum chamber and subjected to hydrocarbon gas, high heat (900 to 1200 °C), and pressure.

Then, a microwave beam induces carbon to condense and form a plasma cloud, which crystallizes and forms diamonds. The result is called a ‘cake’ — a couple of diamond blocks. The excess carbon is lasered away, then the cake is processed and polished. This is known as the chemical vapor deposition method (CVD).

There is another method of growing diamonds in a lab, and that’s known as the high-pressure, high-temperature (HPHT) method. Here, a small bit of natural diamond is used to seed a chamber filled with carbon, which is then subjected to high pressure and temperatures. The carbon crystallizes around the seed and grows around a millimeter each day.

As the industry evolves, lab-grown diamonds present a sustainable alternative to natural diamonds. But the consumer is always in charge.

Once you’ve got a stone, what then? Just use 3D printing to help create the ring and setting.

Colour Film Processing For The 2020s Hacker

We’re now somewhere over two decades since the mass adoption of digital photography made chemical film obsolete in a very short time, but the older technology remains in use by artists and enthusiasts. There’s no longer a speedy developing service at you local mall though, so unless you don’t mind waiting for one of the few remaining professional labs you’ll be doing it yourself. Black-and-white is relatively straightforward, but colour is another matter. [Jason Koebler] has set up his own colour processing lab, and takes us through the difficult and sometimes frustrating process.

From an exhaustive list of everything required, to a description of the ups and downs of loading a Patterson tank and the vagiuaries of developer chemicals, we certainly recognise quite a bit of his efforts from the Hackaday black-and-white lab. But this is 2024 so there’s a step from days past that’s missing. We no longer print our photos, instead we scan the negatives and process then digitally, and it’s here that some of the good advice lies.

What this piece shows us is that colour developing is certainly achievable even if the results in a home lab can be variable. If you’re up for trying it, you can always automate some of the process.

Desiccants, Tested Side By Side

We’re so used to seeing a little sachet of desiccant drop out of a package when we open it, that we seldom consider these essential substances. But anyone who spends a while around 3D printing soon finds the need for drying their filament, and knowing a bit about the subject becomes of interest. It’s refreshing then to see [Big Clive] do a side-by-side test of a range of commonly available desiccants. Of silica gel, bentonite, easy-cook rice, zeolite, or felight, which is the best? He subjects them to exactly the same conditions over a couple of months, and weighs them to measure their efficiency in absorbing water.

The results are hardly surprising, in that silica gel wins by a country mile. Perhaps the interesting part comes in exploding the rice myth; while the rice does have some desiccant properties, it’s in fact not the best of the bunch despite being the folk remedy for an immersed mobile phone.

Meanwhile, this isn’t the first time we’ve looked at desiccants, in the past we’ve featured activated alumina.

Continue reading “Desiccants, Tested Side By Side”

Low-Cost Cryocooler Pumps Out Cheap DIY Liquid Nitrogen

A word of caution if you’re planning to try this cryocooler method for making liquid nitrogen: not only does it involve toxic and flammable gasses and pressures high enough to turn the works into a bomb, but you’re likely to deplete your rent account with money you’ll shell out for all the copper tubing and fittings. You’ve been warned.

In theory, making liquid nitrogen should be as easy as getting something cold enough that nitrogen in the air condenses. The “cold enough” part is the trick, and it’s where [Hyperspace Pirate]’s cryocooler expertise comes into play. His setup uses recycled compressors from cast-off air conditioners and relies on a mixed-gas Joule-Thomson cycle. He plays with several mixtures of propane, ethylene, methane, argon, and nitrogen, with the best results coming from argon and propane in a 70:30 percent ratio. A regenerative counterflow heat exchanger, where the cooled expanding gas flows over the incoming compressed gas to cool it, does most of the heavy lifting here, and is bolstered by a separate compressor that pre-cools the gas mixture to about -30°C before it enters the regenerative system.

There’s also a third compressor system that pre-cools the nitrogen process gas, which is currently supplied by a tank but will eventually be pulled right from thin air by a pressure swing adsorption system — basically an oxygen concentrator where you keep the nitrogen instead of the oxygen. There are a ton of complications in the finished system, including doodads like oil separators and needle valves to control the flow of liquid nitrogen, plus an Arduino to monitor and control the cycle. It works well enough to produce fun amounts of LN2 on the cheap — about a quarter of the cost of commercially made stuff — with the promise of efficiency gains to come.

It does need to be said that there’s ample room for peril here, especially containing high pressures within copper plumbing. Confidence in one’s brazing skills is a must here, as is proper hydro testing of components. That said, [Hyperspace Pirate] has done some interesting work here, not least of which is keeping expenses for the cryocooler to a minimum.

Continue reading “Low-Cost Cryocooler Pumps Out Cheap DIY Liquid Nitrogen”