A team at [Vanderbilt University] have been hacking together their own peristaltic pumps. Peristaltic pumps are used to deliver precise volumes of fluid for research, medical and industrial applications. They’re even occasionally used to dose fish tanks.
They work by squeezing the fluid in a flexible tube with a series of rollers (check out the awesome gif from Wikipedia to the right). We’ve seen 3D printed peristaltic pumps before, and cheap pumps have been appearing on eBay. But this build is designed to be lab grade, and while the cheap eBay devices can deliver ~20ml/min this one can deliver flow rates in the microliter/min range. It also has a significant cost advantage over commercial research grade pumps which typically cost thousands of dollars, each of these pumps costs only fifty bucks.
The pump has a clear hacker heritage, using an Arduino Uno, Adafruit Motor shield, and 3D printed mechanical parts. So it’s particularly awesome that they’ve also made their design files and Arduino code freely available!
Any NYC hackers may have noticed something a bit odd this summer while taking a walk… Giant tanks of the Liquid Nitrogen have been popping up around the city.
There are hoses that go from the tanks to manholes. They’re releasing the liquid nitrogen somewhere… Are they freezing sewer alligators? Fighting the Teenage Mutant Ninja Turtles? Or perhaps, cooling our phone lines??
Luckily, we now have an answer. Popular Science writer [Rebecca Harrington] got to investigate it as part of her job. As it turns out, the liquid nitrogen is being used to pressurize the cables carrying our precious phone and internet service in NYC. The cables have a protective sheath covering them, but during construction and repairs, the steam build up in some of the sewers can be too much for them — so they use liquid nitrogen expanding into gas to supplement the pressurized cables in order to keep the them dry. As the liquid nitrogen boils away, it expands 175 times which helps keep moisture out of the cables.
[Taavi] has a problem – a wonky alarm clock is causing him to repeatedly miss his chemistry class. His solution? Outfit his clock radio with a supercapacitor, of course! But not just any supercapacitor – a home-brew 400 Farad supercap in a Tic Tac container (YouTube video in Estonian with English subtitles.)
[Taavi] turns out to be quite a resourceful lad with his build. A bit of hardware cloth and some stainless steel from a scouring pad form a support for the porous carbon electrode, made by mixing crushed activated charcoal with epoxy and squeezing them in a field-expedient press. We’ll bet his roommates weren’t too keen with the way he harvested materials for the press from the kitchen table, nor were they likely thrilled with what he did to the coffee grinder, but science isn’t about the “why?”; it’s about the “why not?” Electrodes are sandwiched with a dielectric made from polypropylene shade cloth, squeezed into a Tic Tac container, and filled with drain cleaner for the electrolyte. A quick bit of charging circuitry, and [Taavi] doesn’t have to sweat that tardy slip anymore.
As for [Taavi]’s supercap, we’ve seen a few applications for them before, like this hybrid scooter. [Taavi] may also want to earn points for Tic Tac hacks by pairing his supercapacitor with this Tic Tac clock.
For the last few years, the people in the know have been wondering about the memristor. The simplest explanation of what a memristor is comes from the name itself – it’s a memory resistor. In practice it’s a little more complex, but this basic understanding is enough to convey the fact that it’s a resistor that changes its resistance based on how much current has gone through it. The memristor was first described in the 70s by [Leon Chua], the idea sat in journals for nearly forty years, and in 2008 a working memristor was created by HP Labs.
Now you can buy one. Actually, you can buy eight in a 16-pin DIP package. It will, reportedly, cost $240 for the 16-pin DIP. That’s only $30 per memristor, and it’s the first time you can buy them.
These memristors are based on a silver chalcogenide (Ge2Se3). When a circuit ‘writes’ to this memristor and applies a positive voltage, silver ion migrate to the chalcogenide, forming what the datasheet (PDF) calls dendrites. This lowers the resistance of the memristor. When a negative voltage is applied to the device, these dendrites are removed, the memristor is ‘erased’, and the memristor returns to a high-resistance state.
This silver chalcogenide memristor is different from the titanium oxide memristors developed by HP Labs that is most frequently cited when it comes to this forgotten circuit element. This work is from [Kristy Campbell] of Boise State University. She’s been working on it for more than a decade now, with IEEE publications, conference proceedings (that one’s full text), and dozens of patents.
As far as applications for memristors go, there are generally two schools of thought on that. The most interesting, in terms of current computer technology, is storage. Memristors can hold either a binary 0 or a 1 in a fraction of the space NAND Flash or old-fashioned magnetic hard drives ever will. That means greater storage density, and bigger capacity hard drives with lower power requirements. These memristors have a limit of how many times they can be cycled – ‘greater than 2000 times’ according to the datasheet. That’s nearly an order of magnitude less than MLC Flash, and something wear leveling can’t reasonably compensate for. This is a new technology, though, so that could change.
The second major expected use for memristors is neural nets. Neural nets are just a series of inputs, a few neurons, outputs, and connections between all three. These connections are weighted, and the variable resistance of memristors puts them in a unique position to emulate in hardware at the most basic level what was once done with software and custom ASICs. The trade name for these memristors – Neuro-Bit – and the company name – Bio Inspired Technologies – give you a clue at what the intended use is.
As with all new technologies, there’s always something that is inevitably created that was never imagined by the original designers. What these new applications are is at this point just speculation. Now that anyone can buy one of these neat new chips, it’s going to be interesting to see what can be made with these parts.
On a fundamental level a computer’s processor is composed of logic gates. These gates use the presence of electricity and lack thereof to represent a binary system of ones and zeros. You say “we already know this!” But have you ever considered the idea of using something other than electricity to make binary computations? Well, a team at Stanford University has. They’re using tiny droplets of water and bar magnets to make logic gates.
Their goal is not to manipulate information or to compete with modern ‘electrical’ computers. Instead, they’re aiming to manipulate matter in a logical way. Water droplets are like little bags that can carry an assortment of other molecules making the applications far reaching. In biology for instance, information is exchanged via Action Potentials – which are electrical and chemical spikes. We have the electrical part down. This technology could lead to harnessing the chemical part as well.
Be sure to check out the video below, as they explain their “water computer” in more detail.
[NurdRage] recently picked up a magnetic stirrer and hotplate. It’s been working great so far, but it lacks a thermometer probe. [NurdRage] thought he was getting one with the hotplate when he ordered it, he just never received one. Contacting the seller didn’t elicit a response, and reading the terribly translated manual didn’t even reveal who the manufacturer was. Figuring this was a knock-off, a bit more research revealed this hotplate was a copy of a SCILOGEX hotplate. The SCILOGEX temperature probe would cost $161 USD. That’s not cool.
The temperature probe was listed in the manual as a PT1000 sensor; a platinum-based RTD with a resistance of 1000Ω at 0°C. If this assumption was correct, the pinout for the temperature probe connector can be determined by sticking a 1kΩ resistor in the connector. When the hotplate reads 0ºC, that’s the wires the temperature probe connects to.
With the proper pin connectors found, [NurdRage] picked up a PT1000 on eBay for a few dollars, grabbed a DIN-5 connector from a 20 year old keyboard, and connected everything together. The sensor was encased in a pipette, and the bundle of wires snaked down piece of vinyl tube.
For $20 in parts, [NurdRage] managed to avoid paying $161 for the real thing. It works just as good as the stock, commercial unit, and it makes for a great video. Check that out below.
[Cody] has a nice little ranch in the middle of nowhere, a rifle, and a supply of ammunition. That’s just fine for the zombie apocalypse, but he doesn’t have an infinite supply of ammo. Twenty years after Z-day, he may find himself without any way to defend himself. How to fix that problem? He needs gunpowder. How do you make that? Here’s a plastic jug.
There are three ingredients required to make gunpowder – saltpeter, charcoal, and sulfur. The last two ingredients are easy enough if you have trees and a mine like [Cody], but saltpeter, the a source of nitrates, aren’t really found in nature. You can make nitrates from atmospheric nitrogen if you have enough energy, but [Cody] is going low tech for this experiment. He’s saving up his own urine in a compost pile, also called a niter bed. It’s as simple as putting a few grass clippings and straw on a plastic tarp, peeing on it for a few months, and waiting for nitrogen-fixing to do their thing.
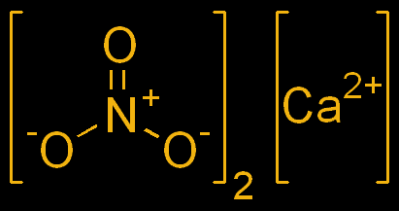
Calcium Nitrate
[Cody] doesn’t have to wait a year for his compost pile to become saturated with nitrates. He has another compost pile that has been going for about 18 months, and this is good enough for an experiment in extracting calcium nitrate. After soaking and straining this bit of compost, [Cody] is left with a solution of something that has calcium nitrate in it. This is converted to potassium nitrate – or saltpeter – by running it through wood ash. After drying out this mess of liquid, [Cody] is left with something that burns with the addition of a little carbon.
With a source of saltpeter, [Cody] only needs charcoal and sulfur to make gunpowder. Charcoal is easy enough to source, and [Cody] has a mine with lead sulfide. He can’t quite extract sulfur from his ore, so instead he goes with another catalyst – red iron oxide, or rust.
The three ingredients are combined, and [Cody] decides it’s time for a test. He has a homebuilt musket, or a piece of pipe welded at one end with a touch hole, and has a big lead ball. With his homebrew gunpowder, this musket actually works. The lead ball doesn’t fly very far, but it’s enough to put a dent in a zombie or deer; not bad for something made out of compost.
Historically, this is a pretty odd way of making gunpowder. For most of history, people with guns have also had a source of saltpeter. During the Napoleonic Wars, however, France could not import gunpowder or saltpeter and took to collecting urine from soldiers and livestock. This source of nitrates was collected, converted from calcium nitrate to potassium nitrate, and combined with charcoal and sulfur to field armies.
Still, [Cody] has a great example of what can be done using traditional methods, and the fact that he can fire a ball down a barrel is proof enough that the niter bed he’s peeing in will produce even better gunpowder.

 They work by squeezing the fluid in a flexible tube with a series of rollers (check out the awesome gif from Wikipedia to the right). We’ve seen 3D printed peristaltic pumps before, and cheap pumps have been appearing on eBay. But this build is designed to be lab grade, and while the cheap eBay devices can deliver ~20ml/min this one can deliver flow rates in the microliter/min range. It also has a significant cost advantage over commercial research grade pumps which typically cost thousands of dollars, each of these pumps costs only fifty bucks.