Syringe pumps are valuable tools when specific amounts of fluid must be dispensed at certain rates and volumes. They are used in many ways, for administering IV medications to liquid chromatography (LC/HPLC). Unfortunately, a commercial pump can cost a pretty penny. Not particularly thrilled with the hefty price tag, [Aldric Negrier] rolled up his sleeves and made a 3D-printed version for 300 USD.
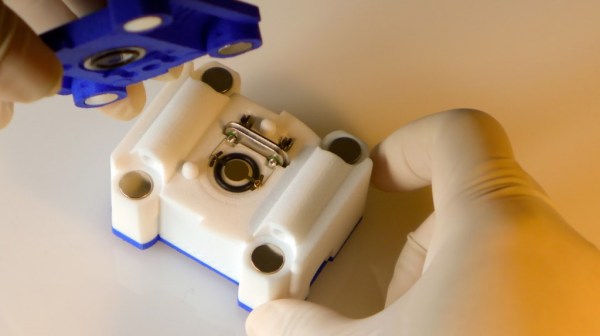
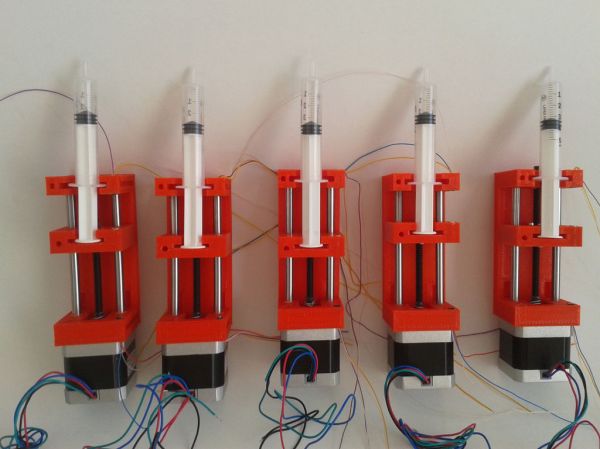
[Aldric] has been featured on Hackaday before, so we knew his latest project would not disappoint. His 3D Printed Syringe Pump Rack contains five individual pumps that can operate independently of each other. Five pieces are 3D-printed to form the housing for each pump. In addition, each pump is composed of a Teflon-coated lead screw, an Arduino Nano V3, a Pololu Micro stepper motor driver, and a NEMA-17 stepper motor. The 3D Printed Syringe Pump Rack runs on a 12V power supply using a maximum of 2 amps per motor.
While the standard Arduino IDE contains the Stepper library, [Aldric] wanted a library that allowed for more precise control and went with the Accelstepper library. The 3D Printed Syringe Pump Rack has a measured accuracy of 0.5µl in a 10ml syringe, which is nothing to laugh at.
Syringe pump racks like [Aldric’s] are another great example of using open source resources and the spirit of DIY to make typically expensive technologies more affordable to the smaller lab bench. If you are interested in other open source syringe pump designs, you can check out this entry for the 2014 Hackaday Prize.
Continue reading “Pump Up The Volume With The 3D Printed Syringe Pump Rack”