Making Aerogel At Home

[Ben] outdid himself. He successfully made monoliths of silica aerogel in his garage. Aerogel, the light-weight solid that has been referred to as ‘hard air’ is really freaking expensive especially in non-granulated form.

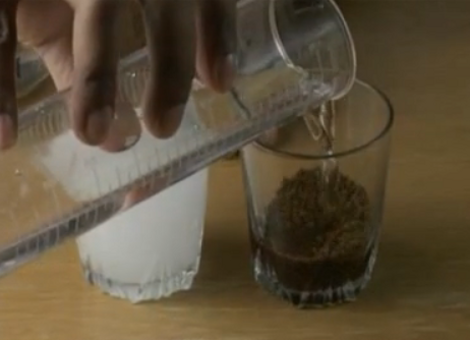
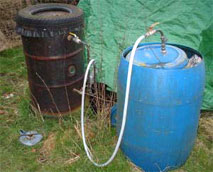
The techniques behind producing aerogels have been on the Internet for a fairly long time. A few uncommon chemicals and a supercritical drying chamber are required for production, meaning it takes a lot of know-how to make hard air at home. Somehow, [Ben] got ahold of some tetramethoxysilane, the hard to come by ingredient and made a supercritical drying chamber out of pipe fittings and liquid Carbon Dioxide.

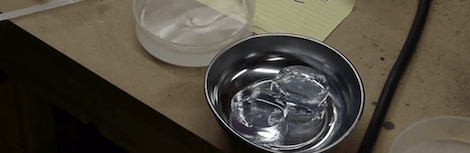
In the end, [Ben] was able to make a few small pieces of aerogel. The size of his pieces were constrained by his “mold” (actually a syringe) and the size of his drying chamber. It’s very possible [Ben] could build a larger supercritical drying chamber and make larger pieces of aerogel that would be sold commercially for hundreds of dollars.

Check out the very informative walkthrough of [Ben]’s process after the break. It’s 10 minutes long and makes for a great lunch break video.

Continue reading “Making Aerogel At Home”

Can You Develop Film With Coffee And Vitamin C?

Are you feeling a little MacGyver-ish and have access to a film camera? Perhaps you want to try developing your pictures using coffee and vitamin C instead of a traditional developing solution. [Danish Puthan Valiyandi] does a great job of walking us through the steps he took, including precise measurements, temperatures, and timings involved in achieving great results. This is probably not for the first-timers, as he does use special equipment associated with traditional developing methods.

The process uses a couple of easily obtainable materials: instant coffee, vitamin C powder, and washing soda (sodium carbonate). Once the roll of film has been exposed, it’s put onto a jig for developing (Danish does this with the lights on to make the video after the break worth watching, but you’ll need to do it in the dark). Once nestled inside of the development container, he mixes up a batch of his diy developer and agitates according to a times schedule. When the development is finished, a chemical fixer–no diy alternative used here–is added to set the film. Dry out the strips and use a scanner to digitize your work. We’re surprised by the quality of the finished product, but we shouldn’t be… he certainly knows what he’s doing.

Continue reading “Can You Develop Film With Coffee And Vitamin C?”

anodizing_aluminum_without_battery_acid

Anodizing And Dyeing Aluminum Without Battery Acid

While many people have tried their hand at anodizing aluminum at home, there are plenty who would just as soon leave it up to the professionals due to the highly concentrated sulfuric acid required for the process. [Ken] started thinking about the process and wondered if there was a way to get comparable results using chemicals that are easier to obtain and dispose of.

Through some experimentation he found that sodium bisulfate (NaHSO4), which is a sodium salt of sulfuric acid, can easily be used in its place with great results. The chemical is typically advertised in hardware and pool stores as “Aqua Chem”, and can be had at a very reasonable price. When paired with the proper DC current along with a cathode, the sodium bisulfate easily anodizes an aluminum workpiece and renders it ready for coloring with RIT, readily available cloth dye.

We were impressed with the results, and when looking at [Ken’s] test pieces, it seems that the metal dyed with sodium bisulfate has a more uniform, less streaky coloring to it. It’s also worth mentioning that [Ken] has found it is fairly easy to etch the aluminum before anodizing using a solution of sodium hydroxide, which is great for individuals who prefer a more matte finish.

If this is something that interests you, be sure to swing by his site. He has a posted nice video overview of the process that may be of some help.

Making Luminol From Household Chemicals

What to make your own chemiluminescent material? Check out this process that uses common household goods to synthesize luminol. You’ll need some lab equipment, and [NurdRage] mentions some precautions to take as luminol is not itself toxic, but some of the fumes and intermediary chemicals found during the process are.

Start by cutting up some vinyl gloves and boiling them with some rubbing alcohol to extract diethyl hexyl phthalate. After filtering, that gets boiled with water and some drain cleaner. The goal here is to continue the process until you have pure phthalic anhydride. Almost done? Not even getting started. This is a very complicated process, but fascinating to watch. After the break you’ll find the full video, or a five-minute abridged version for those that just want a taste of this experiment.

When we looked at the quantum dot manufacturing process a couple of days ago we asked for more chemistry hacks. This is exactly what we were talking about and are thankful that [Rob] sent in the tip. Keep them coming!

Continue reading “Making Luminol From Household Chemicals”

Brewing Up Some Quantum Dots

We’re taking a field trip from the backyard, garage, and basement hacking in order to look in on what research scientists are up to these days. A group from the Johns Hopkins Institute for NanoBioTechnology has been manufacturing quantum dots for use in the medical field. Made up of Cadmium Selenide, this is a nanomaterial that you can think of as individual crystals of the smallest size possible. Quantum dots have many uses. Here, [Charli Dvoracek] takes the recently manufactured dots and activates them with antibodies capable of targeting cancer cells. Once mixed with a biological sample, the dots embed themselves in the walls of the cancer, allowing the researchers to find those cells thanks to the phosphorescent properties of the dots.

The video after the breaks walks us through the various steps involved in growing these dots. [Charli] has the benefit of a fully outfitted lab, using tools like an argon-filled glove box to protect her from harmful off-gases. You’re not likely have this sort of thing in your home laboratory, but as we’ve seen before, you can make some of your own equipment, and produce interesting chemicals with simple processes. If you’re someone who already tinkers with chemistry experiments we want to hear about your exploits so please drop us a tip about what you’re up to.

Continue reading “Brewing Up Some Quantum Dots”

CheapStat: An Open-source Potentiostat

A commercial potentiostat can cost several thousand dollars, but the CheapStat is an open source project that makes it possible to build your own at a tiny fraction of that cost. It is possible to build one for less than $80, breaking down the cost barrier faced by many labs that would like to have this test hardware.

A potentiostat is used to measure electrochemical properties. To give you a few examples of what it can do, the hardware can measure arsenic levels in water, Vitamin C concentration in orange juice, Acetaminophen concentrations in over-the-counter medications, and a bunch of other less easily explained tests having to do with chemical compounds and DNA.

The device makes use of an Atmel XMEGA microcontroller and connects to a computer via USB. A Java program grabs that data from the hardware displaying test results on your choice of computer platforms. If you’re looking for all the gory details you won’t be disappointed by their journal paper.

Engine Hacks – A DIY Methane Generator

All “methane generator” jokes aside, This one actually serves a useful purpose. Although not an engine hack per se, methane can be used to run an engine. As the traditional method of powering an internal combustion engine, gasoline, gets more and more expensive, alternatives will have to be found. If you happen to live on a farm, or have access to a source of organic waste, this method could serve as a viable one.

One would need quite a bit of waste, as each kilogram yields around 400 liters of methane gas. This amount is enough to run a gas light for around 4 hours. Any sort of useful engine would require quite a bit more than this (chicken farm possibly?).

A process for converting waste to fuel is illustrated in the video after the break. Extreme caution should be used if attempting to do something like this. There is a danger of not only flammable gas leaking and catching on fire or exploding, but the organic material can be quite toxic as well. Continue reading “Engine Hacks – A DIY Methane Generator”