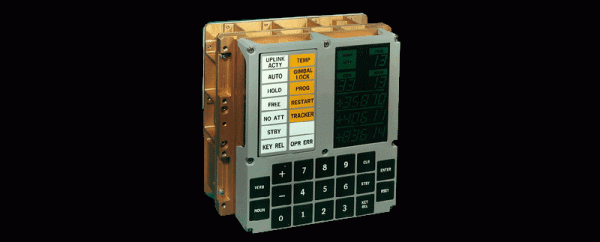
[Fran] has already made a name for herself in some retro cool historical aviation and computer circles by tearing down a flight-ready spare of a Saturn V launch vehicle digital computer, the computer that was responsible for getting all flights to the moon into low earth orbit. Now she’s ready for another project, and again, this is something that hasn’t been done in 40 years. She’s building a DSKY, the control panel for the Apollo Guidance Computer
The Apollo Guidance Computer is a well-documented piece of computing history, with homebrew versions all over the web. The DSKY is only one small part of the AGC, but it is by far the most famous module. Being the only user interface for the AGC, it’s the only part of the AGC that gets all the screen time in Apollo 13, the travesty on BluRay that was Apollo 18, and is the only device that bears any physical resemblance to its real-life counterpart in a number of AGC simulators.
That’s not to say DSKY builds haven’t been attempted before; there are a few out there using LEDs and off-the-shelf buttons for the build, but the DSKY from the mid-60s is much, much cooler than a bunch of LEDs and light pipes. The eery green numbers are actually EL displays. Guess how those displays are controlled? Relays. It’s a masterpiece of technology, made even more impressive in that the folks at MIT who built the thing didn’t have anything better to build the display with.
Because of her deconstruction efforts with the Saturn V LVDC, [Fran] was invited down to the National Air and Space museum in the middle of Washington DC. There, she saw everyones favorite ugliest spacecraft, the Apollo LEM, along with an incredible assortment of paraphernalia from aviation history. The Wright Flyer – yes, the original one – is hanging from the ceiling next to the Spirit of St. Louis, and X-15 rocket plane, right above the command module Columbia from Apollo 11. Copies of probes currently rolling over Mars are on display, and you can walk through a training model of Skylab. If you’ve never been, spend half a day there, then take the metro out to the Udvar-Hazy center, where you’ll find all the stuff they couldn’t fit in the downtown collection like a Space Shuttle and a Concorde.
This is only the first part of [Fran]’s vlog documenting the construction of a copy of the DSKY, and we haven’t even seen the inner guts of the most famous part of the AGC yet. She’s been working on this for a while now, and there’s no doubt she’ll finish the job and come up with the best replica of a DSKY ever.


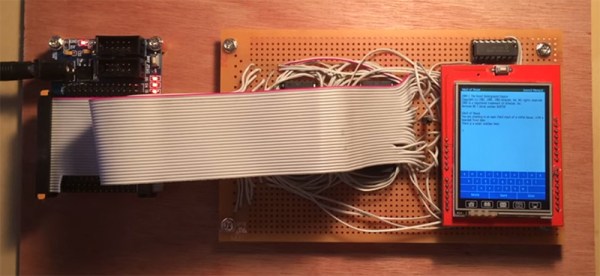
 The circuit is constructed with a $10 eBay special FPGA, the Cyclone II EP2C5. Other than that, it’s just some Flash, some RAM, a display, and a whole lot of wire.