PC Case Using CNC Router And Home Building Products

[Reinventing Science] needed a project that he could use to test out his skills on a new CNC routing machine he recently acquire. He settled on building a PC case using easily obtained materials. What he ended up with is the clean-looking case seen above that was machined from materials you can pick up at the home store.

The bulk of the case is made from extruded PVC which is designed to perform like solid wood trim. He picked up one piece of the ‘lumber’ and cut out the front, back, top, bottom, and drive bay bezel. We expected the joints between the horizontal and vertical pieces to either be butt joints, or rabbits. But [Reinventing Science] wanted a cleaner look and managed to mill mortise and tenon joints. These are strong joints that leave a very nice finished look. Since the material is designed as a lumber replacement it shouldn’t be too surprising to see drywall screws used as the fasteners.

In addition to joinery, some other CNC tricks were used. The sides of the case were cut from clear acrylic, with a decorative bead milled in the surface. There’s also fan ports cut in the top and vents on the bottom, as well as some engraving with the name of the project just above the optical drive. The wood-grain embossing makes for an interesting final look; we’d like to see how this takes a few careful coats of paint.

If you’re interested in the CNC hardware used, take a look at the unboxing post that shares a few details.

Tilt And Pivot Camera Base Uses Just Two Servos

[Caled] shows us how to build a tilt and pivot camera base. One of these can be quite handy for taking precisely aligned images that can later be stitched together into panoramic, or even spherical images. We have grand visions of being able to produce something along the lines of these stunning interactive images with hardware that is cheaper and easier to build than this other motorized rig.

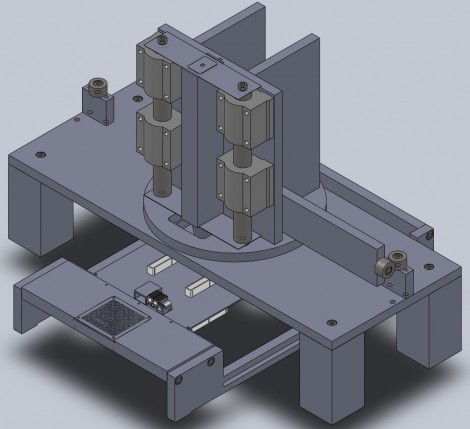
The design utilizes just two servo motors. In the image above you can just make out a pair of discs that serve as the base for the rig. In the center of the upper disc is the first servo, pointing downward, which rotates the camera. Two upright supports on either side of the point-and-shoot provide the framework for the tilt feature. The camera is mounted in a frame whose center is a threaded rod on the near side, and the second servo motor on the far side. An Arduino with a servo shield controls the movements along with a button pad and LCD screen as a user interface. The last step in the project log points to software options for combining the captured photos.

CNC Etch-a-Sketch Draws On Itself

cnc_etchasketch

Having never been any good with an Etch-a-Sketch, [Ben] decided it was time to tame the children’s toy that had taunted him for so long. He received one in a gift exchange a few years back and hung onto it, recently digging it out again to fit it with some CNC components.

Using his RepRap, he printed a set of mounting plates and gears to drive the Etch-a-Sketch’s dials. He installed a pair of Airpax steppers to the gears and wired them up to an ATmega AT90 USB board he had sitting around. He installed RepRap firmware on the microcontroller, since it has a built-in gcode interpreter, making it easy for him to upload any gcode file to the Etch-a-Sketch for drawing.

You can see a quick demonstration of the device in action below. He converted a spiral image to gcode, then uploaded it to the Etch-a-Sketch – the machine does the rest. It draws pretty quickly as well – [Ben] even suggests that he could probably get it moving fast enough to melt the stylus!

It would be great to see the Etch-a-Sketch configured to support an online interface. That way he could allow people to upload images to the device, later showing off the artwork in a web gallery not unlike the LOL Shield Theatre we featured last week.

[via Make]

Continue reading “CNC Etch-a-Sketch Draws On Itself”

Bench-top Laser Engraver Does Some Cutting Too

Grab that stack of old optical drives you have in the corner and get to work building this laser engraver. [Groover] is taking a no-nonsense approach to the build and we think it is just simple enough to be accessible to a very wide audience.

The physical assembly uses sleds from two optical drives. These are mounted some angle bracket. Since lasers cut at one specific focal length, there is not need for a Z axis (simplifying the build greatly). In fact, we think the hardest part of the assembly is retrieving the laser diode from a DVD-R drive and packaging it for use with this setup.

The electronics are a combination of a couple of consumer products. Two pre-fab motor drivers are used to command the stepper motors on the optical sleds. These receive their commands from an Arduino. A package called GRBL reads in G-code ([Groover] shows how to generate this from Inkscape) and in turn sends commands to the Arduino.

The results are quite remarkable. It can engrave wood with great resolution and contrast. The video after the break even shows it cutting out shapes from construction paper. Now we still want our own full-size laser cutter, but this project is much more fiscally possible for us.

Continue reading “Bench-top Laser Engraver Does Some Cutting Too”

Laser-cut Noise Maker Resembles Violin

This looks very much like a violin but it sounds very much like someone abusing a family of cats. [Ranjit] came with the idea of building a violin using laser cut parts. It doesn’t follow the normal curved shape we’re used to seeing with string instruments. This is because the parts were all cut from flat stock, including the sides of the instrument. The boxy shape that resulted invokes visions of early video game objects and is why this is called the 8-bit violin.

After the break you can see a video of [Bre Pettis] playing the laser-cut instrument. It’s pretty bad, but not in that five-year-old picking up an instrument for the first time sort of way. Yes the best violinists spend a lifetime honing their craft, but they also play on instruments hand carved by master Luthiers who also spend a lifetime perfecting their skills. Don’t get us wrong though, we think it’s just as much fun as that 3D printed guitar.

Continue reading “Laser-cut Noise Maker Resembles Violin”

CNC-built R2-D2 Brings Childhood Dreams To Life

r2d2_build

As a kid, [Wes] always dreamed of building a full-size, functional R2-D2 droid from Star Wars. While most youthful aspirations such as this fall to the wayside amid adult responsibilities and commitments, he did not allow his dreams to disappear along with his childhood.

He began his droid-building journey armed only with his dreams and some assistance from the friendly folks over at R2Builders. The entire replica was built using MDF, wood, and styrene sheeting, along with just one tool: a CNC machine. He walks you through the every step of the construction, stopping to give recommendations on CNC hardware, software, etc. along the way. He also provides Gcode files for each of the pieces he has constructed, which should be a huge help to anyone looking to build a R2-D2 clone of their own.

It looks like he is just getting around to fitting motors into the leg housings of his R2-D2 replica, but we can’t wait to see what it looks like once he has all of the electronics and other details finished.

If you are interested in more R2-D2 coverage, look no further than right here.

Chilling Drinks With Your Friends’ Faces

facecube

3D printing of Kinect-mapped models seems to be all the rage lately. [Nirav] caught the bug and has developed software which allows him to join in the fun. Frustrated by the lack of documentation and source code for the Fabricate Yourself project, he set out to create his own open-source process for scanning people and objects to share with the hacking community.

His software allows you to aim the Kinect and capture a 3D scan of any object, after which you need to use MeshLab or similar software to turn the scan into a STL file for printing. He says that the process is a bit tedious at the moment, but he is working hard to condense it down into a single step.

While he can scan and print pretty much anything he wants, his ultimate goal is to create ice cube trays for his friends featuring molds of their faces. The project has a lot of promise, though we’re not sure about our friends crunching on our faces after finishing their drink.