Inkscape Plugin For Engraving Fonts

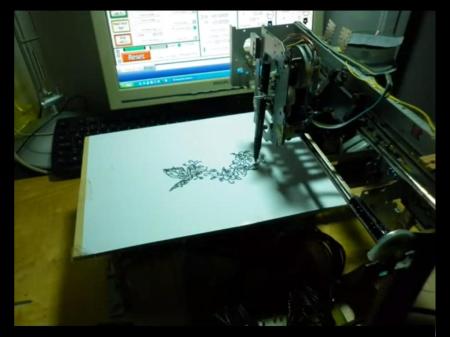
[Windell] developed an Inkscape extension called Hershey Text that helps you process fonts into vector representations. If you’ve tried to 3D print, plot, or mill text in the past you may have run across the problem of generating vector paths that deal with the outline and fill of the text appropriately. The problem stems from how fonts are defined; either by the area that they enclose, or by the path that is used to draw the outline. Check out [Windell’s] tutorial for this extension where he explains each of these issues and shows how to overcome them.

The image above illustrates the stroke options, which allow you to vector multiple paths to best fill in the correct parts of each character using path-based hardware. The package includes a wide variety of interesting font sets that are in the public domain, and includes tools such as a glyph map generator that make it very user friendly.

Open Source 5-axis CNC Router

This 5-axis CNC router could soon be an open source tool. [Mike Calvino] built it for the School of Architecture at the University of Arkansas. It can be used as a router or as a plasma cutter/welder. Now he’s trying to raise some money that will underwrite his time and effort to develop and release instructions, design files, and specifications to make it an open source hardware project.

It is extremely large, and in addition to the X, Y, and Z axes that you’d expect to find on CNC machinery, it can tilt and rotate the cutting tool. This is not something you’re likely to build at home. But the availability of plans would be a huge contribution toward making machine tools accessible at a relatively small price tag. It’s not hard to image universities building this as a class project. We also think it would be a perfect group project for you and your buddies over at the local Hackerspace to undertake. Check out some milling action in the clip after the break.

Continue reading “Open Source 5-axis CNC Router”

Encase Yourself In Carbonite With Kinect

kinect_plastic_renders

There never seems to be a lull in the stream of new and novel hacks that people create around Microsoft’s Kinect. One of the more recent uses for the device comes from [Interactive Fabrication] and allows you to fabricate yourself, in a manner of speaking.

The process uses the Kinect to create a 3D model of a person, which is then displayed on a computer monitor. Once you have selected your preferred pose, a model of the image is rendered by a 3D plastic printer. Each scan results in a 3cm x 3cm plastic model complete with snap together dovetail joints allowing the models to be combined together. A full body scan can be constructed with three of these tiles, resulting in a neat “Han Solo trapped in Carbonite” effect.

Currently only about 1/3 of Kinect’s full resolution is being used to create these models, which is pretty promising news to those who would try this at home. Theoretically, you should be able to create larger, more detailed images of yourself provided you have a 3D printer at your disposal.

Keep reading for a quick video presentation of the fabrication process.

Continue reading “Encase Yourself In Carbonite With Kinect”

Magnetic SMD Pick And Place

magnetic_pick_and_place

[svofski] sent us this pick and place robot (Google translation) that he found , and it’s quite unique. The majority of the components that make up this pick and place have been recycled from old computer equipment. The X-axis motion is accomplished using old printer parts, while an old CD-ROM drive was gutted to provide motion along the Y-axis. Floppy drive components were ultimately chosen to give the pick and place Z-axis motility.

What makes this pick and place unique however is the way in which components are moved. Most pick and place devices we have seen rely on suction in order to lift and carry components, but this one uses a magnet instead. The machine is used to build small circuit boards for a robotics platform offered on the builder’s web site, which primarily utilizes SMD parts. Once they realized that the majority of their small components were ferromagnetic, they built a hand-wound electromagnet to lift them. While the design limits the usage of the device to strictly ferromagnetic parts, they have a very specific need, which this fills perfectly.

Another unique aspect of this pick and place is the grooved table that sits under the workpiece. It is used to route up to four reels of SMD components, with the placement head providing all of the reel motion instead of relying on separate motors.

If you have a few minutes, be sure to check out the video of the pick and place at work.

DIY Pick And Place Seems Easy To Build

We’re not saying it’s a simple project, but the build methods that [Alan Sawula] used for this DIY pick and place are probably the easiest we’ve seen yet. As this is just a CNC machine, the methods he used would also work quite well for mills or other machines. Instead of using precision rods for the X and Y axes, he used square tubing. The tubing is oriented more like a diamond, with the ninety degree corners providing the travel surface. Two bearings with a shim between them provide a groove that rides along the corner, and since this is square and not just ‘L’ bracket, the sleds are secured both above and below the tube. Stepper motors provide the movement along X and Y, with a servo motor for Z and another one to rotate the medical grade needle that serves as the vacuum tip. Starting four minutes into the video you can see that this not only works, but it’s lightning fast!

Continue reading “DIY Pick And Place Seems Easy To Build”

Molded Parts: Prusa Mendel In 30 Minutes

This set of white RepRap parts were created in molds, instead of being printed by another RepRap. [Mark A. Ganter] of the University of Washington admits that this breaks the idea of a 3D printer that is self-replicating. But the molds – which were created by tweaking Prusa Mendel parts to be mold friendly – have the ability to produce every plastic part necessary to build your own RepRap and they can do it much faster. Once the molds were completed [Mark] and his students were able to produce a full set of parts in just 30 minutes, cutting as much as 14 hours off of the time it would have taken to print the parts. Still not convinced? How about this: the molds can be created by a 3D printer or by using a high-resolution power printing method like they have here.

The process starts by printing master parts, then creating a silicone RTV mold from them. Once the molds are ready, [Mark’s] team pours polyurethane into them and waits for it to harden. They plan to share the STL files in less than a week so that you can make your own molds to use to build your RepRap army.

Backlit Buttons And Panels

“Kick the tyres & light the fires” is a blog by [Ruscool Electronics] that is focused on building a cockpit simulator from scratch, and while the blog is loaded with all sorts of nifty information, reader [Brian] pointed out one entry which explains how to make back-lit control panels out of acrylic sheet, and a CNC machine.

The parts start off as clear acrylic, and cut to shape and size. Next up is a thick, but uniform coat of paint so the panels are opaque , then its back off into the CNC machine for engraving. What is engraved is now a frosty white, ready for leds behind.

The end result looks fantastic and professional, though, we are left thinking of how to pull off the same look, sans CNC.

Ideas?