This OSHW Trackball Is Ready To Be Customized

Oh sure, Amazon can deliver any number of Logitech peripherals to your door in 48 hours, but where’s the fun in that? With open source hardware (OSHW) input devices like the Ploopy Adept Trackball, you not only get to say you built the thing yourself, but there’s also an opportunity to tune the gadget to your exacting specifications — even if that just means packing it full of RGB LEDs.

The trackball is powered by the Raspberry Pi Pico running QMK, features a high-accuracy PMW3360 sensor that can be found in commercial gaming mice, and uses a snooker ball for the business end. All the hardware is wrapped up in a 3D printed enclosure, and thanks to the VIA project, configuring the device can be done right in the browser through a web app.

Like the other devices in the (somewhat unfortunately named) Ploopy family, all of the design files for the Adept Trackball are released under the CERN license, which combined with the project’s fantastic documentation means you’ve got everything you need to build it from scratch. There are official parts kits if you don’t want to source or print all the components yourself, but as of this writing, the Ploopy Shop will only let you preorder them.

A Retro-Style Trainer For Motorola’s 1-Bit Chip

If you want to program a microcontroller today, you pop open your editor of choice, bang out some code, and flash it over USB. But back in ancient times, when your editor was a piece of paper and you didn’t even have a computer of your own, things were a bit different. In that case, you might have reached for a “trainer”: a PCB that included the chip you wanted to program along with an array of switches, LEDs, and maybe even a hex keypad for good measure. Grab yourself the programming manual (printed on paper, naturally), and you’re good to go.

So when [Nicola Cimmino] became curious about the Motorola MC14500, a 1-bit ICU (Industrial Control Unit) from the 1970s, he could think of no more appropriate way to get up close and personal with the chip than to design an era-appropriate trainer for it. The resulting board, which he’s calling the PLC14500 Nano, is festooned with LEDs that show the status of the system buses and registers. Thanks to the chip’s single-step mode, this gives you valuable insight into what’s happening inside this piece of classic silicon.

An early breadboard version of the trainer.

But just because the board looks like it could have come from the 1970s doesn’t mean you have to live in the past. There’s an Arduino Nano on the backside of the trainer that handles communicating with a modern computer. [Nicola] even provided an assembler that lets you write your code in ASM before shuttling the binary off to the board for execution.

Interested in getting your hands on one? Not a problem. The design is completely open source for anyone who wants to build one at home. In fact, [Nicola] even got his trainer OSHW Certified. He’s also selling kits on Tindie, though at the time of this writing, they’re sold out.

This project has actually been a long time coming. We covered an early breadboard prototype of the concept back in 2015. We’re glad to see that [Nicola] was finally able to bring this one across the finish line. It’s a beautiful piece of hardware, and thanks to its open-source nature, something that the whole community can enjoy and learn from.

ZSWatch: This OSHW Smart Watch Is As DIY As It Gets

We say it often, but it’s worth repeating: this is the Golden Age of making and hacking. Between powerful free and open source software, low-cost PCB production, and high resolution 3D printers that can fit on your desk, a dedicated individual has everything they need to make their dream gadget a reality. If you ever needed a reminder of this fact, just take a look at the ZSWatch.

When creator [Jakob Krantz] says he built this MIT-licensed smart watch from scratch, he means it. He designed the 4-layer main board, measuring just 36 mm across, entirely in KiCad. He wrote every line of the firmware, and even designed the 3D printable case himself. This isn’t some wearable development kit he got off of AliExpress and modified — it’s all built from the ground up, and all made available to anyone who might want to spin up their own version.

The star of the show is the nRF52833 SoC, which is paired with a circular 1.28″ 240×240 IPS TFT display. The screen doesn’t support touch, so there’s three physical buttons on the watch for navigation. Onboard sensors include a LIS2DS12 MEMS accelerometer and a MAX30101EFD capable of measuring heartrate and blood oxygen levels, and there’s even a tiny vibration motor for haptic feedback. Everything’s powered by a 220 mAh Li-Po battery that [Jakob] says is good for about two days — afterwards you can drop the watch into its matching docking station to get charged back up.

As for the software side of things, the watch tethers to a Android application over Bluetooth for Internet access and provides the expected functions such as displaying the weather, showing notifications, and controlling music playback. Oh, and it can tell the time as well. The firmware was made with extensibility in mind, and [Jakob] has provided both a sample application and some basic documentation for would-be ZSWatch developers.

While an unquestionably impressive accomplishment in its current form, [Jakob] says he’s already started work on a second version of the watch. The new V2 hardware will implement an updated SoC, touch screen, and an improved charging/programming connector. He’s also looking to replace the 3D printed case for something CNC milled for a more professional look.

The ZSWatch actually reminds us quite a bit of the Open-SmartWatch project we covered back in 2021, in that the final result looks so polished that the average person would never even take it for being DIY. We can’t say that about all the smartwatches we’ve seen over the years, but there’s no question that the state-of-the-art is moving forward for this kind of thing in the hobbyist space.

Infrared controller and receiver board

Your Own Home IR Cloner

Many devices use infrared (IR) as a signalling medium like, for example, RGB LED strip controllers
modules and some TV controllers. Often times these signals aren’t meant for secure applications which means the functionality can be reproduced by simply replaying back the received signal verbatim. Sometimes, enterprising hackers want to reverse engineer the IR signals, perhaps to automate some tasks or just to get a better understanding of the electronics we use in our everyday life. To help in this effort, [dilshan] creates an open source hardware IR cloner device, capable of snooping IR signals and retransmitting them.

The IR cloner is a sweet little IR tool that can be used to investigate all sorts of IR signals.
In addition to the source code and design files, [dilshan] has also taken care to create detailed documentation as an addendum to the video on assembly and usage. Continue reading “Your Own Home IR Cloner”

WiFiWart Boots Linux, Moves To Next Design Phase

Over the last few months we’ve been keeping an eye on WiFiWart, an ambitious project to develop a Linux single-board computer (SBC) small enough to fit inside a USB wall charger. Developer [Walker] says the goal is to create an easily concealable “drop box” for penetration testing, giving security researchers a valuable foothold inside a target network from which to preform reconnaissance or launch attacks. Of course, we don’t need to tell Hackaday readers that there’s plenty of other things you can do with such a tiny open hardware Linux SBC.

Today we’re happy to report that [Walker] has gotten the first version of the board booted into Linux, though as you might expect given a project of this complexity, there were a few bumps along the way. From the single missing resistor that caused U-Boot to throw up an error to the finer points of compiling the kernel for an embedded board, the latest blog post he’s written up about his progress provides fascinating insight into the little gotchas of bringing up a SBC from scratch.

Once the board was booted into Linux, [Walker] started testing out different aspects of the system. A memory benchmark confirmed the finicky DDR3 RAM was working as expected, and he was able to load the kernel modules for the dual RTL8188 interfaces and connect to a network. While the two WiFi modules are currently hanging off the board’s full-sized USB ports, they will eventually be integrated into the PCB.

Critically, this prototype board is also allowing [Walker] to get an idea of what the energy consumption of the final hardware might be. Even at full tilt, this larger board doesn’t go over 500 mA at 5 VDC; so if he designs the power supply with a maximum output of 1 A, he should have a nice safety margin. As mentioned in the previous post, the plan is currently to put the PSU on its own board, which will allow more effective use of the charger’s internal volume.

With the software and hardware now largely locked in, [Walker] says his attention will be turned towards getting everything small enough to fit into the final form factor. This will certainly be the most challenging aspect of the project, but with a growing community of hackers and engineers lending their expertise to the cause, we’re confident the WiFiWart will soon be a reality.

Palm-Sized Sixteen Segments Light The Way To Our Hearts

It’s no secret that we here at the Hackaday are suckers for cool display. LEDs, OLEDs, incandescent, nixie or neon, you name it and we want to see it flash. So it fills us with joy to discover a new way to build large, daisy-chainable 16-segment digits, and even more excited to learn how easy they are to fab and assemble.

A cousin of the familiar 7 segment display, the 16 segment gives so many more possibilities (128% more possibilities to be exact) for digit display. To be specific, those extra segments unlock the ability to display upper and lowercase latin characters as well as scads of punctuation.

But where the character set is complex, the assembly is anything but thanks to a great design from [Kolibri] called klais-16. They’re available fully assembled if you want to jump straight to code, but thanks to thorough documentation (seriously, check this out) assembly is a snap.

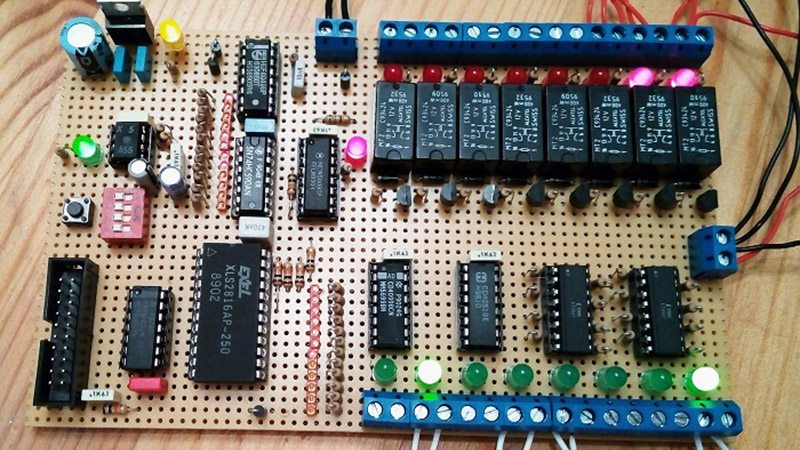
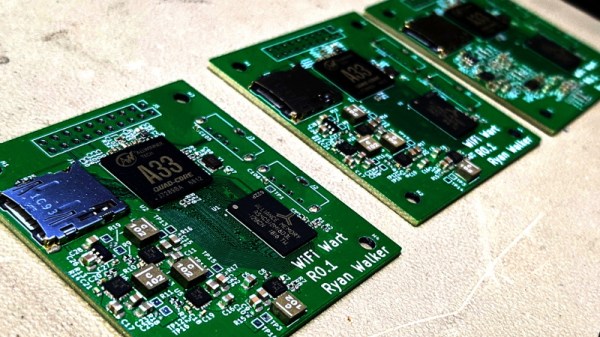
Each module is composed a very boring PCBA base layer which should be inexpensive from the usual sources, even when ordering one fully assembled. A stackup of three more PCBs are used for spacing and diffusion with plans for die-cut or injection mold layers if a larger production run ends up happening. Board dimensions for each character are 100 mm x 66.66 mm (about 4″ x 2.5″). Put together, each module can stand on its own or be easily daisy-chained together to make a longer single display.

Addressing all those bits with an elaborate, ugly control scheme would be a drag but fortunately the firmware for the onboard STM8 microcontroller exposes a nice boring serial interface which can be used without configuration to display strings. There’s even an example Windows Batch script!

Three Years Of HardwareX: Where Are They Now?

After three years of online publications, HardwareX may have solidified itself as an academic journal for open-source hardware. We originally wrote about HardwareX back in 2016. At the time, HardwareX hadn’t even published its first issue and only begun soliciting manuscripts. Now after three years of publishing, six issues as of October 2019 (with the seventh scheduled for April 2020), and an impact factor of 4.33, it’s fair to say that Elsevier’s push into open-access publications is on a path to success.

To give you a bit of background, HardwareX aims to promote the reproducibility of scientific work by giving researchers an avenue to publish all the hardware and software hacks that often get buried in traditional manuscripts. The format of HardwareX articles is a bit different than most academic journals. HardwareX articles look more like project pages similar to Hackaday.io. (Maybe we inspired them a bit? Who knows.)

It’s a bold attempt on Elsevier’s part because although open-access is held as an ideal scenario for scientific work, such efforts often come under quite a bit of scrutiny in the academic community. Don’t ask us. We can’t relate.

Either way, we genuinely wish Elsevier all the best and will keep our eyes on HardwareX. Maybe some of our readers should consider publishing their projects in HardwareX.