DIY CNC Router Uses Chains The Right Way

There are a million and one ways to build your own CNC router, depending on your tastes, budget, and application, your design choices will differ accordingly. [Steve Tyng] was well aware of this when undertaking his project, and built the machine that made sense for him.

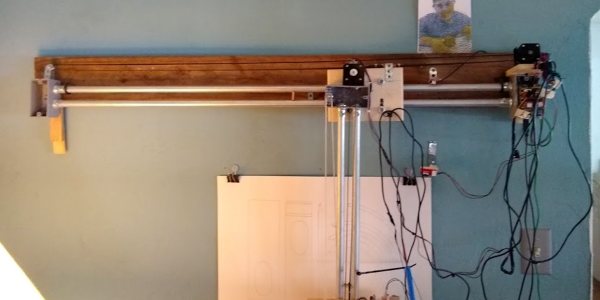
[Steve’s] build has a strong focus on keeping costs down, and that’s reflected in the hardware used. Wanting a large work area of 30″ x 60″, off-the-shelf linear rails in 6 foot lengths were prohibitively expensive. Instead, 1″ angle iron was sourced from the local garden centre, and used in conjunction with steel v-bearings. It’s a lot cheaper, and good enough for the application at hand, so why not? Other smart choices abound, such as using an IKEA cabinet as the base, and a fanless computer to run the show to avoid death by dust.

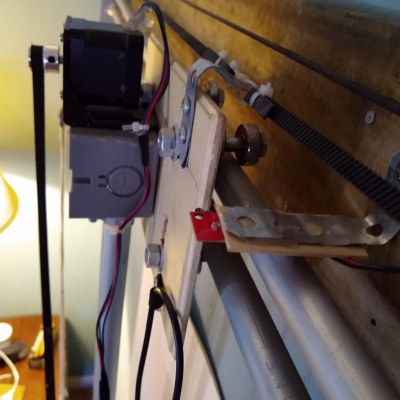
When it came time to build the axes, there was plenty of roller chain on hand. Chain is usually passed up for options such as timing belts or ballscrews in the CNC community, as it tends to stretch over time and offers poor accuracy. However, [Steve] took stock of the drawbacks of the method, and made efforts to overcome these weak points in the design. The Y and X axes were specially designed to keep the chain supported along its length. This helped avoid the problem of long drooping chains and poor tension.

While it’s not an industrial-strength build with world-beating accuracy, it’s a solid CNC machine that can carve out large workpieces without issue. Over the years, we’ve seen plenty of DIY CNCs, built with everything from PVC pipe to welded steel. Video after the break.

Continue reading “DIY CNC Router Uses Chains The Right Way”

Jubilee: A Toolchanging Homage To 3D Printer Hackers Everywhere

I admit that I’m late to the 3D printing game. While I just picked up my first printer in 2018, the rest of us have been oozing out beautiful prints for over a decade. And in that time we’ve seen many people reimagine the hardware for mischief besides just printing plastic. That decade of hacks got me thinking: what if the killer-app of 3D printing isn’t the printing? What if it’s programmable motion? With that, I wondered: what if we had a machine that just offered us motion capabilities? What if extending those motion capabilities was a first class feature? What if we had a machine that was meant to be hacked?

One year later, I am thrilled to release an open-source multitool motion platform I call Jubilee. For a world that’s hungry for toolchanging 3D printers, Jubilee might be the best toolchanging 3D printer you can build yourself–with nothing more than a set of hand tools and some patience. But it doesn’t stop there. With a standardized tool pattern established by E3D and a kinematically coupled hot-swappable bed, Jubilee is rigged to be extended by anyone looking to harness its programmable motion capabilities for some ad hoc automation.

Jubilee is my homage to you, the 3D printer hacker; but it’s meant to serve the open-source community at large. Around the world, scientists, artists, and hackers alike use the precision of automated machines for their own personal exploration and expression. But the tools we use now are either expensive or cumbersome–often coupled with a hefty learning curve but no up-front promise that they’ll meet our needs. To that end, Jubilee is meant to shortcut the knowledge needed to get things moving, literally. Jubilee wants to be an API for motion.

Continue reading “Jubilee: A Toolchanging Homage To 3D Printer Hackers Everywhere”

Forget Printing Labels For Your Bathtub Hooch, Why Not Engrave The Bottle?

[BlueFlower] sends in this cool wine bottle engraver. It’s a simple machine that reminds us of the infamous EggBot. One axis can move in x and z while the other axis rotates the work piece. The EggBot works in spherical coordinates while this one lives in a cylindrical world.

The base of the device appears to be an older project of [BlueFlower]’s an XY-Plotter/Cutter. The plotter itself is a very standard twin-motor gantry design. In fact, it looks like when the machine is converted to bottle engraving, the drivers which previously moved the Y-axis are re-purposed to move two rollers. The rollers themselves are suspiciously similar to those found inside 2D printers. We all have them kicking around our junk drawers, but it’s rare to see them actually being used. The spindled is just a DC motor with a ball grinder coupled to the end.

As for the final result, we have to admit that the engraved bottles are quite fetching. Catch a video of the engraving process after the break.

Continue reading “Forget Printing Labels For Your Bathtub Hooch, Why Not Engrave The Bottle?”

High-Precision Air Bearing CNC Lathe And Grinder

You know you’re in for a treat when you are told that a lathe which can reach a resolution of one micrometer (1×10⁻⁶, a millionth of a meter, or 0.00004″ for people who love zeros) is ‘not hard to build’.  This is one of the opening statements in this video by [Dan Gelbart], as he walks the viewer through the details of a custom CNC lathe which he built. (Video embedded below.)

As it’s a combined CNC lathe and grinder, it uses custom software he had developed specifically for the machine. Much of the high precision of the machine is courtesy of air bearings. All but two of the air bearings were made by [Dan], with the two surplus air bearings he used coming from machines used in the semiconductor industry.

The bed of the machine is formed out of off-the-shelf reference granite, to which the other parts are epoxied, providing a stable base with well-defined dimensions. Though perhaps a few light years beyond most DIY lathe efforts, [Dan]’s videos nevertheless provide a treasure trove of tips and information for lathe builders and users alike. Certainly worth a look.

Thanks [Drew] for the tip in the comments.
Continue reading “High-Precision Air Bearing CNC Lathe And Grinder”

Retro Hardware Plots Again Thanks To Grbl And ESP32

When it comes to building a new CNC machine, you’ve got a wide world of controller boards to choose from. Whether you’re building a 3D-printer or a CNC plasma cutter, chances are good you’ll find a controller that fits your needs and your budget. Not so much, though, when you want to add CNC to a pen plotter from the early days of the PC revolution.

[Barton Dring] just posted the last installment of a five-part series in which he documented putting an Atari 1020 plotter under CNC control. The plotter was a peripheral for the Atari line of 6502 machines from the late 1970s; the guts of the little roll-fed, ballpoint-pen plotter appeared in Commodore, Tandy, and TI versions as well. [Bart]’s goal was to not add or modify anything to the mechanically simple device apart from the controller. That was easier said than done, given the unipolar stepper motors controlling the pen position and paper roll, and the fact that the pen lift mechanism uses a solenoid. Support for those had to be added to his Grbl_ESP32 firmware, as did dealing with the lack of homing switches in the plotter, and adapting the Grbl tool change command to the pen color change mechanism, which rotates the pen holder by bumping it into the right-hand carriage stop. The stock controller was replaced by a custom PCB that fits perfectly within the case, with plenty of room to spare. The video below shows it plotting out a vexillogically relevant sample.

From custom coasters to wooden nickels to complex string art, [Bart] has really put Grbl through the wringer. We really like this retro-redo, though, and fully support his stated desire to convert more old hardware to Grbl_ESP32.

Continue reading “Retro Hardware Plots Again Thanks To Grbl And ESP32”

A Masterpiece, But Our Maestro Is A CNC Machine

Sometimes we manage to miss projects when they first appear, only to have the joy of discovering them a while later. So it is with [John Opsahl]’s Project Convert To Paint, a CNC painting ‘bot that takes a bitmap image and paints it on canvas as a fine artist would, with a real brush, and paints.

It was first created for the 2017 robotart.org competition, and takes the form of a fairly standard CNC gantry machine. It departs from the norm in its chuck however, as it has what is described as a universal artist chuck, capable of holding a variety of artistic implements. The images are converted from bitmap to vector format, and thence to gcode with the help of a bit of custom Python code.

He’s at pains to say that simply because an image can be converted to a paintable format does not mean that it will produce a good picture. But some of the results are rather impressive, delivering anything from a pointilist effect to a broader brush stroke. We can see that with a bit of experience in the processing it would be possible to create a veritable gallery of masterpieces.

We may have missed this one the first time, but we did catch another drawbot from the same competition.

Smoothieboard Gets An Ambitious Update For V2

If you’ve been reading Hackaday for awhile, there’s an excellent chance you’ve seen a project or two powered by the Smoothieboard. The open source controller took Kickstarter by storm in 2013, promising to be the last word in CNC thanks to its powerful 32-bit ARM processor. Since then we’ve seen it put to use in not only the obvious applications like 3D printers and laser cutters, but also for robotic arms and pick-and-place machines. If it moves, there’s a good chance you can control it with the Smoothieboard.

But after six years on the market, the team behind this motion control powerhouse has decided it’s time to freshen things up. The Kickstarter for the Smoothieboard v2 has recently gone live and, perhaps unsurprisingly, already blown past its funding goal. Rather than simply delivering an upgraded Smoothieboard, the team has also put together a couple “spin-offs” targeting different use cases. If Smoothie v1 was King of CNC boards, then v2 is aiming to be the Royal Family.

Smoothieboard v2-Prime with breakouts

The direct successor to the original board is called v2-Prime, and it’s everything you’d expect in an update like this. Faster processor, more RAM, more flash, and improved stepper drivers. There’s also available GPIO expansion ports to connect various breakout boards, and even a header for you to plug in a Raspberry Pi. If you’re looking to upgrade your existing Smoothieboard machines to the latest and greatest, the Prime is probably what you’re after.

Then there’s the v2-Mini, designed to be as inexpensive as possible while still delivering on the Smoothieboard experience. The Mini has the same basic hardware specs as the Prime, but uses lower-end stepper drivers and deletes some of the protection features found on the more expensive model. For a basic 3D printer or laser cutter, the Mini and its projected $80 price point will be a very compelling option.

In the other extreme we have the v2-Pro, which is intended to be an experimenter’s dream come true. It features more stepper drivers, expansion ports, and even an integrated FPGA. Realistically, this board probably won’t be nearly as popular as the other two versions, but the fact that they’ve even produced it shows how committed the team is to pushing the envelope of open source motion control.

Our coverage of the original Smoothieboard campaign back in 2013 saw some very strong community response, with comments ranging from excited to dismissive. Six years later, we think the team behind the Smoothieboard has earned a position of respect among hackers, and we’re very excited to see where this next generation of hardware leads.

Continue reading “Smoothieboard Gets An Ambitious Update For V2”