On the off chance you’re reading these words on an actual desktop computer (rather than a phone, tablet, smart mirror, game console…), stop and look at the speakers you have on either side of your monitor. Are you back now? OK, now look at the PC speakers and amplifier [Kris Slyka] recently built and realize you’ve been bested. Don’t feel bad, she’s got us beat as well.
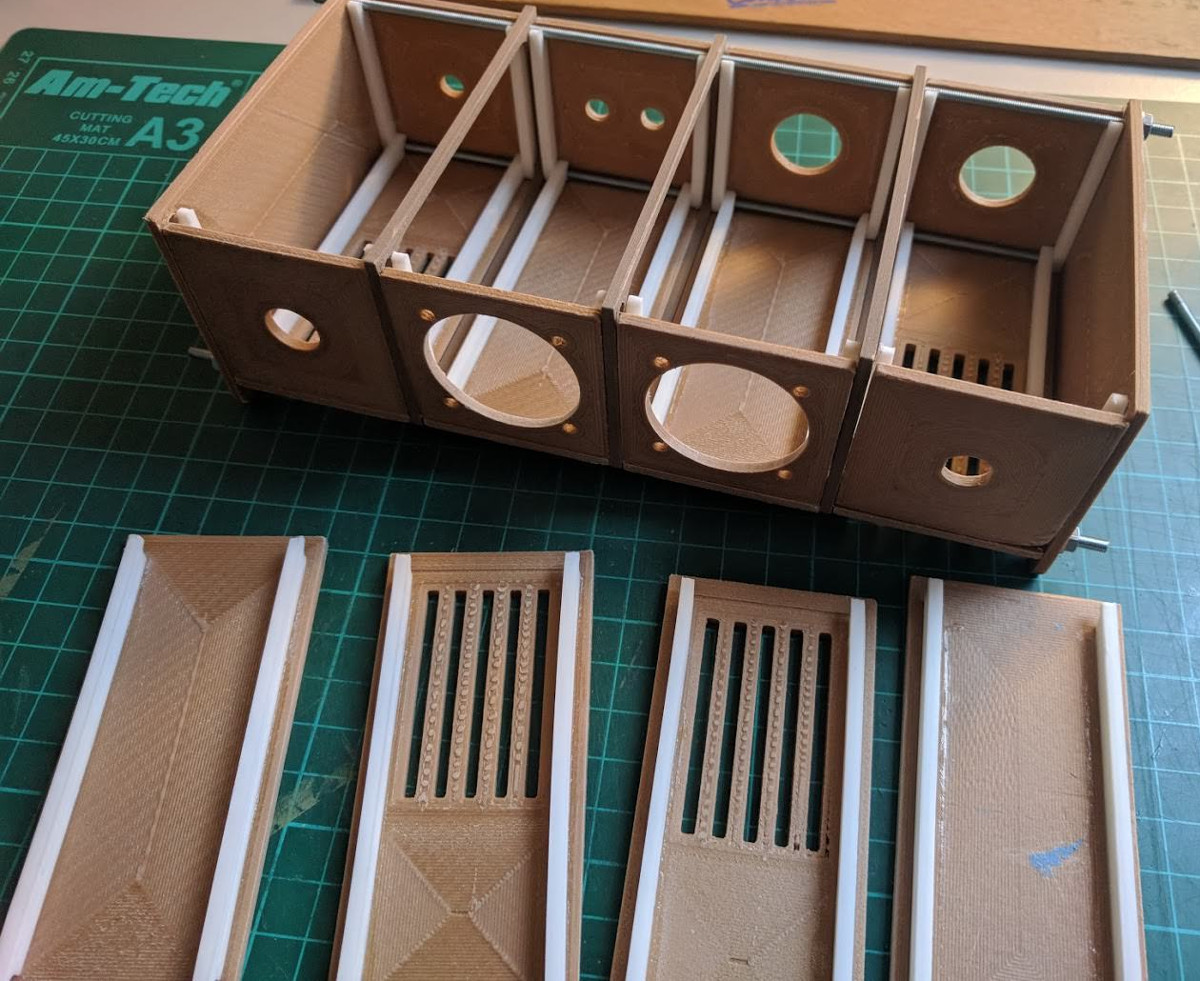 The speaker and amplifier enclosures were painstakingly printed and assembled over the course of three months, and each piece was designed to be small enough to fit onto the roughly 4 in x 4 in bed of her PrintrBot Play. While limited print volume made the design considerably trickier, it did force [Kris] to adopt a modular design approach with arguably made assembly (and potential future repairs or improvements) easier.
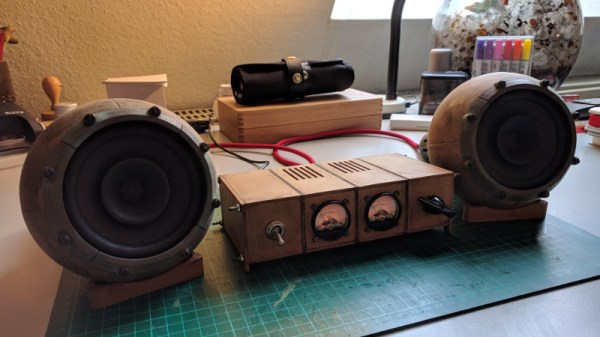
The amplifier is made up of rectangular “cells” which are connected to each other via 3 mm threaded rods. For now the amplifier only has 4 cells, but this could easily be expanded in the future without having to design and print a whole new case. Internally the amplifier is using two TDA8932 digital amplifier modules, and some VU meters scored off of eBay.
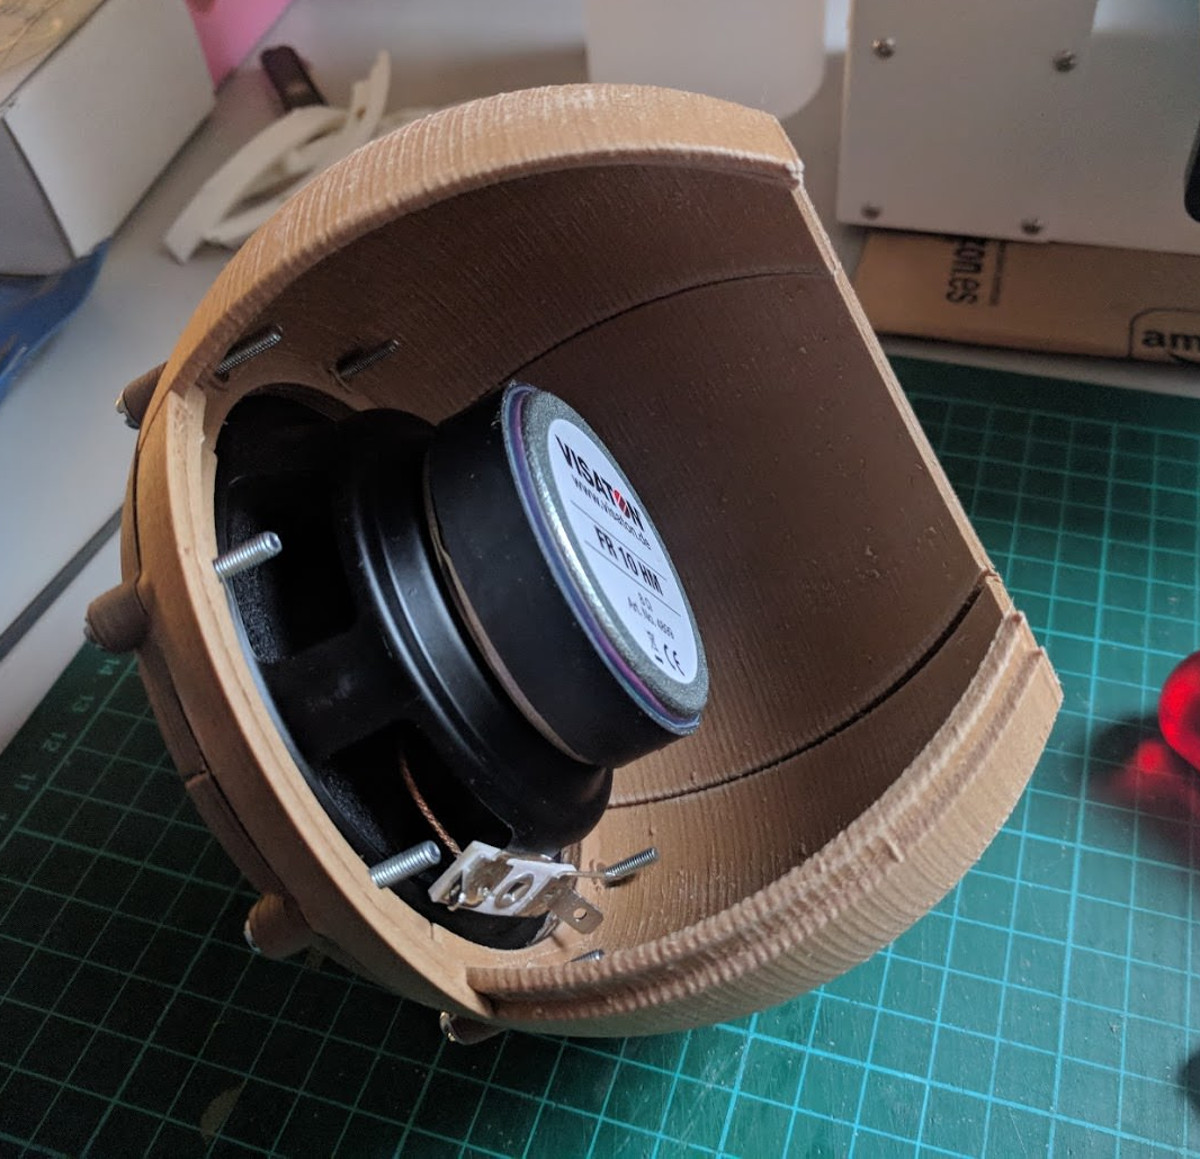 Each speaker enclosure is made up of 10 individual printed parts that are then glued and screwed together to make the final shape, which [Kris] mentions was inspired by an audio installation at the Los Angeles County Museum of Art. They house 4″ Visaton FR 10 HM drivers, and are stuffed with insulation.
It’s a bit difficult to nail down the style that [Kris] has gone for here. You see the chunky controls and analog VU meters and want to call it retro, but it’s also a brass cog and sprocket away from being Steampunk. On the other hand, the shape of the speakers combined with the bamboo-filled PLA used to print them almost gives it an organic look: as if there’s a tree somewhere that grows these things. That’s actually a kind of terrifying thought, but you get the idea.
If your computer speakers were assembled by mere mortals, never fear. We’ve covered a number of interesting hacks and mods for more run-of-the-mill desktop audio setups which should hold you over until it’s time to harvest the speaker trees.
[via /r/3Dprinting]