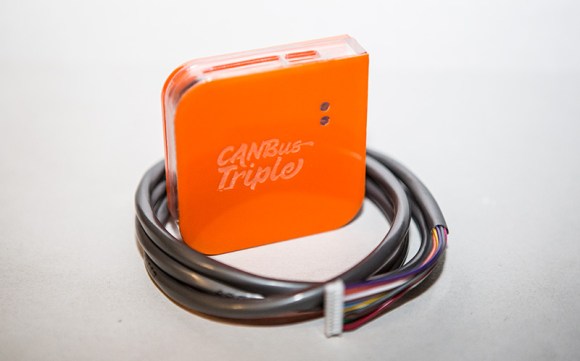
Hold on tight. This is going to be a long post. I kept my temper in the video, but here I can just come out and let you know that I’m livid. Every time I start thinking about this, I feel so angry and helpless that my face gets hot and my hands get shaky. I’m getting ahead of myself though, so lets just back up a little bit and talk about a pretty cool kid named [Thomas].
[Thomas] has muscular dystrophy. This means he’s going to gradually lose strength and control in his muscles over time. He has already lost his ability to stand, and even holding buttons on a game-pad for extended times can be difficult. Gaming, as you can imagine, is very important to [Thomas] and people like him. It offers a release of frustration, like it does for all of us, but also a level playing ground. When he’s in the game, he’s like everyone else.
Today we are quite excited to announce HANDMADE.hackaday. HANDMADE is a place where we celebrate craftsmanship. Usually in the form of a stunning video, or a beautiful image gallery. We will also be sharing extremely detailed DIY projects as well as tutorials. Hop on over and take a peek for yourself to see what you’re in for, but be prepared to clear your schedule, you’re not leaving any time soon.
We are also producing some videos of our own for this that we hope you’ll like.
A personal note:
I am personally so excited about HANDMADE. I’ve been wanting to put this together for a very very long time. I eagerly consume every video of this nature I stumble across, often putting them full screen, high def, and putting in headphones. Any of you who know me personally will attest that getting my full attention on any single thing ever is a daunting task. Also note that these videos usually last several entire minutes; a lifetime in my attention span.
Watching people make things, while applying a practiced and refined skill is almost a religious experience for me. This is creation. I hope some of you will enjoy this area as much as I do.
Over the years we’ve had a tons of tips sent in that were more along the lines of “lifehacks”. Simple little tips to make life better. While we would occasionally squeeze them into hackaday, many got left behind. Now we’ve created an entire site called LIFE.hackaday that we’re filling with all these great ideas. Finally, a place for all those docks people send us!
Occasionally, there might be something that we feel works for the “classic” hackaday and “LIFE.”, in which case, we may just mention it here. We hope that by creating another site, we can give people the “lifehacks” they want while keeping hackaday focused on hardware hacking.
We have some other tricks up our sleeve, but they aren’t quite ready to be revealed yet.
Years ago we covered using thermite to destroy a hard drive. The idea is that if you melt through the platters, the data is completely unrecoverable. There are tons of videos of people doing this, but they all have a similar format. There’s a hard drive, with a flower pot or soda can sitting on top full of thermite. They then light this with a strip of magnesium and a torch.
I wanted to do something a little different. I wanted to implement thermite as a self destruct mechanism inside the device. To do this, I had to come up with a way to ignite the thermite. This stuff is very difficult to light. You have to get it really really hot. The easiest way is to use magnesium, which itself isn’t the easiest thing to light.
What I finally landed on was an ignition system that uses model rocket igniters, gun powder, and magnesium to light the thermite. The model rocket igniter can be set off from the 12v line inside your computer. However, it isn’t hot enough to light magnesium shavings, much less thermite. To get it to work, I needed to add some gunpowder. A small amount of gun powder would get hot enough to light the magnesium shavings, which in turn were hot enough to light the thermite. I had to be careful though, because too much gunpowder would cause a rapid expansion, blowing the thermite everywhere instead of lighting it. You can actually see some red thermite being blown out of the external hard drive and the laptop as the gunpowder ignites.
gun powder
model rocket igniters
magnesium shavings
Effectiveness of external hard drive self destruction:
I wasn’t sure about this one. There isn’t a whole lot of space for thermite and the ignition system inside the box. On top of that, the only space was at the side of the hard drive, where the walls are the thickest. I had no idea if the small amount of thermite I used would penetrate the drive. It did, just barely as you can see in these pictures. It looks as if it pooled in the screw holes and made it inside. The platters are damaged.
burnt unit
looking down on hard drive
you can see a hole in the drive from this angle
yuck
yep, appears to be the screw hole
platters are damaged, but not as effective as thermite to the top
Effectiveness of laptop destruction:
I decided to completely replace the cd rom with thermite. This gave me a ton of space to put things. I was pretty positive this would work. The hard drive is in the center of this laptop, which meant I had to place it on its side for this to be effective. You can see the thermite work its way down toward the drive in the video. As you can see in the pictures below, the drive cover is completely gone and the platters are destroyed. Success!
crusty
hard drive is center of the image
platters are clearly visible
completely fried
un covered
no data coming off that
Since this system can be powered by batteries or the internal power of your computer, it can be put inside a working device only to be used when needed. Obviously it is a ridiculous fire hazard that no one should bother with. It was a fun experiment though and I really feel like it is something that would fit in well in the world of [James Bond]
I’m not above admitting that it is childish of me. I was told I couldn’t have this thing and suddenly I knew I had to make it. I see it with my kids all the time. Toys can sit in a corner collecting dust for ages, but the second it is in threat of being removed, they have renewed interest, at least for a few minutes.
I figured, if I’m going to be childish about it and print a gun that a) won’t work because I don’t have the right printer, and b) I won’t use anyway because I don’t generally play with guns, I might as well make a fun timelapse video of the more recognizable parts being made.
It initially seemed like it was going to be quick and easy. However, I quickly found that just printing this thing was going to be a time consuming and frustrating task.
1. the scale on the individual files was way off.
I suspect this has something to do with the printer it was designed for. It seemed very close to being 1 inch = 1 mm. Not a completely uncommon problem. Manually resizing got some files to look right, but I found many simply wouldn’t resize.
2. Almost every single item had errors.
If you’ve done 3d printing, you’ve found that a model can have all kinds of issues that will stop it from printing correctly. I found every single item for the gun had errors. I actually learned a lot about how to repair non-manifold items from this exercise, so it was good in the end.
Some items, like the hammer and the hammer springs simply would not print. I ran them through systems to repair them and fix errors. It would say that everything was fixed, but when I tried to “slice” them for printing, the software would crash. This means that my gun is incomplete. It has no hammer. Not really that big of a deal to me.
the whole gunNote that it is missing the hammer mechanism. More on that later.disassembled
trigger spring. Cool design, I might use this idea for something else later
black: initial print with errors. Red: fixed print.
the gopro fell into the printer stopping it from moving the bed correctly. You can see the top two layers are shifted about an inch. The rest of that mess is just support material I was ripping out.
The hammer that refused to print correctly despite repeated repairs.
what the hammer was supposed to look like.
the spring that crashed my slicing program every time I tried to prepare it for a print.
Do I care now?
Nope. I climbed to the top of the fridge and got my cookies. I’m a happy child. The reality is that a zip gun is still cheaper, easier, safer, and more reliable. Here’s an example.
I’ve been having fun with the newsletter, and we have over 2500 people subscribed. Up to this point they have mainly just been composed of information about the videos I’m making. I’m going to change that this week. The emails will now also have 10 random hacks, probably the most popular hacks that week. Maybe something from the past of hackaday. It all pretty much just depends on what people end up enjoying. You’ll find the sign up form here, or over there –> in the side bar.
I’m going to keep this extremely informal. I’ll let you know what projects I’m working on, and share some hacks with you. Sign up if this sounds like something you’d enjoy! I plan on sending out 1 to 2 emails per week.
I always thought it would be cool to build a giant fire breathing piranha plant. I never really came up with an excuse to do it though. Eventually, I just decided I didn’t really need an excuse, and thus it was born.
The plant itself is pretty much just foam and cardboard. You can see the construction process in the video, it was really easy, but a little time consuming. I wanted to go with a bit of a crazy, hyper stylized look, so it is covered in veins and has these insane looking wrinkly lips. The plant itself would be a fun thing just to have around the house. Actually, I may turn it into a lamp.