This excellent content from the Hackaday writing crew highlights recurring topics and popular series like Linux-Fu, 3D-Printering, Hackaday Links, This Week in Security, Inputs of Interest, Profiles in Science, Retrotechtacular, Ask Hackaday, Teardowns, Reviews, and many more.
Join Hackaday Editor-in-Chief Elliot Williams and Managing Editor Tom Nardi as they tackle all the hacks that were fit to print this last week. Things start off with some troubling news from Shenzhen (spoilers: those parts you ordered are going to be late), and lead into a What’s That Sound challenge that’s sure to split the community right down the center. From there we’ll talk about human powered machines, bringing OpenSCAD to as many devices as humanly possible, and the finer points of installing your own hardware into a Pelican case. There’s a quick detour to muse on laser-powered interstellar probes, a Pi-calculating Arduino, and a surprisingly relevant advertisement from Sony Pictures. Finally, stay tuned to hear the latest developments in de-extinction technology, and a seriously deep dive into the lowly nail.
It seems I have made my tiny, indelible mark on internet security history, with the term “protestware“. As far as I can tell, I first coined this particular flavor of malware while covering the Faker.js/Colors.js vandalism in January.
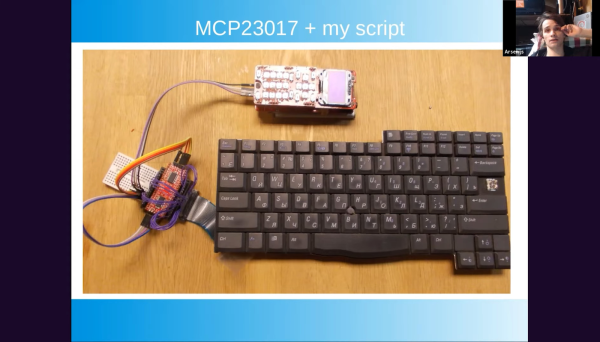
Hackaday’s own [Arsenijs Picugins] has been rather busy hacking old laptops apart and learning what can and cannot be easily reused, and presents for the 2021 Hackaday Remoticon, a heavily meme-loaded presentation with some very practical advice.
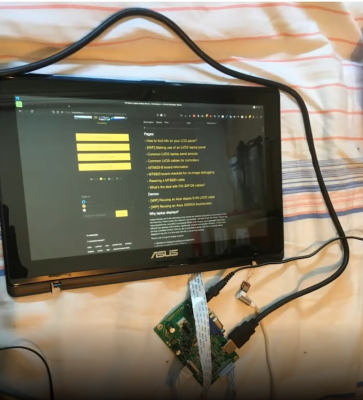
Full HD, IPS LCD display with touch support, reused with the help of a dedicated driver board
What parts inside a dead laptop are worth keeping? Aside from removable items like RAM stick and hard drives, the most obvious first target is the LCD panel. These are surprisingly easy to use, with driver boards available on the usual marketplaces, so long as you make sure to check the exact model number of your panel is supported.
Many components inside laptops are actually USB devices, things like touch screen controllers, webcams and the like are usually separate modules, which simply take power and USB. This makes sense, since laptops already have a fair amount of external USB connectivity, why not use it internally too? Other items are a bit trickier: trackpads seem to be either PS/2 or I2C and need a bit more hardware support. Digital microphones mostly talk I2S, which means some microcontroller coding.
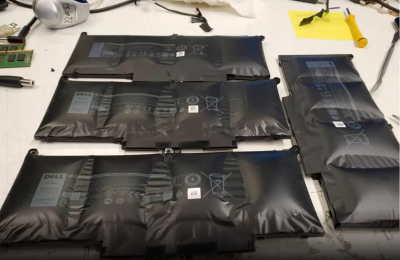
Some items need a little more care, however, so maybe avoid older Dell batteries, with their ‘spicy pillow’ tendencies. As [Arsenijs] says, take them when they are ripe for the picking, but not too ripe. Batteries need a little care and feeding, make sure you’ve got some cell protection, if you pull raw cells! Charging electronics are always on the motherboard, so that’s something you’ll need to arrange yourself if you take a battery module, but it isn’t difficult, so long as you can find your way around SMBus protocol.
These batteries are too ripe. Leave them alone.
Older laptops were much more modular and some even designed for upgrade or modification, and this miniaturization-driven trend of shrinking everything — where a laptop now needs to be thin enough to shave with — is causing some manufacturers to move in a much more proprietary direction regarding hardware design.
This progression conflicts with our concerns of privacy, repairability and waste elimination, resulting in closed boxes filled with unrepairable, non-reusable black boxes. We think it’s time to take back some of the hardware, so three cheers to those taking upon themselves the task to reverse engineer and publish reusability information, and long may it be possible to continue.
You might not think that it would be possible to have a favorite optimization algorithm, but I do. And if you’re well-versed in the mathematical art of hill climbing, you might be surprised that my choice doesn’t even involve taking any derivatives. That’s not to say that I don’t love Newton’s method, because I do, but it’s just not as widely applicable as the good old binary search. And this is definitely a tool you should have in your toolbox, too.
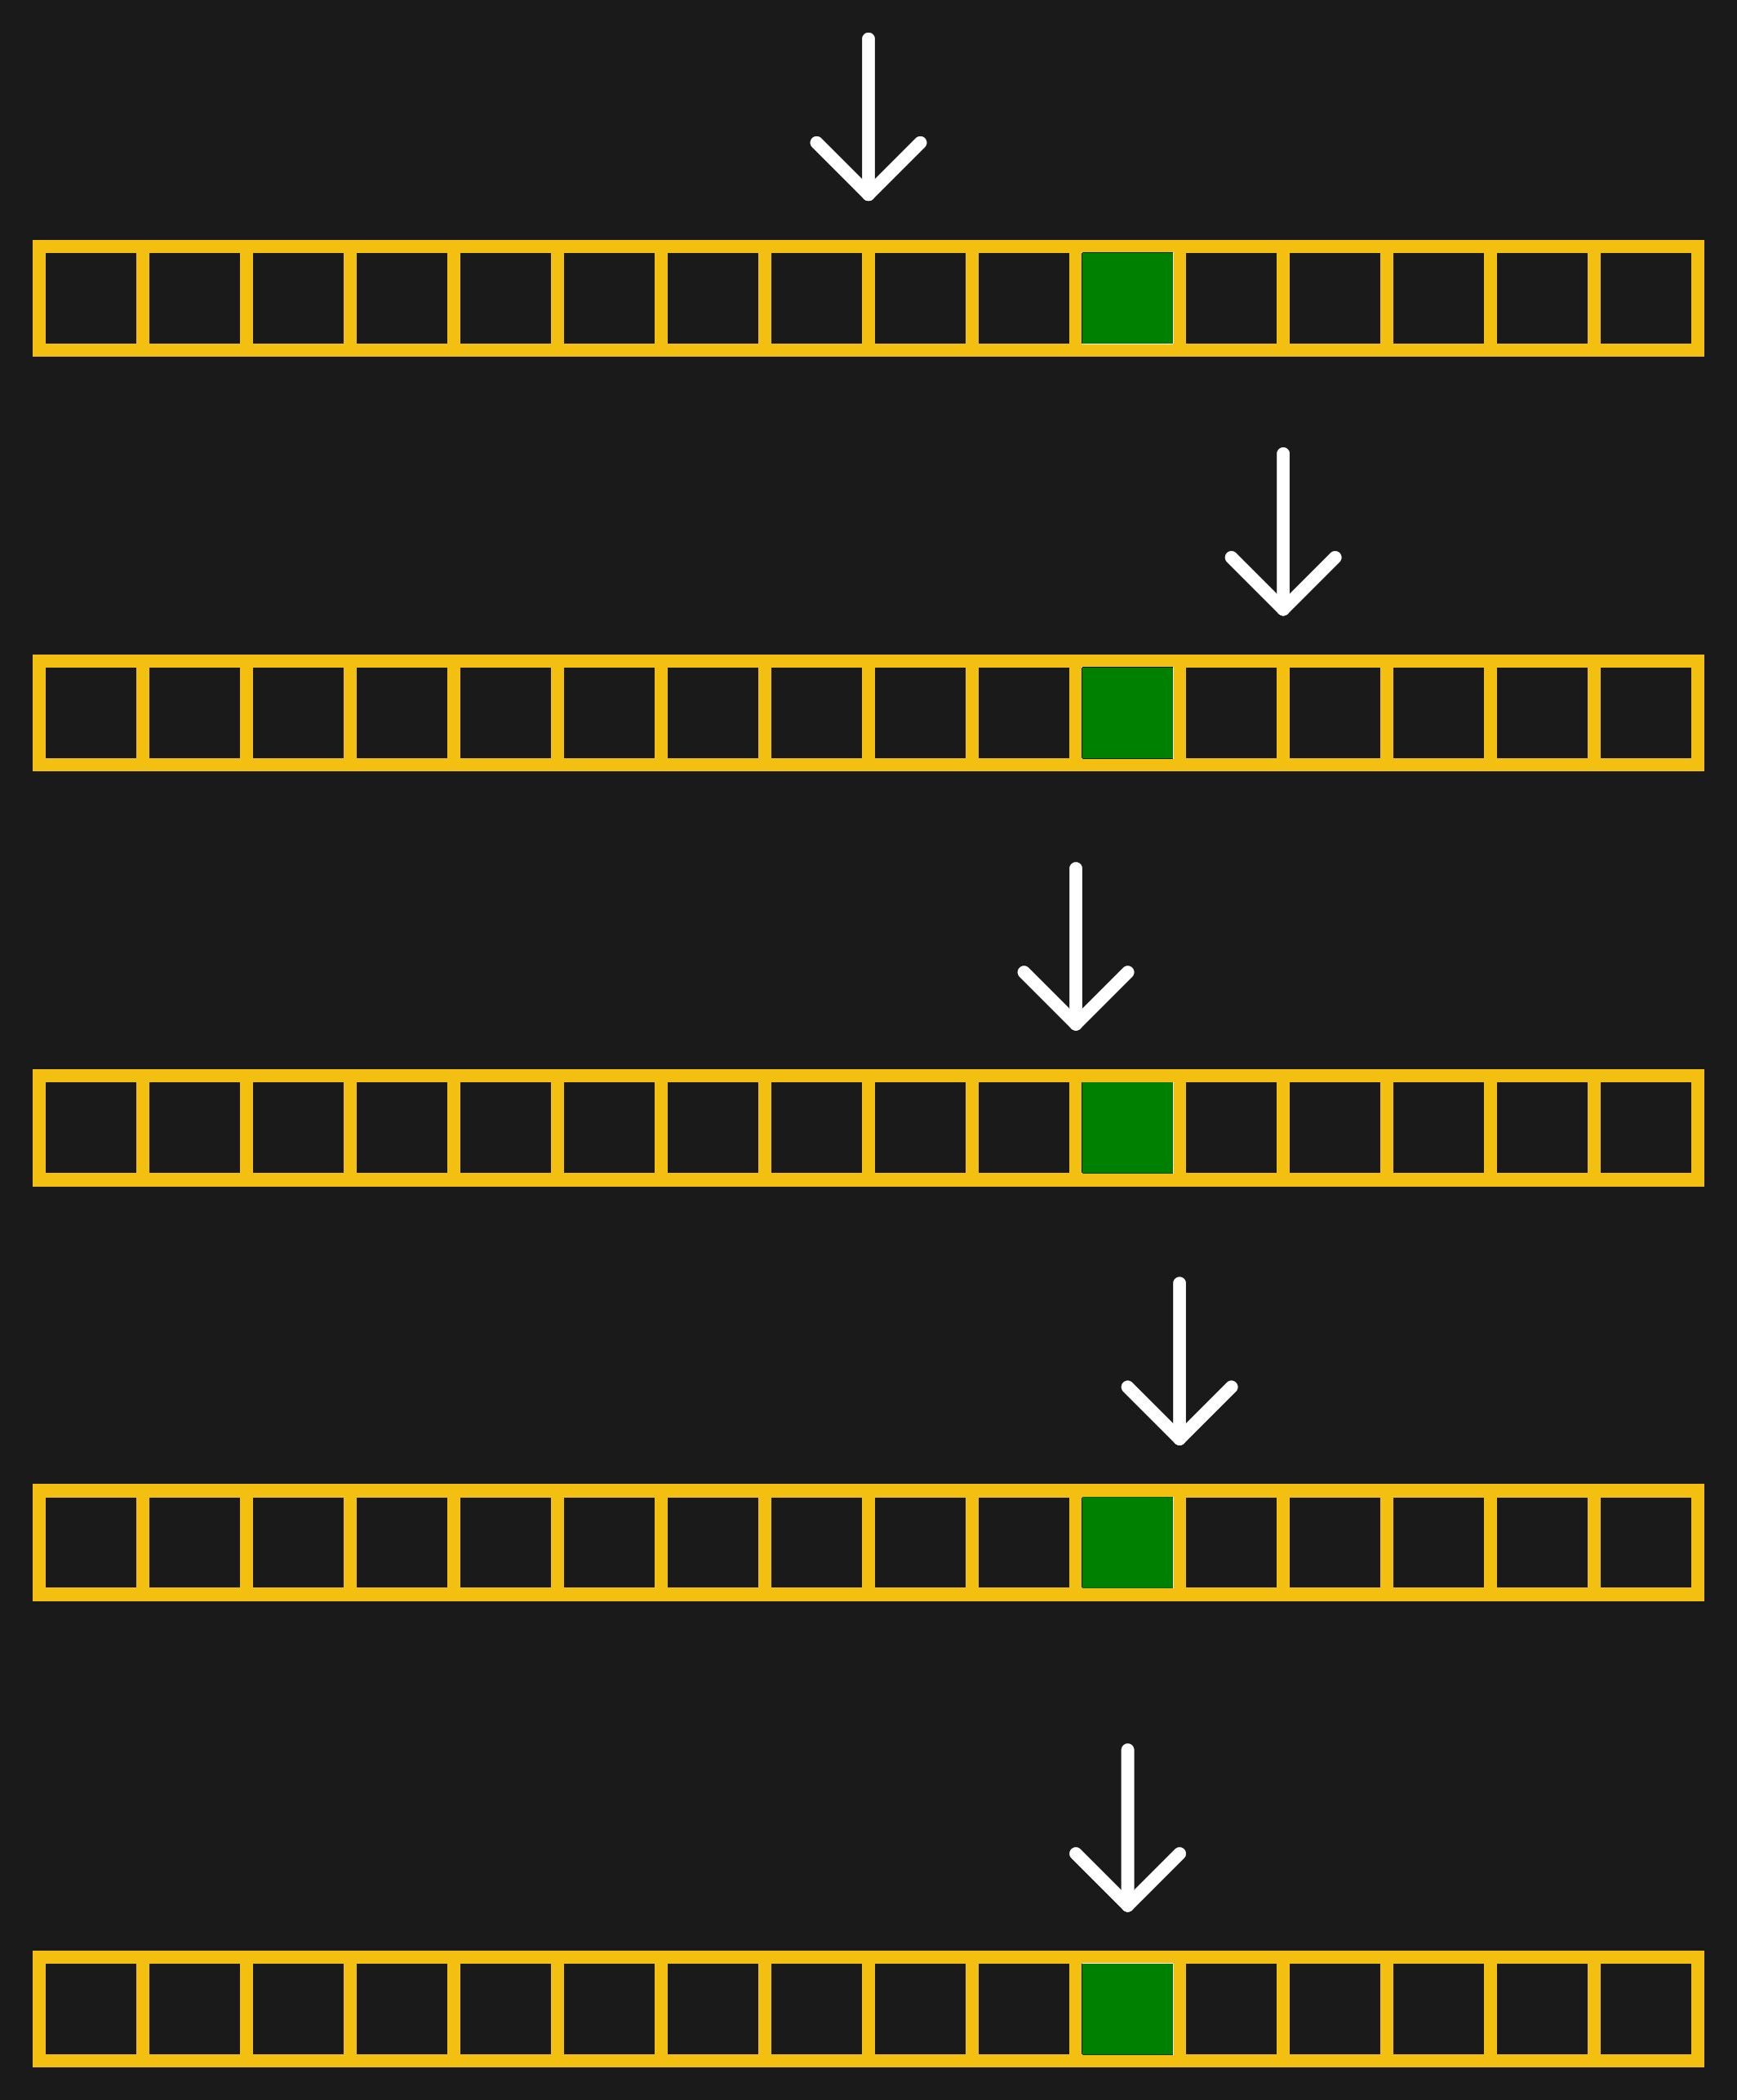
Those of you out there who slept through calculus class probably already have drooping eyelids, so I’ll give you a real-world binary search example. Suppose you’re cropping an image for publication on Hackaday. To find the best width for the particular image, you start off with a crop that’s too thin and one that’s too wide. Start with an initial guess that’s halfway between the edges. If this first guess is too wide, you split the difference again between the current guess and the thinnest width. Updated to this new guess, you split the differences again.
But let’s make this even more concrete: an image that’s 1200 pixels wide. It can’t get wider than 1200 or thinner than 0. So our first guess is 600. That’s too thin, so we guess 900 — halfway between 600 and the upper limit of 1200. That ends up too wide, so we next guess 750, halfway between 600 and 900. A couple more iterations get us to 675, then 638, and then finally 619. In this case, we got down to the pixel level pretty darn fast, and we’re done. In general, you can stop when you’re happy, or have reached any precision goal.
[Ed note: I messed up the math when writing this, which is silly. But also brought out the point that I usually round the 50% mark when doing the math in my head, and as long as you’re close, it’s good enough.]
What’s fantastic about binary search is how little it demands of you. Unlike fancier optimization methods, you don’t need any derivatives. Heck, you don’t even really need to evaluate the function any more precisely than “too little, too much”, and that’s really helpful for the kind of Goldilocks-y photograph cropping example above, but it’s also extremely useful in the digital world as well. Comparators make exactly these kinds of decisions in the analog voltage world, and you’ve probably noticed the word “binary” in binary search. But binary search isn’t just useful inside silicon. Continue reading “Our Favorite Things: Binary Search”→
In the old days, you had a computer and it did one thing at a time. Literally. You would load your cards or punch tape or whatever and push a button. The computer would read your program, execute it, and spit out the results. Then it would go back to sleep until you fed it some more input.
The problem is computers — especially then — were expensive. And for a typical program, the computer is spending a lot of time waiting for things like the next punched card to show up or the magnetic tape to get to the right position. In those cases, the computer was figuratively tapping its foot waiting for the next event.
Someone smart realized that the computer could be working on something else while it was waiting, so you should feed more than one program in at a time. When program A is waiting for some I/O operation, program B could make some progress. Of course, if program A didn’t do any I/O then program B starved, so we invented preemptive multitasking. In that scheme, program A runs until it can’t run anymore or until a preset time limit occurs, whichever comes first. If time expires, the program is forced to sleep a bit so program B (and other programs) get their turn. This is how virtually all modern computers outside of tiny embedded systems work.
But there is a difference. Most computers now have multiple CPUs and special ways to quickly switch tasks. The desktop I’m writing this on has 12 CPUs and each one can act like two CPUs. So the computer can run up to 12 programs at one time and have 12 more that can replace any of the active 12 very quickly. Of course, the operating system can also flip programs on and off that stack of 24, so you can run a lot more than that, but the switch between the main 12 and the backup 12 is extremely fast.
So the case is stronger than ever for writing your solution using more than one program. There are a lot of benefits. For example, I once took over a program that did a lot of calculations and then spent hours printing out results. I spun off the printing to separate jobs on different printers and cut like 80% of the run time — which was nearly a day when I got started. But even outside of performance, process isolation is like the ultimate encapsulation. Things you do in program A shouldn’t be able to affect program B. Just like we isolate code in modules and objects, we can go further and isolate them in processes.
Doubled-Edged Sword
But that’s also a problem. Presumably, if you want to have two programs cooperate, they need to affect each other in some way. You could just use a file to talk between them but that’s notoriously inefficient. So operating systems like Linux provide IPC — interprocess communications. Just like you make some parts of an object public, you can expose certain things in your program to other programs.
When you think of machines you see around you every day, you probably think about your car, computer, or household appliances. However, the world is full of simple machines. One simple machine in particular, the inclined plane, shows up a lot. For example, think of the humble nail. If you are a woodworker or even a homeowner you probably have bags of them. They certainly are all around you if you are indoors and maybe even if you are outdoors right now. Nails have been the fastener of choice for a very long time and they are a form of a wedge which is a type of inclined plane.
What else can you say about nails? Turns out, there is a lot to know. Like other fasteners, there are nails for very specific purposes. There are even nails with two heads and — no kidding — nails with two points. Exactly what kind of nail you need depends on what you are doing and what’s important to you.
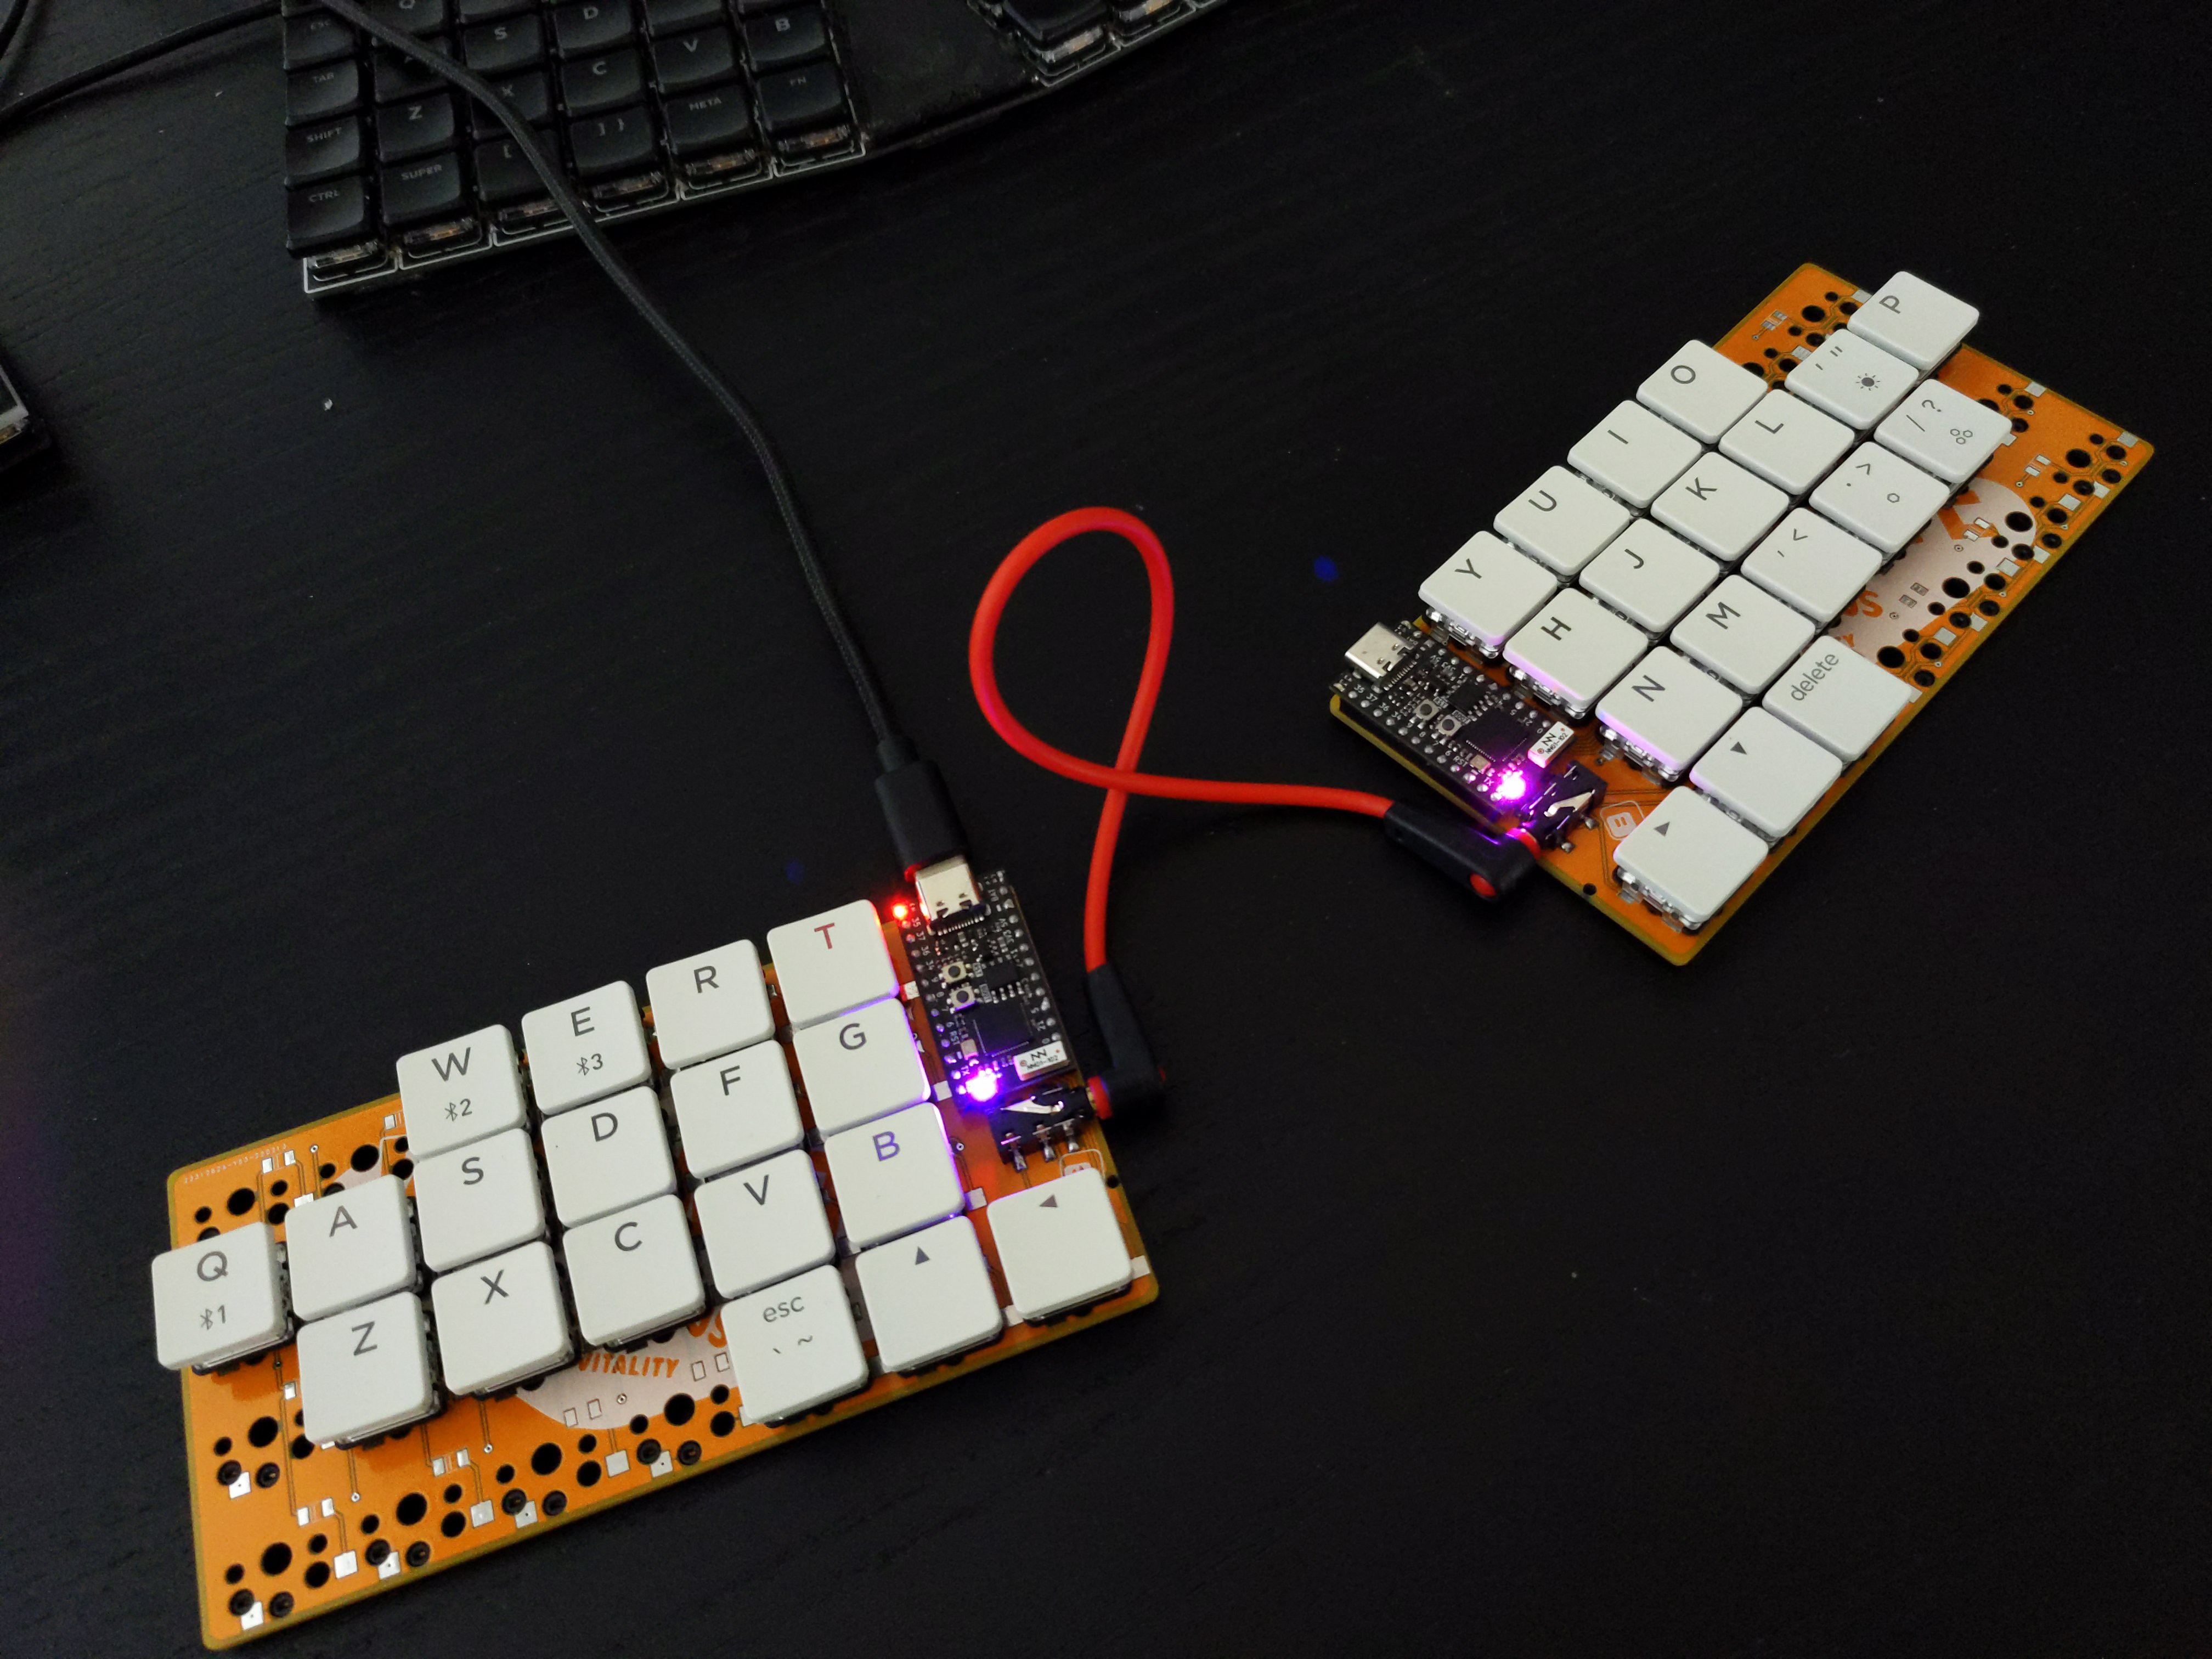
About a month ago, [Unexpected Maker] finished their TinyS3, an ESP32-S3 development board. Since the chip supports both true USB and Bluetooth, [deʃhipu] wondered how well it would work in a keyboard.
Thus, the Vegemite Sandwich was made, perhaps while [deʃhipu] was dreaming of traveling in a fried-out Kombi. But really, it was named so because [Unexpected Maker] hails from Australia.
This is [deʃhipu]’s first time using switch sockets, which is (as far as we know) the only choice when it comes to hot-swappable Kailh chocs. We’ll be watching this one with hungry eyes.