Retrotechtacular: Time For Coffee

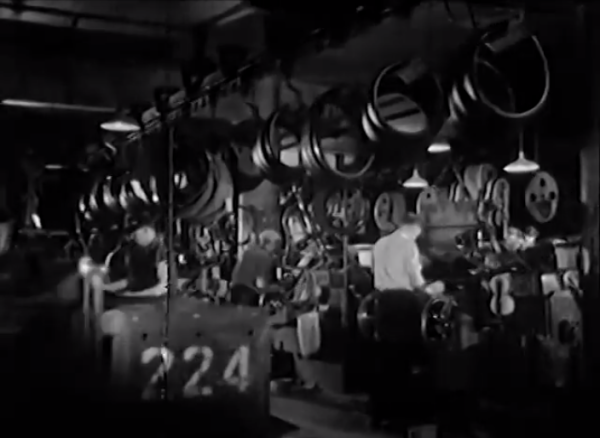
If you ask us, it’s almost always a good time for coffee. In the spotlight this week is an educational/promotional film made by A&P, who started in the 1800s as with a chain of shops offering coffee and tea. By the 1950s, they were operating full self-serve grocery stores with a trail of shuttered mom and pop operations in their wake.

This is the story of coffee as it goes from the nursery to the field to the shelves of your local A&P. It covers the growing, cultivation, and distribution of coffee from South American crops that at the time covered more than one million square miles of Brazil alone.

Coffee trees leave the nursery at two years old and are planted in nutrient-rich red soil. Two to three years later, they bear their first crop. Coffee blossoms appear first, and the fruit ripens over the next 8-9 months. Skilled workers pick the berries by hand. We are told that the average tree produces one pound of roasted coffee per year.

sun dried beansThe day’s harvest is collected, weighed, and bagged for further production. The fruits are crushed to remove each bean from its red jacket. Then, the beans are washed and spread out in the sun for 8-10 days. They are frequently rotated so they dry evenly. The dried coffee is packed in bags and sent into the city.

bag stabbingAt a warehouse, the coffee is inspected, sorted, and graded. Bags are stamped with the coffee’s country of origin and intended destination before going to the seaport. A very important step happens here. As each bag walks by on the shoulders of a worker, another guy stabs it to get a sample of the beans. The on-site A&P officials take over at this point and do their own inspections, sending samples to the US. Here, the coffees are roasted and taste tested for both strength and flavor from a giant lazy Susan full of porcelain cups. taste testing

The film takes a brief detour to tell us that the great cities of Latin America were built upon the labors of coffee exportation. We see a montage of vistas, skylines, and shorelines, which bring it back to the subject of shipping the coffee to various ports of call. At the dock, bags are tumbled onto large nets to be loaded on the ship. As coffee is susceptible to moisture, special care is taken to avoid the ill effects of traveling out of the tropics.

Continue reading “Retrotechtacular: Time For Coffee”

Developed On Hackaday: Chrome/Firefox Apps/Extensions Developers Needed

The Hackaday community is currently working on an offline password keeper, aka Mooltipass. The concept behind this product is to minimize the number of ways your passwords can be compromised, while generating and storing long and complex random passwords for the different websites you use daily. The Mooltipass is a standalone device connected through USB and is compatible with all major operating systems on PCs, Macs and Smartphones. More details on the encryption and technical details can be found on our github repository readme or by having a look at all the articles we previously published on Hackaday.

Our beta testers are now using their prototypes daily and their feedback allowed us to considerably improve the Mooltipass. The firmware development is coming to an end as most functionalities have been implemented in the last few weeks. The development team is therefore turning his attention to the Chrome/Firefox plugins and needs your help to finish them in a timely manner. As you can guess, our goal is to provide a slick and intuitive interface for all of the Mooltipass features. If you have (a lot of) spare time, knowledge of the browsers APIs, feel free to leave a comment below with a valid email address!

Thumbnail that say The Hacklet

Hacklet #13 – Chopper Royalty

13

This week’s Hacklet focuses on two wheeled thunder! By that we mean some of the motorcycle and scooter projects on Hackaday.io.

hondaskyWe’re going to ease into this Hacklet with [greg duck’s] Honda Sky Restoration. Greg is giving a neglected 15-year-old scooter some love, with hopes of bringing it back to its former glory. The scooter has a pair of stuck brakes, a hole rusted into its frame, a stuck clutch, and a deceased battery, among other issues. [Greg] already stripped the body panels off and got the rear brake freed up. There is still quite a bit of work to do, so we’re sure [Greg] will be burning the midnight 2 stroke oil to complete his scooter.

jetbikeNext up is [Anders Johansson’s] jaw dropping Gas turbine Land Racing Motorcycle. [Anders] built his own gas turbine engine, as well as a motorcycle to go around it. The engine is based upon a Garrett TV94, and directly powers the rear wheel through a turboshaft and gearbox. [Anders] has already taken the bike out for a spin, and he reports it “Pulled like a train” at only half throttle. His final destination is the Bonneville salt flats, where he hops to break the 349km/h class record. If it looks a bit familiar that’s because this one did have its own feature last month.

firecoates[GearheadRed] is taking a safer approach with FireCoates, a motorcycle jacket with built-in brake and turn signal indicators. [GearheadRed] realized that EL wire or LED strip wouldn’t stand up to the kind of flexing the jacket would take. He found his solution in flexible light pipes. Lit by an LED on each end, the light pipes glow bright enough to be seen at night. [GearheadRed] doesn’t like to be tied down, so he made his jacket wireless. A pair of bluetooth radios send serial data for turn and brake signals generated by an Arduino nano on [Red’s] bike. Nice work [Red]!

[Johnnyjohnny] rounds out this week’s Hacklet with his $1000 Future Tech Cafe Racer From Scratch. We’re not quite sure if [Johnny] is for real, but his project logs are entertaining enough that we’re going to give him the benefit of the doubt. Down to his last $1000, [Johnny] plans to turn his old Honda xr650 into a modern cafe racer. The new bike will have electric start, an obsolete Motorola Android phone as its dashboard, and a 700cc hi-comp Single cylinder engine at its heart. [Johnny] was last seen wandering the streets of his city looking for a welder, so if you see him, tell him we need an update on the bike!


That’s it for this week. If you liked this installment check out the archives. We’ll see you next week on The Hacklet – bringing you the Best of Hackaday.io!

Droning On: Maiden Flights

do-55

When we last left off, the Hackaday Drone Testbed was just a box of parts on workbench. Things have changed quite a bit since then! Let’s get straight to the build.

With the arms built and the speed controls soldered up, it was simply a matter of bolting the frame itself together. The HobbyKing frame is designed to fold, with nylon washers sliding on the fiberglass sheets. I don’t really need the folding feature, so I locked down the nylock nuts and they’ve stayed that way ever since. With the arms mounted, it was finally starting to look like a quadcopter.

drone1

Using the correct screws, the motors easily screwed into the frames. I did have to do a bit of filing on each motor plate to get the motor’s screw pattern to fit. The speed controls didn’t have a specific mount, so I attached them to the sides of the arms with double-sided tape and used some zip ties to ensure nothing moved. In hindsight I should have mounted them on the top of the arms, as I’m planning to put LED light strips on the outside of edges of the quad. The LEDs will help with orientation and ensure a few UFO sightings during night flights.

Power distribution is a major issue with multicopters. Somehow you have to get the main battery power out to four speed controls, a flight controller, a voltage regulator, and any accessories. There are PCBs for this, which have worked for me in the past. For the Hackaday Testbed, I decided to go with a wiring harness. The harness really turned out to be more trouble than it was worth. I had to strip down the wires at the solder joint to add connections for the voltage regulator. The entire harness was a bit longer than necessary. There is plenty of room for the excess wire between the main body plates of the quad, but all that copper is excess weight the ‘bench’ doesn’t need to be carrying. The setup does work though. If I need to shed a bit of weight, I’ll switch over to a PCB.

Click past the break to read the rest of the story.

Continue reading “Droning On: Maiden Flights”

Retrotechtacular: Turn On The Magic Of Colored Light

title cardChances are, you take color for granted. Whether or not you give it much thought, color is key to distinguishing your surroundings. It helps you identify fire, brown recluse spiders, and the right resistor for the job.

In the spotlight this week is a 1950s educational film called “This is Color“. It also happens to be a delightful time capsule of consumer packaging from the atomic age. This film was made by the Interchemical Corporation, an industrial research lab and manufacturer of printing inks. As the narrator explains, consistent replication of pigments is an essential part of mass production. In order to conjure a particular pigment in the first place, one must first understand the nature of color and the physical properties of visible light.

electromagnetic spectrumEach color that makes up the spectrum of visible rays has a particular wavelength. The five principal colors—red, yellow, green, blue, and violet—make possible thousands of shades and hues, but are only a small slice of the electromagnetic spectrum.

When light encounters a transparent material more dense than air, such as water or glass, it has to change direction and is bent by the surface. This is known as refraction. A straw placed in a glass of water will appear bent below the surface because the air and the water have different refractive indices. That is, the air and water will bend or refract different percentages of the light that permeates them. Continue reading “Retrotechtacular: Turn On The Magic Of Colored Light”

Ask Hackaday: Can Paper USB Business Cards Exist?

swivel business card

The swivelCard Kickstarter campaign recently received a lot of press coverage and makes some impressive claims as their goal is the development of USB and NFC business cards at a $3 unit price. While most USB-enabled business cards we featured on Hackaday were made of standard FR4, this particular card is made of paper as the project description states the team patented

a system for turning regular paper into a USB drive.

As you can guess this piqued our interest, as all paper based technologies we had seen until now mostly consisted of either printed PCBs or paper batteries. ‘Printing a USB drive on regular paper’ (as the video says) would therefore involve printing functional USB and NFC controllers.

Luckily enough a quick Google search for the patents shown in one of the pictures (patent1, patent2) taught us that a storage circuitry is embedded under the printed USB pads, which may imply that the team had an Application-Specific Integrated Circuit (ASIC) designed or that they simply found one they could use for their own purposes. From the video we learn that ‘each card has a unique ID and can individually be programmed’ (the card, not the UID) and that it can be setup to open any webpage URL. The latter can even be modified after the card has been handed out, hinting that the final recipient would go to a ‘www.swivelcard.com/XXXX” type of address. We therefore got confused by

Imagine giving your business card with pictures, videos, presentations, and websites for the recipient to interact with!

paragraph that the project description contains.

This leads us to one key question we have: what kind of USB drive can make a given user visit a particular website, given that he may have Linux, Windows, Mac or any other OS? They all have similar USB enumeration processes and different key strokes to launch a browser… our wild guess is that it may be detected as storage with a single html file in it. Unfortunately for us the USB detection process is not included in the video.

Our final question: Is it possible to embed both USB and NFC controllers in a thin piece of paper without worrying about broken ICs (see picture above)? NFC enabled passports have obviously been around for a long time but we couldn’t find the same for USB drives.

Possible or not, we would definitely love having one in our hands!

Edit: One of our kind readers pointed out that this campaign actually is a re-launch of a failed indiegogo one which provides more details about the technology and confirms our assumptions.

Thumbnail that say The Hacklet

Hacklet #12 – Last Minute Hackaday Prize Submissions

12

If hackers and engineers are notorious for anything, it’s for procrastinating. Many of us wait until the absolute last-minute to get things done. The Hackaday Prize has proved to be no exception to that. Anyone watching the newest projects could see the entries fly in the last few days. Let’s take a quick look at a few.

handuino

[Cyrus Tabrizi] submitted Handuino just a few short hours before the deadline. Handuino is an Arduino based human interface device. You can use it to control anything from R/C cars to 3D printers, to robots to Drones. Input is through the joystick, switches, and buttons, and output through the on-board 2.2″ LCD. Projects can interface to the Handuino via a USB port, or an XBEE radio. Nice Work [Cyrus].

bionicYoSelf

[txyz.info] wants to make us more human than human with Bionic Yourself, an implantable device to make you a bionic superhero. [txyz] plans to use sensors such as an electromagnetic field sensor, accelerometers, and Electromyography (EMG) muscle activity detectors. The idea is to not only sense the implanted wearer, but the world around them. The wearer can then use an embedded Bluetooth radio to send commands. The entire system runs on the Arduino platform, so updating your firmware will be easy. Not everyone has a charging port, so [txyz] has included wireless battery charging in the system.

HAD-alarm-clock[Laurens Weyn] wants to wake us all up with Overtime: the internet connected alarm clock. Overtime is a Raspberry PI powered clock with a tower of 7 segment displays. The prototype displays were sourced from an old exchange rate sign. Overtime does all the normal clock things, such as display the time, and date. It even allows you to set and clear alarms. The display is incredible – there are enough pixels there to play Tetris. Overtime is currently running on an Arduino Mega, but [Laurens] plans to move to a Raspberry PI and hook into the internet for information such as Google calender events.

We’re going to cut things a bit short this week. Your work is done (for now) but for the Hackaday staff, the work is just beginning. We’re already on task, reviewing the entries, and picking which submissions will move on to the next round. Good luck to everyone who entered.

As always, See you in next week’s Hacklet. Same hack time, same hack channel, bringing you the best of Hackaday.io!