Used Hard Drive Repurposed As A Cotton Candy Machine

hard-drive-cotton-candy-machine

If you’re reading this website, you’re probably someone who likes to take things apart. As such, you probably also have one or more old computer hard drives just sitting around in a parts bin.  Of all the projects you could have for an old drive, here’s an interesting one – A Chinese engineer who operates a hard drive repair and data recovery center decided to turn a used drive into a cotton candy machine.

Possible sanitary concerns set aside, his creation is very cheap and easy to build. Most hackers probably have all the necessary gear just sitting around already. The only parts he used were: a hard drive that still powered up, a generic plastic basin, an aluminum can, a flat round metal tin, and six bicycle spokes.

It might not be pretty, but it works. If you want to create your own, be sure to check out the above link. There’s a full DIY guide complete with step-by-step photos.

[Thanks Fabien]

Custom Boards At Home Without Etching

PCB

PC board houses are getting more accessable and less expensive all the time. Some of us are even getting very, very good at making our own circuit boards at home. There are times, though, when a project or prototype requires an extremely cheap custom board right now, something etching a custom board won’t allow. [KopfKopfKopfAffe] has a unique solution to this problem, able to create custom boards in under an hour without any nasty chemicals.

Instead of starting his build with copper-clad board, [KopfAffe] used every rapid prototyper’s friend, simple one-sided perf board. The shape of the board was milled out on a CNC machine, and both the top silk screen and bottom layer were marked off using the toner transfer method. After that, a custom circuit is just a matter of placing components and putting solder bridges between all the marked pads.

[KopfAffe] is only using this technique for single-sided boards, but we don’t see any reason why it couldn’t be employed for simple double-sided boards. This would still have the problem of making vias between the layers, but that’s still a problem with proper, home-etched double sided boards.

Auto Off For Any Circuit

autooff

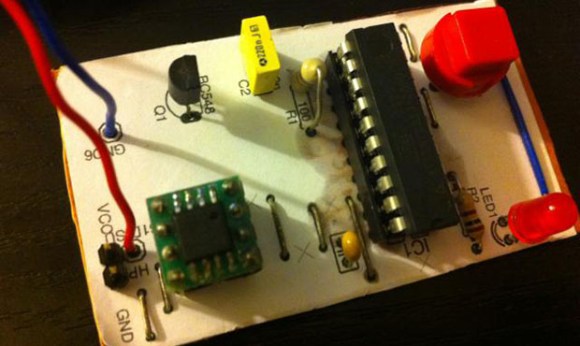
Properly configured, your computer will go into sleep mode when left unattended for a long enough time. So will your cell phone, and just about every other piece of sufficiently complex electronics. Much simpler circuits, though, are left at the mercy of a SPST switch; if you forget to turn a flashlight off, it will be dead next time you need to use it. Wanting an auto-off circuit simple electronics, [Kyle] threw together this auto shutoff circuit.

The basic idea behind the cirucuit is to use a microcontroller as a timer controlling two transistors. When [Kyle]’s circuit is power cycled, the timer inside an AVR starts, making a pin high, and when the timer is up, making the pin low again. This pin feeds into a PNP transistor which is in turn connected to a NPN transistor, creating a very tiny auto off circuit for anything with an SPST switch.

[Kyle] says there are a few improvements to be made – using MOSFETS to handle higher currents and possibly using a smaller microntroller like an ATtiny 4/5/9/10 to shrink the circuit’s volume. It’s a great idea, bringing the idea of a flashlight with auto shutoff into reality.

Building New, Weird CPUs In FPGAs

CPU

The popularization of FPGAs for the hobbyist market means a lot more than custom LED controllers and clones of classic computer systems. FPGAs are also a great tool to experiment with computer architecture, creating new, weird, CPUs that don’t abide by the conventions the industry has used for 40 years. [Victor] is designing a new CPU that challenges the conventions of how to access different memory locations, and in the process even came up with a bit of example code that runs on an ARM microcontroller.

Most of the time, the machine code running on your desktop or laptop isn’t that interesting; it’s just long strings of instructions to be processed linearly. The magic of a computer comes through comparisons, an if statement or a jump in code, where the CPU can run one of two pieces of code, depending on a value in a register. There is the problem of reach, though: if a piece of code makes a direct call to another piece of code, the address of the new code must fit within an instruction. On an ARM processor, only 24 bits are available to encode the address, meaning a jump in code can only go 16 MB on either side of its call. Going any further requires more instructions, and the performance hit that comes along with that.

[Victor] decided a solution to this problem would be to create a bit of circuitry that would be a sliding window to store address locations. Instead of storing the literal address for jumps in code, every branch in the code is stored as a location relative to whatever is in the program counter. The result is an easy way to JMP to code very far away in memory, with less of a performance hit.

There’s an implementation for this sliding window token thing [Victor] whipped up for NXP’s ARM Cortex M3 microprocessor, and he’ll be working on an implementation of this concept in a new CPU over on his git.

BGA Rework Station

SMD components may be a little challenging for the home builder – even though the’re inordinately practical for homebrew PCBs – but if you play around with electronics and solder long enough, you’re eventually going to run into the horrors of BGA parts. Instead of convenient pins, BGA parts have tiny metallic balls on which solder is applied, a board is thrown through a reflow oven, and hopefully at the end, everything works. Sometimes these balls corrode or otherwise need to be reflowed. This isn’t an easy process, so [Edmar] came up with his own BGA rework station that costs much less than commercial offerings.

[Edmar]’s build began when he wanted to repair a graphics card. A common error on his Amilo XI2428 graphics card is having the small balls on the underside of the chip corrode, leaving the user with a non-functional graphics card. Towel trick notwithstanding, the easiest way to fix this error is to heat up the card to above the melting point of solder, removing the chip, and resoldering it with careful application of solder paste.

[Edmar]’s reflow station is made of an electric skillet for the bottom of the board, an infrared lamp for the top side of the board, and control circuitry constructed from an ATMega128, temperature sensors, and a huge power supply. The temperature is controlled via USB by a computer, allowing [Edmar] to set a temperature profile as recommended by the BGA chip’s data sheet.

Right now, removing a BGA chip works great, but [Edmar] is still working on the tech necessary to replace a BGA chip on a board.

A Real Thermal Imaging Camera For $300

If you want to check your house for hot air leaks, take pictures of the heat coming off a rack of equipment, or just chase the most dangerous animal, [Arnie], through the jungles of central america, a thermal imaging camera is your friend. These devices normally cost a few thousand dollars, but the team behind the Mu Thermal Camera managed to get the price down to about $300.

The basic idea behind the Mu Thermal Camera is overlaying the output of an infrared thermopile – basically, an infrared camera – on top of the video feed of a smart phone’s camera. This is an approach we’ve seen before and something that has even been turned into a successful Kickstarter. These previous incarnations suffered from terrible resolution, though; just 16×4 pixels for the infrared camera. The Mu thermal camera, on the other hand, has 160×120 pixels of resolution. That’s the same resolution as this $2500 Fluke IR camera. After the indiegogo campaign is over, the Mu camera will eventually sell for $325.

We have no idea how the folks behind the Mu camera were able to create a thermal imaging with such exceptional resolution at this price point. The good news is the team will be open sourcing the Mu camera after their indiegogo run is over. W’e’d love to see those docs now, if only to figure out how a thousand dollars of infrared sensor is crammed into a $300 device.

24-port GPIO On A PCI Card

btgpio

So you’ve got a project running on an x86 board and you’d like some GPIO pins. Whether you want to read a few buttons, light up a few LEDs, put an accelerometer in your computer or whatever, you’ve got a problem. Luckily there’s an easy way to get 24 GPIO pins on an x86 board using a PCI card for just a few bucks.

The key component of the build is a PCI TV Tuner card made by Hauppague under the WinTV brand. If you’ve got one of these cards with either a Brooktree bt848, bt849, bt878 or bt879 video capture chip, having 24 GPIO pins is just a spool of magnet wire, a soldering iron, and a steady hand away.

It’s a great build if you’d like some GPIO action without going through the usual parallel port mess, and especially useful since these WinTV capture cards can be had from the usual Internet suppliers for just a few bucks. You’ll need a driver, of course, but the relevant Linux kernel driver – bt8xxgpio – should be included any reasonably modern distro.

Special thanks to [Dex Hamilton] for notifying us of this build.