The Un-Economy Of Building Your Own Spot Welder

If there’s one thing that brings hackers together, it’s the ability to build something for less money than it takes to buy it. It’s an exercise [Great Scott Gadgets] put to the test because he was playing around with some 18650 lithium cells, and had a huge need to put some tabs on batteries. This can be done by soldering, but to do it right you should really use a spot welder. Here’s the rub: you can buy a spot welder for about $250, and you can build one for a little less. So, the question: should [Great Scott] build or buy a spot welder? This wouldn’t be worth reading if he started off with an eBay order.

[Great Scott] designed this spot welder around a half-dozen supercaps, all securely held together with Kapton tape. This goes through a set of MOSFETs, and everything is controlled through an Arduino, a rotary encoder, and a dirt-cheap OLED display. It’s a simple enough circuit but a bit too much for perfboard, so [Great Scott] laid out a PCB and got a few boards for under $40. A bit of solder and some debugging later, and theoretically a spot welder was created.

After all that work, how did the spot welder work? Well, it didn’t. A slight misstep in the schematic meant this board didn’t have reference ground on the MOSFETs, so all this work was for naught. Of course, the only thing required to fix this board was a second board spin, as [Great Scott] probably bought more parts than necessary because that’s what smart people do. Still, he decided to cut his losses and shelve the project.

Continue reading “The Un-Economy Of Building Your Own Spot Welder”

New Part Day: Put An Alexa In Everything

The last great hope for electronics manufactures is smart home assistants. The Alexas and Siris and OK Googles are taking over homes across the country. At its best, it’s HAL 9000, only slightly less homicidal. It will entertain your children, and you can order cat litter just by saying you want cat litter. This is the future, whether we like it or not.

In an attempt to capture the market, Amazon has released the Alexa Connect Kit. This is an Amazon-Echo-On-a-Chip — a piece of hardware that adds Alexa to microwaves, blenders, and whatever other bit of home electronics you can imagine.

The Alexa Connect Kit is the hardware behind Amazon’s efforts to allow developers easy integration with Alexa. The options for adding Alexa to a product up until now have been using Zigbee to connect an Echo Show or Echo Plus, or simply giving a device the ability to connect to an Echo through Bluetooth. The Alexa Connect Kit, however, is a pure hardware solution that puts Alexa in anything.

Unfortunately you can’t get one yet. Right now, the Alexa Connect Kit is just a preview, and if you want to get your hands on one — or get any specs on this bit of hardware — you’ll need to apply to the developer program. We’ve signed up and will share and juicy details that come our way as part of the program.

According to the Wall Street Journal (try Google referral link if you hit the pay wall), several companies are already working on integrating the Alexa Connect Kit into their existing product lines. Hamilton Beach and Procter & Gamble are both working on something, although the press doesn’t say what kind of device will now be loaded up with a voice assistant. Amazon, however, has a microwave using the technology that the owner can, “command the microwave to do things like defrost a half-pound of chicken, or set it up to automatically reorder a favorite type of popcorn on Amazon”.

Despite the sparse details, this is relatively game-changing when it comes to the world of homebrew electronics. We’ve seen dozens of projects using hacked Raspberry Pis and other microcontrollers to at Alexa to hacked coffee machines, to shoot Nerf darts, and to control a projector. If you can actually get one of these Alexas-on-a-chip, all those projects could be done with one simple piece of hardware.

Show That Sega Saturn Save Battery Who’s Boss

Breaking out the Sega Saturn out of the closet for a hit of 90’s nostalgia comes with its own set of compromises: the wired controllers, the composite video, and worst of all that dead CR2032 battery behind the backdoor. Along with the death of that battery went your clock and all those precious hours put into your game save files. While the bulk of us kept feeding the insatiable SRAM, a friendly Canadian engineer named [René] decided to fix the problem for good with FRAM.

The issue with the battery-backed memory in the Saturn stems from the particularly power-hungry factory installed SRAM chip. Normally when the console is plugged-in to a main power source the CR2032 battery is not in use, though after several weeks in storage the battery slowly discharges. [René’s] proposed solution was to use a non-volatile form of RAM chip that would match the pinout of the factory SRAM as close as possible. This would allow for easier install with the minimum number of jumper wires.

Enter the FM1808 FRAM chip complete with a whopping 256 kb of addressable memory. The ferroelectric chip operates at the same voltage as the Saturn’s factory SRAM, and has the added benefit of being able to use a read/write mode similar to that of the Saturn’s original memory chip. Both chips conform to a DIP-28 footprint, and only a single jumper wire on pin 22 was required to hold the FM1808 chip’s output-enable signal active-low as opposed to the active-high enable signal on the Saturn’s factory memory chip. The before and after motherboard photos are below:

After a quick test run of multiple successful read and writes to memory, [René] unplugged his Saturn for a couple days and found that his save files had been maintained. According to the FM1808 datasheet, they should be there for the next 45 years or so. The only downside to the upgrade is that the clock & calendar settings were not maintained upon boot-up and reset to the year 1996. But that’s nothing a bit of button-mashing through couldn’t solve, because after all wasn’t the point of all this to relive a piece of the 90s?

For more Sega Saturn goodness, check out how the Sega Saturn was finally cracked after 20 years.

Get Your PCBs Made At The Mall

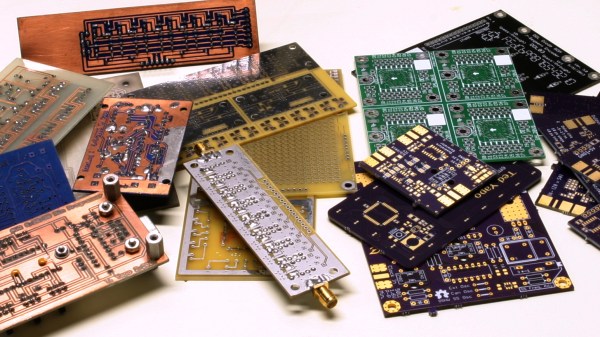
As we’ve seen with some recent posts on the subject here at Hackaday, there seems to be a growing schism within the community about the production of PCBs. Part of the community embraces (relatively) cheap professional fabrication, where you send your design off and get a stack of PCBs in the mail a couple weeks later. Others prefer at home methods of creating PCBs, such as using a CNC, laser engraver, or even the traditional toner transfer. These DIY PCBs take some skill and dedication to produce, but the advantage is that you can have the board in hand the same day you design it. But there may be a third option that seems to have slipped through the cracks.

[Virgil] writes in with a very interesting method of producing professional looking prototype PCBs that doesn’t involve weeks of waiting for the results, nor does it require any complicated techniques or specialized equipment. In this method, a UV printer is used to deposit your mask directly onto the copper clad board, which you then etch with whatever solution you like. Don’t have a UV printer you say? No worries, there’s probably somebody at the mall that does.

As [Virgil] explains, the little kiosks at the mall which offer to personalize items for customers generally use a UV printer which allows them to shoot ink on nearly any material. Instead of asking them to put a logo on the back of your phone, you’ll just be asking them to put the vector file of your mask, which you can bring along on a USB flash drive, onto the bare copper board. They may tell you they can’t guarantee the ink will stick to the bare copper, but just tell them you’re willing to take the risk. It’s one of those situations in which your money will be glad to speak on your behalf.

After the UV printer does its thing, the mask might be somewhat fragile. [Virgil] likes to wrap the boards in plastic for the ride home to make sure they don’t get damaged. Then it’s a quick dunk in the etching solution followed by a rinse and some isopropyl alcohol to get the remainder of the UV ink off. The results really do speak for themselves: nice sharp lines with exceptionally little manual work.

We’ve covered some relatively easy ways of quickly producing nice PCBs at home, as long as you don’t mind spending a couple hundred US dollars to get the hardware together. This seems to be the best of both worlds, though it does have the downside of requiring you speak with another human. We’d love to hear from any readers who give this particular method a shot.

Continue reading “Get Your PCBs Made At The Mall”

A $1, Linux-Capable, Hand-Solderable Processor

Over on the EEVblog, someone noticed an interesting chip that’s been apparently flying under our radar for a while. This is an ARM processor capable of running Linux. It’s hand-solderable in a TQFP package, has a built-in Mali GPU, support for a touch panel, and has support for 512MB of DDR3. If you do it right, this will get you into the territory of a BeagleBone or a Raspberry Pi Zero, on a board that’s whatever form factor you can imagine. Here’s the best part: you can get this part for $1 USD in large-ish quantities. A cursory glance at the usual online retailers tells me you can get this part in quantity one for under $3. This is interesting, to say the least.

The chip in question, the Allwinner A13, is a 1GHz ARM Cortex-A8 processor. While it’s not much, it is a chip that can run Linux in a hand-solderable package. There is no HDMI support, you’ll need to add some more chips (that are probably in a BGA package), but, hey, it’s only a dollar.

If you’d like to prototype with this chip, the best options right now are a few boards from Olimex, and a System on Module from the same company. That SoM is an interesting bit of kit, allowing anyone to connect a power supply, load an SD card, and get this chip doing something.

Currently, there aren’t really any good solutions for a cheap Linux system you can build at home, with hand-solderable chips. Yes, you could put Linux on an ATMega, but that’s the worst PC ever. A better option is the Octavo OSD335x SoC, better known as ‘the BeagleBone on a Chip’. This is a BGA chip, but the layout isn’t too bad, and it can be assembled using a $12 toaster oven. The problem with this chip is the price; at quantity 1000, it’s a $25 chip. At quantity one, it’s a $40 chip. NXP’s i.MX6 chips have great software support, but they’re $30 chips, and you’ll need some DDR to make it do something useful, and that doesn’t even touch the fiddlyness of a 600-ball package

While the Allwinner A13 beats all the other options on price and solderability, it should be noted that like all of these random Linux-capable SoCs, the software is a mess. There is a reason those ‘Raspberry Pi killers’ haven’t yet killed the Raspberry Pi, and it’s because the Allwinner chips don’t have documentation and let’s repeat that for emphasis: the software is a mess.

Still, if you’re looking for a cheap chip you can solder at home, this one seems to be the only game in town. We’re really looking forward to seeing what you make with it!

Open Source Paramotor Using Quadcopter Tech

Have you ever dreamed of flying, but lack the funds to buy your own airplane, the time to learn, or the whole hangar and airstrip thing? The answer might be in a class of ultralight aircraft called powered paragliders, which consist of a soft inflatable wing and a motor on your back. As you may have guessed, the motor is known as a paramotor, and it’s probably one of the simplest powered aircraft in existence. Usually little more than big propeller, a handheld throttle, and a gas engine.

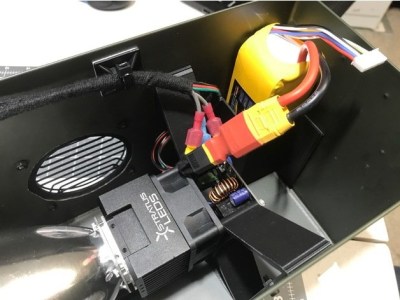
But not always. The OpenPPG project aims to create a low-cost paramotor with electronics and motors intended for heavyweight multicopters. It provides thrust comparable to gas paramotors for 20 to 40 minutes of flight time, all while being cheaper and easier to maintain. The whole project is open source, so if you don’t want to buy one of their kits or assembled versions, you’re free to use and remix the design into a personal aircraft of your own creation.

It’s still going to cost for a few thousand USD to get a complete paraglider going, but at least you won’t need to pay hangar fees. Thanks to the design which utilizes carbon fiber plates and some clever hinges, the whole thing folds up into a easier to transport and store shape than traditional paramotors with one large propeller. Plus it doesn’t hurt that it looks a lot cooler.

Not only are the motors and speed controls borrowed from the world of quadcopters, but so is the physical layout. A traditional paramotor suffers from a torque issue, as the big propeller wants to twist the motor (and the human daring enough to strap it to his or her back) in the opposite direction. This effect is compensated for in traditional gas-powered paramotor by doing things like mounting the motor at an angle to produce an offset thrust. But like a quadcopter the OpenPPG uses counter-rotating propellers which counteract each others thrust, removing the torque placed on the pilot and simplifying design of the paraglider as a whole.

If you still insist on the fixed-wing experience, you could always get some foam board and hope for the best.

[Thanks to Luke for the tip.]

Continue reading “Open Source Paramotor Using Quadcopter Tech”

Bixel, An Open Source 16×16 Interactive LED Array

The phrase “Go big or go home” is clearly not lost on [Adam Haile] and [Dan Ternes] of Maniacal Labs. For years they’ve been thinking of creating a giant LED matrix where each “pixel” doubled as a physical push button. Now that they’ve built up experience working on other LED projects, they finally decided it was time to take the plunge and create their masterpiece: the Bixel.

Creating the Bixel (a portmanteau of button, and pixel) was no small feat. The epic build is documented in an exceptionally detailed write-up on the team’s site, in addition to the time-lapse video included after the break. [Adam] tells us the Bixel took around 100 hours of assembly, and we don’t doubt it. This is truly one of those labors of love which is unlikely to be duplicated, though all of the source files for both the hardware and software are available if you’re feeling brave enough.

The write-up contains a lot of fascinating detail about the design and construction of the Bixel, but perhaps the least surprising of all of them is that the final product ended up being very different from what they originally envisioned. The plan was to simply use lighted arcade buttons in a 16×16 grid, as they were purpose-built for exactly what the guys had in mind. But when they priced them out, the best they could do was $2 a pop. That’s $500 for just the buttons alone, before they even got into the enclosure or electronics. Like any good hackers, [Adam] and [Dan] decided to ditch the ready-made solution and come up with something of their own.

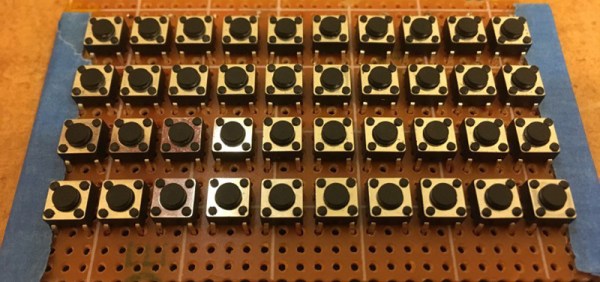
In the end, they cut the individual LEDs out of RGB strips, and soldered them down to their custom designed 500mmx500mm PCB. To the sides of each section of strip are two tactile switches, and above is a “sandwich” made of laser cut acrylic. The sheet closest to the LEDs has a 25mm hole, the top sheet has a 20mm hole, and between them is a circle of acrylic that acts as the “button”. Once it’s all screwed together, the button can’t fall out of the front or move from side to side, but it can be pushed down to contact the tactile switches.

To wire it all up they took a cue from the DIY keyboard scene and used a Teensy, some 595 shift registers, and 256 1N4148 diodes. A Raspberry Pi running their Python framework does the heavy computational lifting, leaving the Teensy to just handle talking to the hardware. Overall it’s a fantastic design to emulate if you’re looking to create large arrays of buttons on the cheap; such as whenever you get around to building that starship simulator.

Continue reading “Bixel, An Open Source 16×16 Interactive LED Array”