Building A Dead Mouse’s Switch

building_a_better_mousetrap

[Ned] had a mouse problem in a very uncomfortable place.

No, not like the back of a Volkswagen, in his ceiling. He wanted to put a mouse trap up there to take care of the critter, but knowing how nasty a tripped trap can be after a few days, he was hesitant. He recalled a project he saw online where a mouse trap was wired like a dead man’s switch and he got to work putting together a trap of his own.

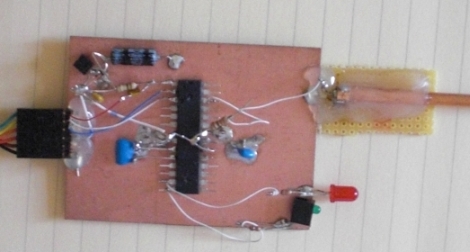
He scavenged some parts from around the house and wired up the mouse trap so that a pair of LEDs were lit so long as the trap had not been sprung on an unsuspecting mouse. Once a mouse is caught in the trap, his circuit is broken, and the LEDs go off, letting [Ned] know it’s time to poke his head back up into the ceiling and clean things up.

While his trap is decidedly low-tech, we always enjoy seeing a cheap and easy solution to annoying, everyday problems.

Thermostat Controlled Plug Box

[Eric] has a problem with his new house, there was no heat in the attic space that had been converted into a loft. Facing no way to tap into the ductwork and wanting to use the space as a bedroom he did what most of us would, and just got a little space heater. Anyone who has lived with a space heater knows you have to be around to turn them on, and they usually dont have decent temperature control. These problems were quickly fixed by making a thermostat controlled plug box.

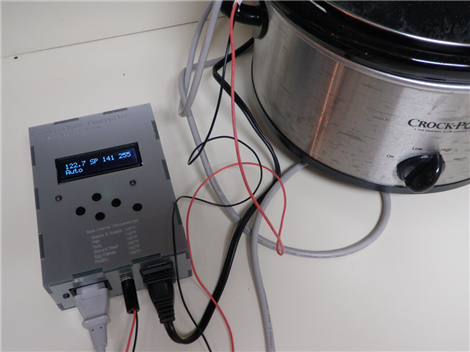
A quick trip to the hardware store resulted in a 2 gang metal junction box, faceplate with GFCI cutout, receptacle and a Honeywell baseboard heater thermostat. The thermostat is then wired to mains and its output connects to the receptacle.

He gives instructions on wiring which focuses on his parts, but you should follow the instructions to your specific thermostat, and error on the side of caution if working with mains current. The end story is a bedroom with a more constant temperature and doesn’t need a 3 hour burn to get there.

Amazing Backyard Rocket Ship Tree House

Ravenna_Ultra-Low-Altitude_Vehicle

If you thought you had a cool tree house as a kid, think again. Tasked with landscaping his back yard and building a tree house for his son, [Jon] decided to go all out and build him a rocket ship instead.

Rising 15 feet into the Seattle skyline, the tree house known as the Ravenna Ultra-Low-Altitude Vehicle (RULAV), is sure to be the envy of every kid in the neighborhood. [Jon] and a friend worked for well over a year on their creation, welding, grinding, painting, and riveting their way along. After the structure was built, they fabricated some custom PCBs, using them to build the ship’s 14 control panels. The entire operation is controlled by a custom OS built to run on the three ATmega MCUs that manage operations.

Not content with just a handful of knobs and switches, the ship contains over 800 LEDs among its laundry list of electronics goodies. Compressed air is used to shoot water from positioning “thrusters”, while a paint mixer spins under the ship to simulate the rough and bumpy nature of space travel. The simulated launches are capped off with plenty of authentic NASA-style audio and a sub woofer that gives everything a deep, resonating rumble.

The project is truly amazing, and a ton of work went into every little detail in order to make this the most spectacular tree house ever seen. [Jon] definitely takes the award for “Coolest Dad Ever” for this build, even we’re jealous!

The pictures certainly don’t do it justice, so be sure to check out the video below for a quick introduction and demo of this awesome project.

Thanks to [Jeremy Elson] for the tip.

Continue reading “Amazing Backyard Rocket Ship Tree House”

NES Game Pad Wireless Light Commander

NES_wireless_light_switch

Annoyed that the new lights he bought for his apartment lacked power switches, Instructables user [p.arry.drew] decided to install a pair of wireless light switches. Not content to use the remotes separately, he decided to see if he could cram them both into an old NES controller, making for a nice all-in-one wireless light commander.

He disassembled the light switch remotes, cutting off a bit of the battery contacts to ensure they fit in the game pad. He then pulled apart his NES controller, removing the cord and adding some foam padding to ensure that the buttons fully contacted the wireless switches when pressed. A few bits of wooden dowel were added to keep everything in place, then the controller was reassembled.

His creation makes for a very convenient method of controlling several light switches from once source, plus the packaging is pretty handsome as well. These remote light switching solutions seem to be all the rage lately, so keep them coming!

Read on for a quick video of his remote light switches in action.

Continue reading “NES Game Pad Wireless Light Commander”

DIY Emergency Lighting System

diy_emergency_lighting_system

When the power goes out at home, what do you do? Most of us probably scramble around the house looking for a flashlight. [Gigawatts] wanted a better solution, so he built an emergency lighting system based off a standard household UPS. A while back he had constructed a relay-switched outlet box to help periodically restart his cable modem which would get hung up a little too often for his liking. Since changing Internet providers, he no longer needed the switched outlet box, and was looking for a way to reuse it.

He hooked up the outlet box into the “battery powered” side of the UPS, and inserted a light bub into the normally closed half of the switch box. A 5v power supply was hooked into the “surge protection only” side of the UPS and is used to keep the relay switched. This causes the half of the switch box that is normally closed to remain open, and the light switched off. When power is lost, the 5v supply no longer switches the relay, and the light is turned on – powered by the UPS battery.

This is quite a useful hack if you happen to have a spare UPS sitting around – it sure beats scrambling around searching for a flashlight in the dark!

Simple Household Status System

The-Household-Informer

[BrianH] decided that he no longer wanted to venture outside on cold or rainy days just to check if the mail had come, so he built himself a notification system that would alert him if the postman had stopped by. Additionally, he admits to being forgetful on occasion and wanted a way to monitor whether or not he forgot to close the garage door. His Instructable details how he accomplished both of these tasks with the household monitor he built around an ATmega168. His project uses a mailbox mounted photoresistor to determine when the mailbox has been opened, and a reed switch that is triggered when the garage door has been opened. If either of these things occur, a beep is emitted from his notifier, and the appropriate status LED is lit. Simply monitoring whether the garage door has been opened is not all that helpful, so he programmed his notifier to beep persistently at 10-minute intervals if the garage has been left open for more than an hour.

His hack is pretty useful, but he does mention that there is an inordinate amount of wiring that needs to be laid, citing his driveway repaving as a great opportunity to do so.

Junkyard Fish Tank

So your house looks like a dumping ground for useless junk? Yeah, we know it’s the hacker’s curse… you just can’t stop salvaging stuff. But follow [Pontazy69’s] lead by building something useful out of that junk. He took an old polystyrene box and made it into this fishtank. You can see that the sides and back of the box has gone unaltered, but the front wall is missing. [Pontazy69] marked and cut straight lines while leaving a lip around the edge. Silicone was used to glue some acrylic (or perhaps glass?) to the inside of this lip. Once dried he added another bead around the outside to ensure it doesn’t leak. Few fish would be happy here without some type of filter so he built one of those out of an old plastic bottle and some other pieces. See videos that show you how to build both the tank and the filter after the break.

We love aquarium hacks almost as much as clock hacks. So check out the water exchange system, and a couple of different lighting systems. Then document your own aquarium projects and let us know about them.

Continue reading “Junkyard Fish Tank”