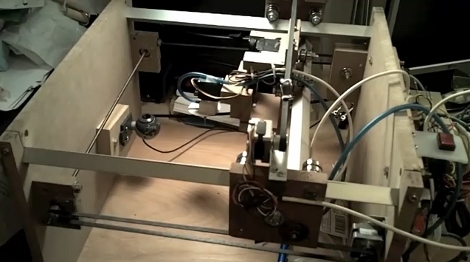
DIY Pick And Place Seems Easy To Build

We’re not saying it’s a simple project, but the build methods that [Alan Sawula] used for this DIY pick and place are probably the easiest we’ve seen yet. As this is just a CNC machine, the methods he used would also work quite well for mills or other machines. Instead of using precision rods for the X and Y axes, he used square tubing. The tubing is oriented more like a diamond, with the ninety degree corners providing the travel surface. Two bearings with a shim between them provide a groove that rides along the corner, and since this is square and not just ‘L’ bracket, the sleds are secured both above and below the tube. Stepper motors provide the movement along X and Y, with a servo motor for Z and another one to rotate the medical grade needle that serves as the vacuum tip. Starting four minutes into the video you can see that this not only works, but it’s lightning fast!

Continue reading “DIY Pick And Place Seems Easy To Build”

Over-engineered Clock Finds Purpose As RSS Reader

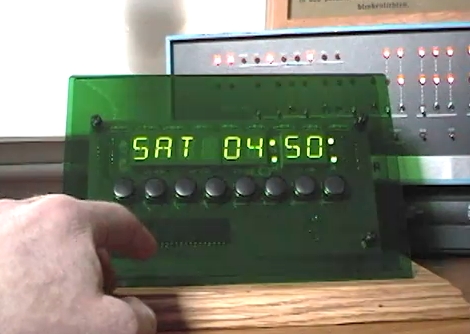
[Bob Alexander] admits that he over-engineered his clock, giving it eight control buttons, eight twelve-segment alpha-numeric display digits, a GPS module as a time source, and a beefy microcontroller to boot. But he’s found a way to get more for his money out of the device by adding RSS and weather features to it.

Since he’s using the PIC 18F4550 it’s a snap to add USB connectivity. From there he wrote a fantastic PC-side application for communicating with the display. Now he has the option of displaying time, RSS feeds, or weather by scrolling through the options with one of the buttons. Perhaps the best feature is the option to launch a browser on the PC and view the current story just by pressing a button on the display. Check out the two demos after the break; one shows the clock features and the other demonstrates the C# software.

Continue reading “Over-engineered Clock Finds Purpose As RSS Reader”

Amazing Backyard Rocket Ship Tree House

Ravenna_Ultra-Low-Altitude_Vehicle

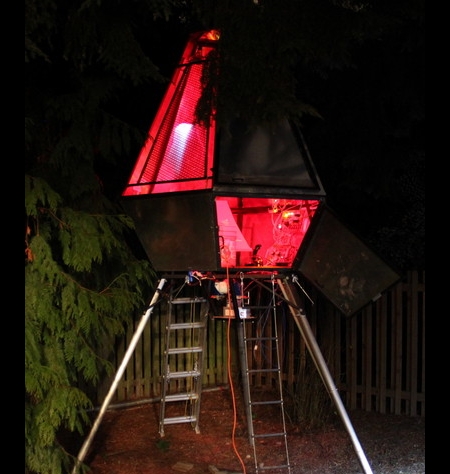
If you thought you had a cool tree house as a kid, think again. Tasked with landscaping his back yard and building a tree house for his son, [Jon] decided to go all out and build him a rocket ship instead.

Rising 15 feet into the Seattle skyline, the tree house known as the Ravenna Ultra-Low-Altitude Vehicle (RULAV), is sure to be the envy of every kid in the neighborhood. [Jon] and a friend worked for well over a year on their creation, welding, grinding, painting, and riveting their way along. After the structure was built, they fabricated some custom PCBs, using them to build the ship’s 14 control panels. The entire operation is controlled by a custom OS built to run on the three ATmega MCUs that manage operations.

Not content with just a handful of knobs and switches, the ship contains over 800 LEDs among its laundry list of electronics goodies. Compressed air is used to shoot water from positioning “thrusters”, while a paint mixer spins under the ship to simulate the rough and bumpy nature of space travel. The simulated launches are capped off with plenty of authentic NASA-style audio and a sub woofer that gives everything a deep, resonating rumble.

The project is truly amazing, and a ton of work went into every little detail in order to make this the most spectacular tree house ever seen. [Jon] definitely takes the award for “Coolest Dad Ever” for this build, even we’re jealous!

The pictures certainly don’t do it justice, so be sure to check out the video below for a quick introduction and demo of this awesome project.

Thanks to [Jeremy Elson] for the tip.

Continue reading “Amazing Backyard Rocket Ship Tree House”

Interfacing An Arduino With A TFT LCD

tft_lcd

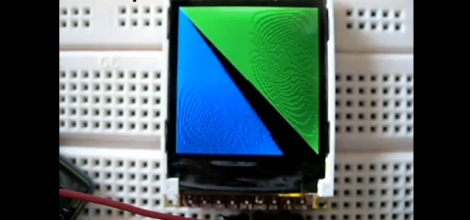
Seven-segment displays and monochrome LCDs are fine for most projects, but some things simply look better in color. [John] over at the Little Bird Electronics blog recently wrote up a tutorial demonstrating the use of a TFT LCD panel with an Arduino. The specific panel he chose was a 4D Systems 1.44” TFT LCD that happened to feature a dedicated graphics processor, which should allow for some fantastic visuals when used to its fullest potential.

The LCD takes its commands over a serial interface, making it a simple five-wire display solution for your projects. The display can be programmed manually by sending hex commands over the serial interface, but there are also some user-developed libraries available that will allow you to use the majority of the most popular functions without the learning curve. One thing to note is that the LCD must be flashed with a particular flavor of firmware before it can communicate over the serial interface, a process for which [John] provides a walk through.

The LCD panel can be used with any Arduino-compatible board, so it can be useful in a whole host of projects.

Stick around to see a simple demo of the board in use.

Continue reading “Interfacing An Arduino With A TFT LCD”

Farmbot

Prospero is the working prototype of an Autonomous Micro Planter, which is intended to be unleashed as a swarm. Using a Parallax propeller mounted on a Lynxmotion AH3-R hexapod body, though we have a ton of different ideas on hexapods if you find the price of the body to be out of budget.

Inputs to the machine are pretty standard robot fare like infrared, and ultrasound. Outputs on the other hand are more interesting, for example spray paint, retractable drill, seed dispenser, and of course a stack of servos.

Arming a robot with a drill and a can of spray paint sounds like a recipe for hours of fun, but it does have a job to do. Walking around, the bot stops and checks the ground below it, and if the ground is ok to seed, a small auger drill flips down from the robot’s belly. After drilling a hole, a seed is dropped, then covered over with a scoop on the back of the drill. Finally the seeded the spot is marked with white paint and the robot moves on.

Though its a prototype and not fully formed yet, its an interesting thing to see, so join us after the break for a video.

Continue reading “Farmbot”

Ultrasmall Arduino

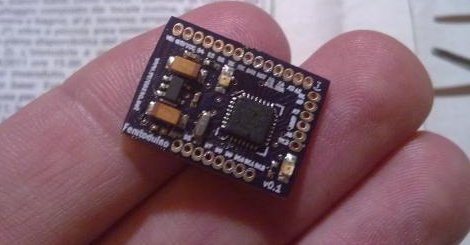
[Fabio Varesano’s] new Arduino compatible board packs a full power punch in a ultra compact layout, measuring at 20.7×15.2 mm, the Femtoduino is probably the smallest 328 based Arduino compatible board around. Most of the staples are present, an QFN atmega328, an MIC5205 low dropout regulator good for a couple hundred milli amps, 16MHz ceramic resonator, reset, power indicator and pin 13 LEDs, but you will need to provide your own serial connection (FTDI, MAX232 etc) and another AVR programmer to get the Arduino boot loader onto the chip.

Since the board is small (smaller than a pro mini) it is not directly breadboard friendly. Even though the hole spacing is 0.05 inch, the size is large enough for “normal” wire to fit into fine, if you wish to use 0.1 inch spacing there is a handy break out board you can make where the Femtoduino just snaps in.

Everything needed to make one of your own is provided on the website, schematics, kicad files, bill of materials, Gerbers for both the board and the breakout board, though we would like to see this as a pre-made board soon, join us after the break for a video and see why.

Continue reading “Ultrasmall Arduino”

NES Game Pad Wireless Light Commander

NES_wireless_light_switch

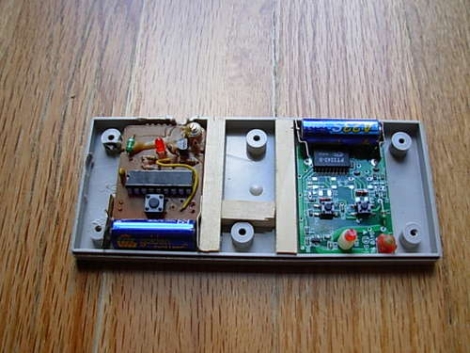
Annoyed that the new lights he bought for his apartment lacked power switches, Instructables user [p.arry.drew] decided to install a pair of wireless light switches. Not content to use the remotes separately, he decided to see if he could cram them both into an old NES controller, making for a nice all-in-one wireless light commander.

He disassembled the light switch remotes, cutting off a bit of the battery contacts to ensure they fit in the game pad. He then pulled apart his NES controller, removing the cord and adding some foam padding to ensure that the buttons fully contacted the wireless switches when pressed. A few bits of wooden dowel were added to keep everything in place, then the controller was reassembled.

His creation makes for a very convenient method of controlling several light switches from once source, plus the packaging is pretty handsome as well. These remote light switching solutions seem to be all the rage lately, so keep them coming!

Read on for a quick video of his remote light switches in action.

Continue reading “NES Game Pad Wireless Light Commander”