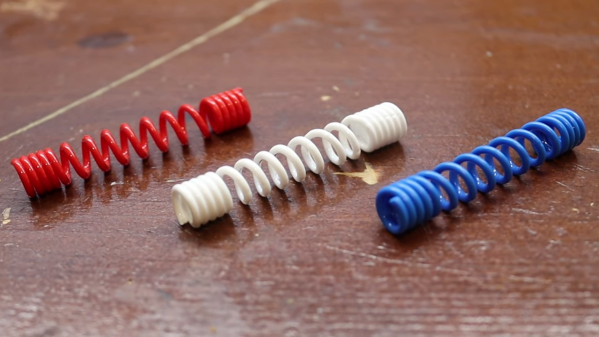
 The next time you find yourself in need of some large-ish plastic springs, maybe consider [PattysLab]’s method for making plastic springs out of spare filament. The basic process is simple: tightly wind some 3D printer filament around a steel rod, secure it and wrap it in kapton tape, then heat it up. After cooling, one is left with a reasonably functional spring, apparently with all the advantages of annealed plastic.
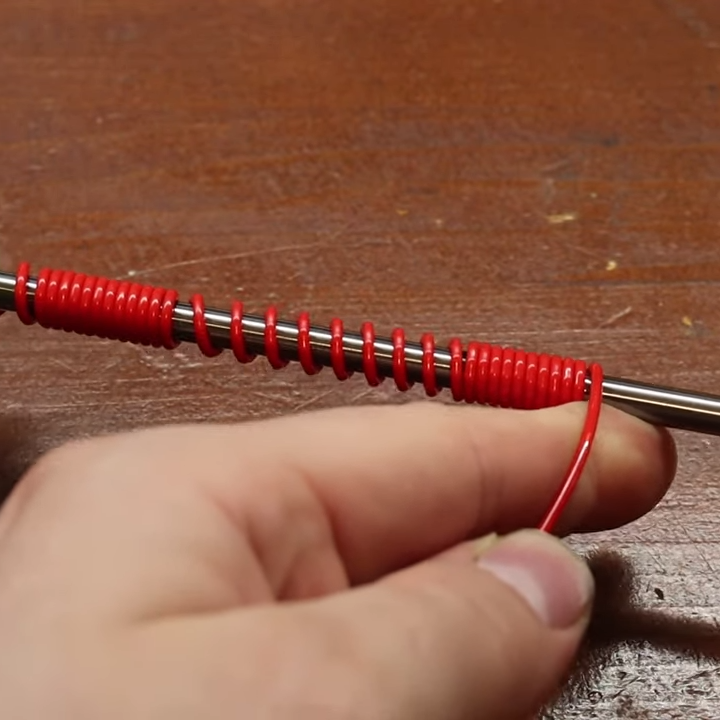
The basic process may be simple, but [PattysLab] has a number of tips for getting best results. The first is to use a 3D-printed fixture to help anchor one end of filament to the steel rod, then use the help of an electric drill to wind the filament tightly. After wrapping the plastic with kapton tape (wrap counter to the direction of the spring winding, so that peeling the tape later doesn’t pull the spring apart), he suspends it in a pre-heated oven at 120 C for PLA and 160 C for PETG. How long does it stay in there? [PattysLab] uses the following method: when the spring is wound, he leaves a couple inches of filament sticking out to act as a visual indicator. When this segment of filament sags down, that’s his cue to begin the retrieval process. After cooling, the result is a compression or extension spring, depending on how it was wound before being heated.
[PattysLab] shared a short video on this Reddit post that shows both springs in action, and the process is all covered in the video, embedded below.
Continue reading “Heat Turns 3D Printer Filament Into Springs”