Hydraulic Press Channel Puts Nuts To The Test

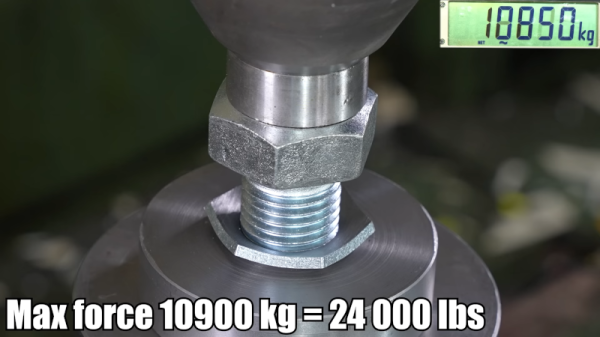
Have you ever wondered how many threads a nut needs to be secure? [Hydraulic Press Channel] decided to find out, using some large hardware and a hydraulic press. The method was simple. He took a standard nut and cut the center out of it to have nuts with fewer threads than the full nut. Then it was on to the hydraulic press.

As you might expect, a single-thread nut gave way pretty quickly at about 10,000 kg. Adding threads, of course, helps. No real surprise, but it is nice to see actual characterization with real numbers. It is also interesting to watch metal hardware bend like cardboard at these enormous pressures.
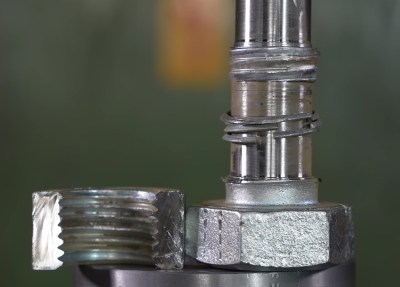
In the end, he removed threads from the bolts to get a better test and got some surprising results. Examining the failure modes is also interesting.

Honestly, we aren’t sure how valid some of the results were, but it was interesting watching the thread stripping and the catastrophic failures of the samples in the press. It seems like to do this right, you need to try a variety of assemblies and maybe even use different materials to see if all the data fit with the change in the number of threads. We expect the shape of the threads also makes a difference.

Still, an interesting video. We always enjoy seeing data generated to test theories and assumptions. We think of bolts and things as pretty simple, but there’s a surprising amount of technology that goes into their design and construction.

Continue reading Hydraulic Press Channel Puts Nuts To The Test”

Better Mousetraps (or Screw Drives) Don’t Always Win

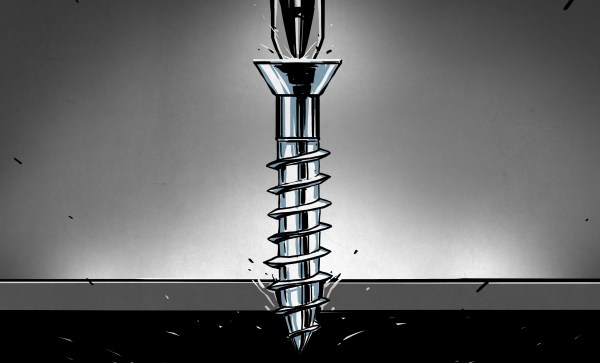
I’ve noticed, lately, that slotted screw heads are all but gone on new equipment. The only thing that I find remarkable about that is that it took so long. While it is true that slotted heads have been around for ages, better systems are both common and have been around for at least a century.

Check out those cool threads.

The reason slotted heads — technically known as the drive — are so common is probably because they are very easy to make. A hacksaw is sufficient for the job and there are other ways to get there, too. The only advantages I know of for the user is that you can easily clean a slotted drive and — possibly — use field expedient items like butter knives and quarters to turn the screw. I’ve heard people claim that it also is a feature that the screwdriver can pry things like paint can lids, but that’s a feature of the tool, not the screw drive.

The disadvantages, though, are significant. It is very hard to apply lots of torque to a slotted screw drive without camming it out or snapping the head off the screw. The screwdriver isn’t self-centering either, so applying force off-axis is common and contributes to the problem.

Continue reading “Better Mousetraps (or Screw Drives) Don’t Always Win”

DIY Insulating Nuts And Bolts

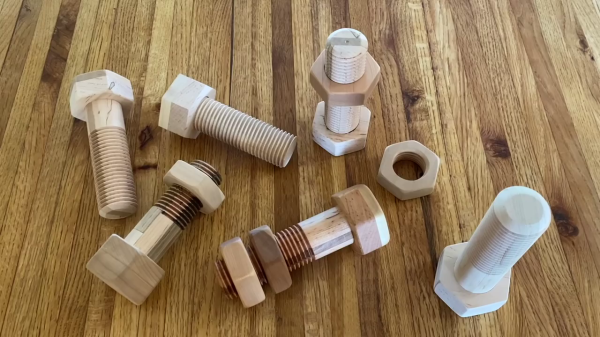
[Rudi Schoenmackers] has devised a clever set of custom 3D-printed jigs that makes it easy to build your own wooden hex nuts and bolts. Well, easy if you have access to a woodworking shop with a router, bandsaw and belt sander.

You won’t be using these to mount your PCBs, however. They are pretty big — UNC 1½-6 threads (the closest metric thread would probably be M36-4). [Rudi] points out that these jigs can be readily adapted to generate different sizes and pitches of threads, even left-handed ones, but we suspect making a #4-40 or M3-0.5 is out of the question. There are commercial jigs for making threads, but as [Rudi] points out, those are quite expensive. The price of [Rudi]’s jigs is quite low, assuming you have a 3D printer.

We’re not sure how to best take advantage of these nuts and bolts in ordinary hacking projects, but [Rudi] enjoys giving them away as cool toys or making large clamps and vises out of them. Let us know if you have any applications where wooden threaded fasteners could come in handy. If wooden threads interest you, then check out this project we covered a few years ago on making simple taps.

Continue reading “DIY Insulating Nuts And Bolts”

A Bit Of DIY Helps Cut Straight And Happy Threads

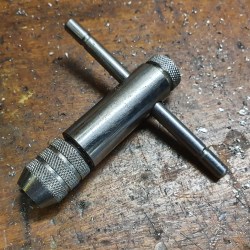
A cheap and effective ratcheting tap.

Need to cut threads into a hole? A tool called a tap is what you need, and a hand-operated one like the one shown here to the side is both economical and effective. A tap’s cutting bit works by going into a pre-drilled hole, and it’s important to keep the tool straight as it does so. It’s one thing to tap a few holes with steady hands and a finely calibrated eyeball, but when a large number of holes need to be tapped it can be worth getting a little help.

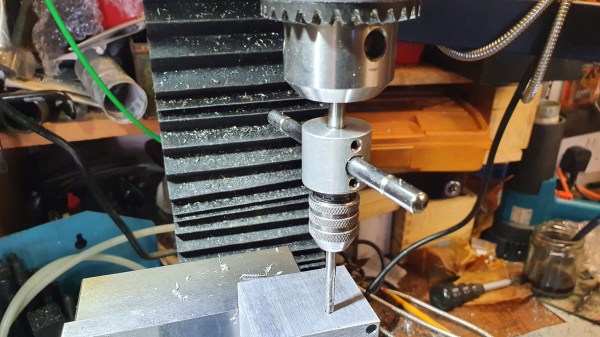
The usual tool to help keep a tap straight and pressed gently downwards is called a tap follower, but [Tony] had a lot of M4 holes to tap and no time to order one and wait for it to arrive. Instead, he converted a cheap tap into a tool that could be held in the chuck of his mill, with the freedom to slide up and down as needed. The result? A tap that’s hand-operated but certain to be orthogonal to the work piece, making the job of cutting a lot of threads much more pleasant.

Tapping isn’t just for metal, either. Cutting threads into wood is also done, and be sure to check out this simple method for making your own surprisingly effective wood taps in the shop with a threaded rod, or a lag screw. Of course, the need to tap a hole can be sidestepped by using threaded inserts in the right material, instead.

Learn The Secrets Of Matching Bottle Cap Threads To One Another

Do you want to design something to match existing threads on a bottle, or a cap? It turns out there’s an easier way than reaching tiredly for the calipers and channeling one’s inner reverse-engineer. Bottle cap threads — whose industry term is the neck finish — aren’t arbitrary things; they are highly standardized, and [Noupoi] researched it all so that you don’t have to! The Bottle Cap Thread Calculator takes a few key measurements and spits out everything needed to model exact matches. Need some guidance on how exactly to use the information the calculator spits out? There is a handy link to a Fusion360 tutorial on creating bottle threads (YouTube video) to demonstrate.

This all came from [Noupoi] wanting to model an adapter to transfer the contents of one bottle to another, smaller bottle. By identifying which thread was used on each bottle, the job of modeling a matching adapter was much easier. It turns out that the bottle necks were an SP 28-415 (larger) and a 24-415 (smaller), and with that information the adapter was far simpler to design. If you want to check the adapter out, it’s available on Thingiverse.

If truly reverse-engineering bottle threads is needed, here’s a method we covered that involves making a simple cast and working from that.

[via Reddit]

Locking Up Lock Washers

We’ll admit most of us are more comfortable with solder and software than mechanical things. However, between robots, 3D printers, and various other mechanical devices, we sometimes have to dig into springs, belleville washers, and linear actuators. Unless you are a mechanical engineer, you might not realize there’s a lot of nuances to something even as simple as a nut and bolt. How many threads do you need to engage? Do lock washers work? [Engineer Dog] has a post that answers these and many other questions.

The top ten list starts off with something controversial: split ring lock washers don’t work. The original post cites a paper that claims they don’t except in very special circumstances. However, he updated the post later to say that some people disagree with his cited study. In the end, you’ll have to decide, but given there are other options, maybe we’ll start using those more often.

Continue reading “Locking Up Lock Washers”

Threaded 3D Printed Part Comparison

If you want to make serious assemblies out of 3D printed parts, you’ll eventually need to deal with threading. The easiest way is to make a nut trap that you can either insert a standard nut into after printing or even during printing. However, there are limitations to this method. If you want a real threaded part you can print the thread, cut the thread with a tap or bolt, or use a threaded insert. [Stefan] ran some tests to see how each of those methods held up to real use. (YouTube, embedded below.) He used fifty test parts to generate data for comparison.

We like the threaded insert method where a brass insert is pushed into the plastic while hot. Special features in the insert cause the brass part to grab the plastic, making it difficult to pull the insert out or twist it within the hole. Another thing we liked was that the tests used holes printed in the horizontal and vertical plane. You can clearly see that the orientation does alter how the holes work and fail to work.

Continue reading “Threaded 3D Printed Part Comparison”