RGB LED Ceiling Display

yP8PoVDisco Floor’s are passé. [dennis1a4] turned them upside down and built an awesome RGB LED ceiling display using some simple hardware and a lot of elbow grease. His main room ceiling was exactly 32 ft x 20 ft and using 2 sq. ft tiles, he figured he could make a nice grid using 160 WS2812B RGB LEDs. A Teensy mounted in the ceiling does all the heavy lifting, with two serial Bluetooth modules connected to it. These get connected to two Bluetooth enabled NES game controllers. Each of the NES controller is stuffed with an Arduino Pro Mini, a Bluetooth module, Li-Ion battery and a USB charge controller.

Bluetooth is in non-secure mode, allowing him to connect to the Teensy, and control the LEDs, from other devices besides the NES controllers. The Teensy is mounted at the centre of the ceiling to ensure a good Bluetooth link. Programming required a lot of thought and time but he did manage to include animations as well as popular games such as Snake and Tetris.

LED_Ceiling_deadbugThe hard part was wiring up all of the 160 LED pixels. Instead of mounting the 5050 SMD LED’s on PCBs, [dennis1a4] wired them all up “dead bug” style. Each pixel has one LED, a 100nF decoupling capacitor, and 91 ohm resistors in series with the Data In and Data Out pins – these apparently help prevent ‘ringing’ on the data bus. Check the video for his radical soldering method. Each SMD LED was clamped in a machine shop vice, and the other three parts with their leads preformed were soldered directly to the LED pins.

The other tedious task was planning and laying out the wiring harness. Sets of 10 LEDs were first wired up on the shop bench. He then tacked them up to the ceiling and soldered them to the 14 gauge main harness. The final part was to put up the suspended ceiling and close the 2 sq. ft. grids with opaque plastic.

[dennis1a4]  did some trials to figure out the right distance between each LED and the panel to make sure they were illuminated fully without a lot of light bleeding in to adjacent panels. This allowed him to get away without using baffles between the tiles.

Check out the video to see a cool time-lapse of the whole build.

Continue reading “RGB LED Ceiling Display”

Christmas Star Uses Two AA Batteries

When [hkdcsf] was a teenager, he made a Christmas star with an up counter driving decoder logic and using transistors to light LEDs in festive patterns. He’s revisited this project using modern techniques including a microcontroller, a DC/DC converter, and constant current LED drivers.

The project uses two AA batteries, and that’s what makes the DC/DC converter necessary. Blue LEDs have a forward voltage of just over 3V, and the LED driver chip requires about 0.6V of overhead. Two fresh AAs will run a tad above 3V, but as they discharge, or if he’s using rechargeables, there just won’t be enough potential. To make sure the star works even with whatever LEDs are chosen, the converter takes the nominal 3V from the batteries and converts it to 3.71V.

Continue reading “Christmas Star Uses Two AA Batteries”

Vintage Video Projector Lives Again

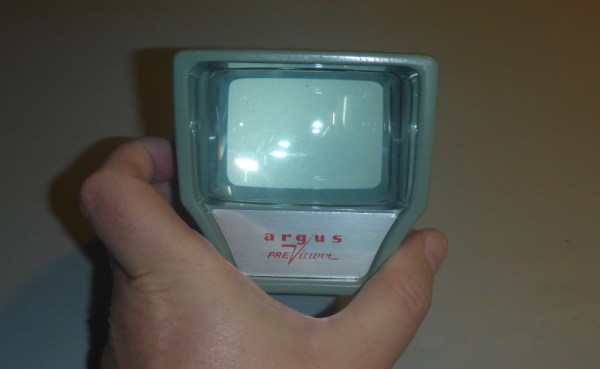
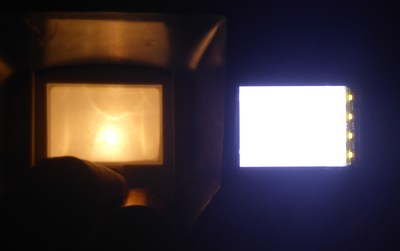
Projectors are getting a lot less expensive these days, what with China pumping out Pico projectors by the boat load and all. But did you know it’s not that hard to convert an old slide projector to digital? [Alec Smecher] shows us how with a 1950’s LaBelle 75 slide projector, and the result is pretty awesome.

dmd_chipDigital projectors can use a few different technologies to work. The best, and brightest is DLP (Digital Light Processing) by Texas Instruments — which is pretty well the world-wide standard for high-end, high-lumen digital projection. It works by bouncing red, green, and blue light off of three DMD’s (Digital Micromirror Devices) which have an array of tiny 2-position mirrors, with each representing a pixel.

One of the older technologies is LCD, which is even easier to understand. You shine white light through a color LCD, and there is your projection. All you need for a projector, then, is an LCD, a light source, and a bit of optics.

Continue reading “Vintage Video Projector Lives Again”

Impressive NFC Controlled Infinity Mirror Table Cuts No Corners

If you’re looking to add a bit of the future to your living room, you might want to look at this tutorial to build a very professional infinity mirror table.

It’s an IKEA RAMVIK coffee table, modified to include RGB LEDs and a one-way mirror for that ever-so-awesome infinity effect. And technically, you only have to cut one hole in the table.

By placing a large mirror underneath the glass, wrapping the inner edge with a strip of RGB LEDs and coating the original glass top with a reflective car tint, it’s a pretty simple hack that results in a very polished product — not something that can be said for most of our projects!  But to make it even better, [Pierre] added an NFC chip under the table, allowing you to control the color with just a tap.

Continue reading “Impressive NFC Controlled Infinity Mirror Table Cuts No Corners”

Hairband Lights Up Depending On Your Mood

After learning how to use the ESP8266, [Chirag Nagpal] decided to do a fun project to experiment that polls data from Twitter. He calls it the Sentiband, and it analyses your last tweet’s sentiment and changes color accordingly.

There is an API available called Sentiment140 (Formerly ‘Twitter Sentiment’) which is capable of determining the emotional content of a tweet on Twitter. It uses classifiers built from machine learning, and was developed at Stanford by a few CS graduates. We’ve seen it used before on a Christmas tree ornament on a much larger scale, analyzing all holiday tweets to light up your tree.

[Chirag’s] version allows you to set a username and display the latest sentiment of that user’s tweets hidden in the subtext. Three LEDs light up; green for a positive tweet, red for negativity, and blue for neutral.

Continue reading “Hairband Lights Up Depending On Your Mood”

Sudden Death Night Light Sounds Scary, Is Sweet

We have to admit that we were mislead by the title “Sudden Death: Wall Sign + Night Light”. This naturally conjured up images of deadly night lights, but the truth turned out to be a lot less fatal: [Smerfj] had two weeks to make a present for a friend’s wedding. The project was either a go or a no-go depending on the deadline — that sort of sudden death. But as we all know, deadlines have a way of bringing the motivation out of us that’s not always bad.

The night light in question is a bunch of hand-made circuits, each stuffed into a wooden slice with a letter burned on the face, spelling out [Smerfj]’s friend’s name. But to really appreciate it, you have to dig through the build details.

55461447189465844We didn’t know how to burn precise lettering into wood. [Smerfj] covered the wood in metal foil tape, then cut the letters out of the foil. Now applying the torch blackens only the part of the logs that have tape removed. Slick.

To get accurate lettering cut into the aluminum tape, [Smerfj] made an impromptu projector out of a cell phone taped to a chandelier (approximately a point light source) and a stencil suspended somewhere between the chandelier and the wood target. Naturally, this is best done in a darkened room under tight deadline pressure.

The battery holders are fantastic. Springs from commercial battery holders were soldered to enamel wire and placed in holes drilled just the width of AA batteries. With the length of the battery taken into account, channels were drilled into the wood and copper wires jammed through, holding the batteries in place, and providing the other electrical contact. Brilliant.

And finally, the free-form night light circuits are great. Fine-tuned to draw the minimum current, they’re adjusted to the specific LEDs and phototransistors that [Smerfj] had on hand. Bespoke free-form electronics in hand-blackened wood. That’s a nice gift.

Now [Smerfj] just needs nice packaging to present them in. We’re thinking DIY laser-cut boxes with interior lighting, naturally.

A Sound And LED-tastic Tricycle Shopping Cart

What do you get when you take a massive number of LEDs and combine them with a shopping cart and a bicycle? An awesome rave-mobile created by [kramerr]. He’s even taking it one step further by making the electronics solar powered.

[Kramerr] controls the LEDs with multiple WS2803 LED drivers. Three PIC18F4550s control the WS2803s over SPI. He devised a neat way of exciting the LEDs from music by using a pair of graphic equalizer display filter chips, MSGEQ7s, to drive the PICs to create patterns. A USB input also allows the PICs to display song titles or other information.

leds and boards

The mechanical design is as impressive as the electronics. The rear half of a bicycle is welded to the frame of the shopping cart with the cart’s handle used for steering. The shopping cart’s rear wheels are replaced by small bicycle wheels.

But [Kramerr] wasn’t done. He built his own solar panel since he couldn’t find one to fit the size requirements. The panel consists of 26 cells connected in series to provide 1A at 13V on a sunny day. A solar charge controller keeps a standard 12v lead acid battery ready to power the tricycle cart.

And there is still more! There is a sound system driven by a Raspberry Pi. The Pi also drives the USB inputs when [Krameer] wants to display song titles or artists instead of the audio patterns.

There are at least four hacks in this project each worthy of applause. [Karmeer] deserves an ovation for doing all of them in one project. If you are looking for less bling and less pedaling may we direct you to this powered, riding shopping cart.

Some rave music and lights via video after the break.

Continue reading “A Sound And LED-tastic Tricycle Shopping Cart”