Do Not Look Into 12 Watt UV Lamp With Remaining Eye

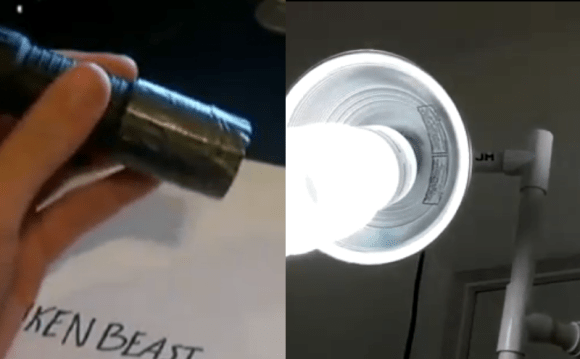
We’ve seen a couple of UV lamp builds for exposing photosensitive PCBs and erasing EPROMs, but [John] over at pcboard.ca decided if it’s worth doing, it’s worth overdoing. They designed a UV exposure board using twelve 1 Watt UV LEDs, an impressive amount ultraviolet light that you probably shouldn’t look at for too long.

We’ve seen UV exposure boxes before, usually made with a bunch of 5mm UV LEDs soldered to a piece of protoboard. These projects do their job, but the exposure time is on the order of minutes. The PCboard.ca UV lamp can expose a PCB in just 20 seconds.

The build began with four pieces of aluminum bar, 1 inch wide and 1/8″ thick. The 12 star LEDs were glued down to this bar with thermal adhesive and serve their purpose as a rather large heat sink.

[John] performed a little test to determine how long it would take this monstrous UV source to expose a PCB. By copying a PCB mask four times and placing it over an unexposed board, [John] made a PCB with exposure times of 60, 45, 30, and 15 seconds. After developing and etching, all but the 15-second exposure was fully etched, an amazing result that will probably lead to some very, very rapid prototyping.

All the more impressive is the fact that only four 1-watt LED drivers were used for this build. That’s right, this UV lamp is actually operating at about a quarter of its maximum rating, or about 285mA per LED. We’d hate to see this thing operate at full power, protective eyewear or not.

Beginner Project: Color Sensing With RGB LEDs And A Photocell

I’ve seen the concept art for “real world eyedroppers” several times. I haven’t noticed any of the products come to market though. It isn’t the technology stoping them, color sampling can be done a million ways. I picked one of the easiest ways and tossed something together pretty quickly.

Continue reading “Beginner Project: Color Sensing With RGB LEDs And A Photocell”

LED Fun And Light Painting With The PyMCU

pymcu-led-pov-writing

Recently [Richard] at [pyMCU] was nice enough to send me one of their units to try out. As featured here before, this little board allows you to control physical things using your computer and the Python programming language. After evaluating it and making a LED blink, there were a couple other LED projects I wanted to try.

The first idea was to make a LED chaser. This was quite simple, using a little code and plugging in a few LEDs. From this, since you can make the LEDs chase each other, then in the right sequence it should be able to be used to display images using long-exposure photography. Be sure to check out the video after the break of this 10 LED chaser/light bar being assembled.

The results of this LED light bar experiment were really cool, writing some simple text and image with 10 LEDs. Considering the low component count, this is one of the simplest light bar builds that we’ve seen. Programming was simple as well, since the computer using Python does all the processing of the drawing as well as physically turning the LEDs on and off. Of course this setup isn’t without its limitations, having to be connected to a computer being the most obvious. Continue reading “LED Fun And Light Painting With The PyMCU”

Thinking Cap Is Also Party Hat

The Thinking Cap is a piece of wearable signage that lets you display what’s on your mind. The hat uses a Teensy 2.0 connected to a Bluetooth radio to allow the wearer to update the message on the fly, letting the room know what their thinking at that instant.

This hack is based off of LPD8806 controlled LED strips, which are becoming very popular for adding lots of LEDs to anything. There are five strips that need to be controlled over SPI, but the Teensy only has one SPI peripheral.

This lead to the use of multiplexer to allow for controlling each strip individually. The hat uses an interesting and low cost scheme to multiplex five channels using two 744052 dual 4 channel multiplexors and a 7400 inverter.

The Teensy can receive messages using the Bluetooth serial port protocol. The 5 x 7 pixel characters are stored in a framebuffer, and shifted around the hat to create the animation.

The result is a bright message circling around the user’s head, which can be updated with a smartphone over Bluetooth. Check out a video demo of the hat after the break.

Continue reading “Thinking Cap Is Also Party Hat”

Bluetooth Control For Your DSLR Or Just About Any Other IR Operated Device

Just the other day we were reading a Reddit thread asking about how to control a television with a smartphone. The conversation started by talking about adding an IR LED to the phone.  Then it was suggested that there should be standalone Bluetooth devices that convert commands to IR, and came around to the ideas that TV’s should ship with native Bluetooth hardware. We couldn’t agree more but we’re also not about to replace our TV just for this option. That’s why we were delighted to find this project waiting on our tip line. It’s a method of controlling a camera shutter from a smartphone using Bluetooth. But the technique will work for any device which uses an infrared remote control.

The video after the break shows two different devices controlling the camera shutter. As you can see in the diagram above, the iPhone is the master controller, connecting to a Bluetooth headset mounted on the camera. That headset was altered to feed the speaker connections into an IR LED pointed at the camera’s receiver. The iPhone plays an encoded audio track matching the IR remote command, resulting in the properly formatted message flashing on the LED. The watch doesn’t have the ability to playback audio, but it can send a message to the phone, which then plays the proper audio track through the headset.

Continue reading “Bluetooth Control For Your DSLR Or Just About Any Other IR Operated Device”

Pumpkin Tetris Inspired By Our Own LED Jack-o-lantern

The kids (or maybe their parents) are going to be lined up at [Nathan’s] front porch to get their turn at playing pumpkin Tetris. That’s right, he built a game of Tetris into a real pumpkin. We thought this looked quite familiar when we first saw it and indeed he was inspired by our own LED Matrix Pumpkin from two Halloweens ago. We love seeing derivative works and [Nathan] definitely make few great improvements to the process.

The matrix itself was wired in very much the same way we used, but he added an additional 58 LEDs to nearly double the size of the display. He used a paper grid and power drill to make room for the holes, but improved the visibility of the lights by sculpting square pixels in the skin of the fruit. But how does one control the game? The stem of the pumpkin is actually a joystick. One of the most innovative parts of the physical build was to use drywall anchors on the inside to mount the joystick hardware.

Don’t miss a demo video after the jump.

Continue reading “Pumpkin Tetris Inspired By Our Own LED Jack-o-lantern”

Halloween Props: A Spooky Mirror

This mirror will spook your guests with a variety of static and animated images. It includes a proximity sensor so the images will not appear until someone comes close enough to see themselves in the looking glass.

The electronic parts are quite easy to put together. There is a 32×32 RGB LED matrix mounted on the back of the mirror. It is driven by an IOIO board with some custom firmware written by [Ytai], the creator of that board who happens to live next door to [Alinke]. Where this starts to get interesting is when [Alinke] was working on the mirror to make the LEDs visible from the front. He used a razor knife to put hundreds of scratches in the varnish on the back. This lets just enough light through to see the LEDs, but keeps the mirrored surface reflective. See for yourself in the clip after the break.

The images are fed to the IOIO board by an Android device. We think this could have a lot of use after Halloween as a weather display or news ticker. Perhaps you could even feed it from your diy Android thermostat.

Continue reading “Halloween Props: A Spooky Mirror”