Candied LEDs Are A Light, Tasty Treat

rock_candy_diffused_leds

[Emily Daniels] recently snagged a free iPad in the Instructables “Play with your food challenge” with an interesting way to work with LEDs. Growing up, most kids attempted to make, or at least have seen rock candy be produced. [Emily] thought it would be interesting to mix LEDs with the stuff to see what she could come up with, and her candied LEDs are the result.

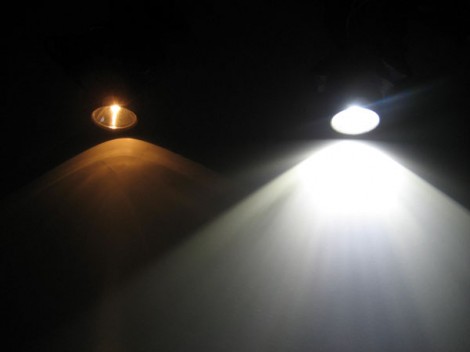
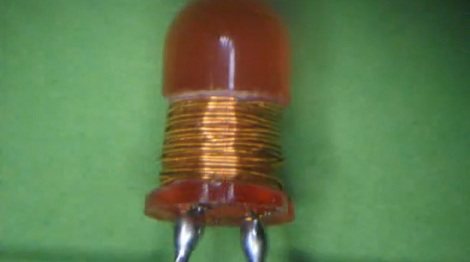
The process is pretty straightforward, and involves mixing up a batch of supersaturated sugar syrup in which LEDs are suspended. The LEDs act as a nucleation point for the crystal formation, growing a nice solid coating of sugar after a couple weeks’ time. After some cleaning up, the LEDs can be connected to a coin cell battery or similar, as you would normally do. The sugar acts as a diffusing medium for the LEDs, giving them a nice soft beam pattern.

Obviously you likely wouldn’t want to use these for any long-term electronics project, but it’s a fun activity for the kids, and it could be a good way to incorporate electronics into baked goods.

Slick Music Synchronized Light Show Uses UV LEDs And Water

music_synchronized_light_show

[mike6789k] wanted to spice up his dorm room, so he built a cool music synchronized light show that struck us as being very well thought out. We have seen similar music-based visualizations before, but they tend to be pretty basic, relying on volume more than actual audio frequencies to trigger the lighting.

[mike6789k] didn’t want to build “just another” synchronized light show, and his all-analog approach gives a true representation of the music being played instead of just flashing lights along with the beat. Using a trio of simple filters, he broke the audio signals down into three distinct frequency bands before being driven through a high gain transistor to power a set of LEDs.

We were pretty impressed at how bright the display was given that he is using UV LEDs, but the 1W diodes seem to have no problem lighting up the place when aimed through the UV-reactive water, as you can see in the video below.

If you’re looking to make something similar for your next party, the folks over at Buildlounge were able to wrangle a schematic out of [mike6789k], which you can find here.

Continue reading “Slick Music Synchronized Light Show Uses UV LEDs And Water”

Animated X-mas Sign

Sure, it may be two and a half months until Christmas. That doesn’t mean we can’t start building a few Christmas decorations. Last year, [RB] over at Embedded Lab made an animated Christmas sign using a simple microcontroller setup. This year, [RB] is adding a blinking LED border and doing the entire project with 74xx ICs.

The letters for this year’s sign were recycled from last years’. This time, however, two strings of 12 LEDs are used for the blinking border. The blinking circuitry uses a 74hc14 Schmitt trigger to provide the clock. A pair of 74hc595 shift registers turn each letter on one at a time. The speed is controlled with a small trim pot.

Using ICs to drive a series of lights in a pattern isn’t a new thing – you’d be hard pressed to not find a similar setup in the blinking panels of sci-fi shows of the 60s and 70s. Of course this sign doesn’t compare with what can be done with a microprocessor a lot of patience, it’s still a very nice build. Check out the video after the break to see the X-mas sign in action.

Continue reading “Animated X-mas Sign”

Tetris On A Building

Around a year ago, a bunch of blinkenlights were installed in the HCI-Building of ETH Zürich. These LED spots weren’t interactive and only showed hardcoded patterns. Of course a bunch of LEDs demand interactivity, so for the first-semester party this year a giant game of Tetris was built on the side of a building.

There’s no official build log, but from what we’ve learned, the LEDs are connected to a DMX controller that is in turn plugged into a computer and the University’s ethernet. For the command and control of the Tetris game, a USB joystick was connected to an old Dell that was pulled out of the junk pile.

The software for the project, LED side of the project was written in Visual C++ reusing old Tetris routines and example code from the DMX controller. For the controller portion, everything was written in C. The controller simply dumps chars into a TCP port on the second computer. While the Tetris board was only 3 pixels wide, there was a fairly massive queue of people wanting to play.

IPhone Controlled Daft Punk Helmet Replica A Dazzling Build

This Daft Punk helmet replica is beautiful to look at, but the deeper we delve into the build process, the more we begin to think that the entire project is a piece of artwork. [Harrison Krix] has been working on it for months, and just posted his three-part build log in September. Check out the video and the links to all three parts after the break.

Now [Harrison] isn’t new to prop replica scene. He’s the guy responsible for the other fantastic Daft Punk helmet we saw last year. He’s tapped the same fabrication skills to churn out an equally impressive chromed helmet, complete with addressable flashing LEDs. He built his own mold to create the body of the helmet, reminding us of the Storm Trooper helmet replicas we saw in July. While this was off being coated in chrome, he got down to business with the electronics.

The visor of the helmet has a red LED marquee. This, along with the multicolored visor sides and ear pucks, is controlled by an Arduino yellow jacket. The lights can be controlled by an iPhone app that connects to the helmet via WiFi, letting a user push custom messages to the display, and alter the light patterns. The build shines on the inside as well as the outside with an incredibly clean LED matrix build, and clever control placement for switching each part on or off.

Continue reading “IPhone Controlled Daft Punk Helmet Replica A Dazzling Build”

Adalight: Ladyada’s Ambilight

The latest and greatest ambilight clone, the Adalight, comes from the fruitful mind and cluttered workbench of the sometimes Hack A Day contributor [Phil Burgess].

We’ve seen a few clones of the Philips ambilight tech, but [Phil] knocked this one out of the park. The hardware is a string of 12mm RGB LEDs connected to the Arduino of your choosing. After attaching the LEDs to the rear of the TV using anything from, “laser-cut acrylic to nothing more than a pizza box,” it’s on to the software.

The Processing sketch performs a series of screen captures and averages the pixels around the perimeter of the screen. Reportedly, Carl Sagan’s Cosmos looks fantastic with the Adalight but there might be a better option.

[Phil] used 25 LEDs on his Adalight, more than the usual 6-10 we see on other Ambilight clones. Check out the video after the break to see the Adalight in action.

Continue reading “Adalight: Ladyada’s Ambilight”

Hone Your Skills By Building Control Modules

If you ask us, there’s no substitute for learning by doing. But often the hardest part of acquiring new skills is coming up with the idea for a project that utilizes them. [Mike Rankin] wanted to develop a project using laser cut acrylic, and settled on building a control box for an RGB LED strip. He got some practice modeling objects in SolidWorks and seeing the process through to the final build. But it also let him explore an area of microcontroller programming in which he had little experience.

The LED strip he’s using depends on the HL1606. This is an SPI addressable chip that we see popping up in a lot of projects these days. It’s pretty simple to send red, green, and blue values through the data bus, and it allowed [Mike] to try his hand at programming menus and sub-menus. The controller takes input from a clickable rotary encoder. The settings are displayed on an OLED screen, with all the hardware nestled comfortably in his custom-cut enclosure.

Don’t miss the demo video embedded after the break.

Continue reading “Hone Your Skills By Building Control Modules”