Helicopter POV Display Is A Masterwork

helicopter hack LED mod

Yes! A radio control helicopter with a fairly high-resolution persistence-of-vision display is a beautiful thing. [Mziwisky’s] handiwork is the result of several steps along the prototyping path. He built up a POV test rig on a breadboard, designed his first PCB for the project, and then went to work building it. After initially being inspired by a POV ceiling fan [Mziwisky] looked around to see if anyone else had already added a display to a helicopter. Indeed, this has been done before but there were very few details on the build.

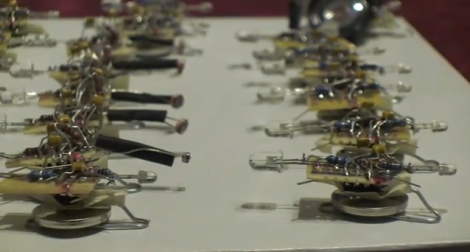
The helicopter has two blades and each have the same hardware on them and gobbled up about ten hours of assembly time each. He basically built a printed circuit board using the blades as a substrate by attaching adhesive copper foil. This makes up the matrix for the LEDs and connects to a small circuit board with an ATmega8 and some shift registers mounted on the inside end of the blade. There’s also a 180 mAh LiPo battery pack, and a hall effect sensor to synchronize the display on each. The results are spectacular, as you can see in the video after the break, but there’s a few bugs left to work out in order to fully tame the 32 LEDs on each rotor.

Kind of looks like the future is happening right now.

Continue reading “Helicopter POV Display Is A Masterwork”

Beginner Concepts: LEDs And Laws

Adafruit has a new LED tutorial for people wanting to get started with electronics. It is full of useful diagrams, pictures, and quizzes to help make sure you are understanding the concepts. This is the real basic stuff here: LEDs, resistors, and the laws from Kirchhoff, and Ohm. It starts out explaining the parts of an LED. Then variations of LEDs: illumination versus indication, clear versus diffused, brightness, color, and size. The mass of the tutorial covers how and why an LED’s brightness can be changed by a resistor and why a resistor is needed to keep an LED from burning out. Such as how Kirchhoff’s Voltage Law works with Ohm’s Law to help you determine the proper resistor for an LED. If you found useful the other beginner concepts posts about Analog Circuits and Electronics basics from the Giz, you should find this tutorial to be useful.

AVR Controlled RGB LED Matrix Plays Tetris

[Stan] built this LED matrix using a 16×16 grid of RGB LEDs. He built the hardware and wrote some subroutines to randomize the colors. He’s not using PWM because frame buffering is not feasible for the 1k SRAM limit of the ATmega168 he used. Instead, shift registers drive the lights which can be mixed to achieve eight different colors (including off for black) reducing the framebuffer size to just 96 bytes. After he got done with the build he realized this is sized well for a game of Tetris. We’ve seen AVR tetris, PIC Tetris, and Tetris using composite video but it’s always a pleasure to see a new display build.

After the break we’ve embedded [Stan’s] demo video, several pictures, and a schematic. He’s using many of the same principles outlined in our How to Design an LED matrix tutorial.

Continue reading “AVR Controlled RGB LED Matrix Plays Tetris”

Machine Your Own Ring Light

[Alan] acquired a stereo microscope from eBay, and decided to save some more money by designing, machining, and assembling his own arc reactor ring light to go along. After finding an LED driver board sitting around as well as ordering some surface mount LEDs, he set about using a lathe to cut away a block of lexan, making sure to include slots for the lights as well as the microscope mount point. Follow the link to see the detailed build photos, as well as some comparison shots with and without the ring light.

A month or two earlier though, and [Alan] would have had a fantastic start to an Iron Man costume.

70 LED Matrix In A Jack-o-lantern

What takes eight hours to solder and uses more shrink tubing that you thought imaginable? An LED matrix installed in a real pumpkin. When I mentioned that we’d like the LED pumpkin in last Friday’s post scaled up to a full LED matrix I had no idea it would be me doing the work. But [Caleb] and I thought it might be just the thing to present for the hacker’s favorite holiday.

Installed in the autumn vegetable is a marquee made from a 5×14 matrix of light emitting diodes. I spaced them by printing out a grid on the computer, taping it to the pumpkin, and drilling 70 holes in the front of the thing. The real trouble came when inserting all of the LEDs from the inside; each of them has four wires soldered to it, creating a net of black wiring. Above you can see it turned out great. This is a shot of it scrolling the message HAPPY HALLOWEEN.

Join us after the break for video of this prop. But we’re not just sharing the finished product. I’ll take you through the build process. Along the way you’ll learn the design considerations that go into an LED matrix and how you can use these techniques to build your own in any size and configuration you desire.

Continue reading “70 LED Matrix In A Jack-o-lantern”

Lightsaber Color Selector

[George Hadley] developed a nice setup to control the color of a replica Lightsaber. A small PCB houses a PIC 18F2221 and three switching transistors for the colors. A powerful LED resides in the tip of the handle, lighting up the diffuser that makes up the blade. But our favorite part is the control scheme. He’s embedded a small RGB LED in the handle, giving feedback as to which color of light can currently be adjusted (red, green, or blue). One button scrolls through the colors and a slide potentiometer adjusts that them.

We wouldn’t go as far as calling this a Halloween prop, we think it’s better suited for serious replica builds. But it would make an amazing addition to the little one’s costume. See it in action after the break.

Continue reading “Lightsaber Color Selector”

RGB LED Headband

Hard to imagine this going on business trips to Shangai

[Johncon] wrote this fantastic instructible showing us how to make an RGB LED headband. This should come in really handy the next time we find ourselves needing one… it happens. He picked up this little RGB LED strip while on a business trip to Shanghai. He had to reverse engineer the chip that controls each pair, but once that was done there wasn’t much left to do. He’s using a picaxe microcontroller since he had some lying around and, as he points out, they require very little external hardware.

He says he’s going to be ordering more of this LED strip soon and is willing to make a group buy if anyone is interested.

[via MakeZine]