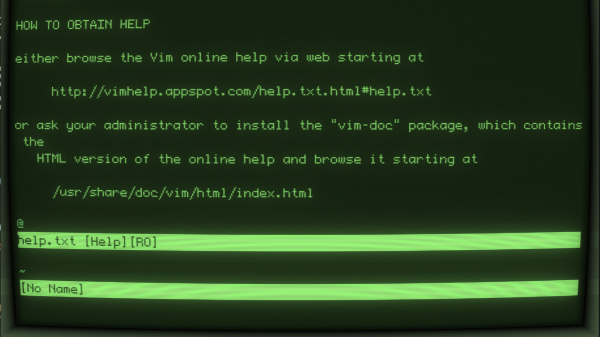
Gawking Text Files

Some tools in a toolbox are versatile. You can use a screwdriver as a pry bar to open a paint can, for example. I’ve even hammered a tack in with a screwdriver handle even though you probably shouldn’t. But a chainsaw isn’t that versatile. It only cuts. But man does it cut!

aukAWK is a chainsaw for processing text files line-by-line (and the GNU version is known as GAWK). That’s a pretty common case. It is even more common if you produce a text file from a spreadsheet or work with other kinds of text files. AWK has some serious limitations, but so do chainsaws. They are still super useful. Although AWK sounds like a penguin-like bird (see right), that’s an auk. Sounds the same, but spelled differently. AWK is actually an acronym of the original author’s names.

If you know C and you grok regular expressions, then you can learn AWK in about 5 minutes. If you only know C, go read up on regular expressions and come back. Five minutes later you will know AWK. If you are running Linux, you probably already have GAWK installed and can run it using the alias awk. If you are running Windows, you might consider installing Cygwin, although there are pure Windows versions available. If you just want to play in a browser, try webawk.

Continue reading “Gawking Text Files”

Linux: Assembly Required

Sometimes you might need to use assembly sometime to reach your project objectives. Previously I’ve focused more on embedding assembly within gcc or another compiler. But just like some people want to hunt with a bow, or make bread by hand, or do many other things that are no longer absolutely necessary, some people like writing in assembly language.

In the old days of DOS, it was fairly easy to write in assembly language. Good thing, because on the restricted resources available on those machines it might have been the only way to get things to fit. These days, under Windows or Linux or even on a Raspberry Pi, it is hard to get oriented on how to get an assembly language off the ground.

Continue reading “Linux: Assembly Required”

Talking Star Trek

Speech generation and recognition have come a long way. It wasn’t that long ago that we were in a breakfast place and endured 30 minutes of a teenaged girl screaming “CALL JUSTIN TAYLOR!” into her phone repeatedly, with no results. Now speech on phones is good enough you might never use the keyboard unless you want privacy. Every time we ask Google or Siri a question and get an answer it makes us feel like we are living in Star Trek.

[Smcameron] probably feels the same way. He’s been working on a Star Trek-inspired bridge simulator called “Space Nerds in Space” for some time. He decided to test out the current state of Linux speech support by adding speech commands and response to it. You can see the results in the video below.

Continue reading “Talking Star Trek”

Gcc: Some Assembly Required

There was a time when you pretty much had to be an assembly language programmer to work with embedded systems. Yes, there have always been high-level languages available, but it took improvements in tools and processors for that to make sense for anything but the simplest projects. Today, though, high-quality compilers are readily available for a lot of languages and even an inexpensive CPU is likely to outperform even desktop computers that many of us have used.

So assembly language is dead, right? Not exactly. There are several reasons people still want to use assembly. First, sometimes you need to get every clock cycle of performance out of a chip. It can be the case that a smart compiler will often produce better code than a person will write off the cuff. However, a smart person who is looking at performance can usually find a way to beat a compiler’s generated code. Besides, people can make value trades of speed versus space, for example, or pick entirely different algorithms. All a compiler can do is convert your code over as cleverly as possible.

Besides that, some people just like to program in assembly. Morse code, bows and arrows, and steam engines are all archaic, but there are still people who enjoy mastering them anyway. If you fall into that category, you might just want to write everything in assembly (and that’s fine). Most people, though, would prefer to work with something at a higher level and then slip into assembly just for that critical pieces. For example, a program might spend 5% of its time reading data, 5% of its time writing data, and 90% of the time crunching data. You probably don’t need to recreate the reading and writing parts. They won’t go to zero, after all, and so even if you could cut them in half (and you probably can’t) you get a 2.5% boost for each one. That 90% section is the big target.

The Profiler

Sometimes it is obvious what’s taking time in your programs. When it isn’t, you can actually turn on profiling. If you are running GCC under Linux, for example, you can use the -pg option to have GCC add profiling instrumentation to your code automatically. When you compile the code with -pg, it doesn’t appear to do anything different. You run your program as usual. However, the program will now silently write a file named gmon.out during execution. This file contains execution statistics you can display using gprof (see partial output below). The function b_fact takes up 65.9% of CPU time.

screenshot_232

If you don’t have a profiling option for your environment, you might have to resort to toggling I/O pins or writing to a serial port to get an idea of how long your code spends doing different functions. However you do it, though, it is important to figure it out so you don’t waste time optimizing code that doesn’t really affect overall performance (this is good advice, by the way, for any kind of optimization).

Assembly

If you start with a C or C++ program, one thing you can do is ask the compiler to output assembly language for you. With GCC, use a file name like test.s with the -o option and then use -S to force assembly language output. The output isn’t great, but it is readable. You can also use the -ahl option to get assembly code mixed with source code in comments, which is useful.

You can use this trick with most, if not all, versions of GCC. Of course, the output will be a lot different, depending. A 32-bit Linux compiler, a 64-bit Linux compiler, a Raspberry Pi compiler, and an Arduino compiler are all going to have very different output. Also, you can’t always figure out how the compiler mangles your code, so that is another problem.

If you find a function or section of code you want to rewrite, you can still use GCC and just stick the assembly language inline. Exactly how that works depends on what platform you use, but in general, GCC will send a string inside asm() or __asm__() to the system assembler. There are rules about how to interact with the rest of the C program, too. Here’s a simple example from the a GCC HOWTO document (from a PC program):

__asm__ ("movl %eax, %ebx\n\t"
"movl $56, %esi\n\t"
"movl %ecx, $label(%edx,%ebx,$4)\n\t"
"movb %ah, (%ebx)");

You can also use extended assembly that lets you use placeholders for parts of the C code. You can read more about that in the HOWTO document. If you prefer Arduino, there’s a document for that, too. If you are on ARM (like a Raspberry Pi) you might prefer to start with this document.

So?

You may never need to mix assembly language with C code. But if you do, it is good to know it is possible and maybe not even too difficult. You do need to find what parts of your program can benefit from the effort. Even if you aren’t using GCC, there is probably a way to mix assembly and your language, you just have to learn how. You also have to learn the particulars of your platform.

On the other hand, what if you want to write an entire program in assembly? That’s even more platform-specific, but we’ll look at that next time.

Hackaday Prize Entry: An Interface For The Headless Linux System

Connecting a headless Raspberry Pi to a wireless network can be quite a paradoxical situation. To connect it to the network, you need to open an SSH connection to configure the wireless port. But to do so, you need a network connection in the first place. Of course, you can still get command-line access using a USB-to-UART adapter or the Pi’s ethernet port – if present – but [Arsenijs] worked out a much more convenient solution for his Hackaday Prize entry: The pyLCI Linux Control Interface.

His solution is a software framework written in Python that uses a character display and buttons to make a simple hardware interface. This allows you to configure all important aspects of a Raspberry Pi – or any other Linux SBC – from a tidily organized click-and-scroll menu. [Arsenijs] implemented a whole bunch of useful tools: There’s a network tool to scan and connect to WiFi networks. A systemctl tool that lets you manage the services running on the system, which is especially helpful when you need to restart a stuck service. A partition tool helps with viewing and unmounting mass storage devices. He’s even planning to add a filesystem browser.

With his Open Source project, [Arsenjs] aims to shorten the development time for embedded projects by taking out the efforts of implementing the basic interface functions from scratch. Indeed, there are countless scenarios, where a basic display interface can be of great value. Given the great project documentation and the fact that this can work with virtually any Arduino or Raspberry Pi LCD-pushbutton-hat or shield, we’re sure this is going to be used a lot. Enjoy the video!

Continue reading “Hackaday Prize Entry: An Interface For The Headless Linux System”

Meter All The Phases: Three Phase Energy Meter With OpenWrt

Keeping track your overall electricity usage is a good thing, and it’s even better if you know where all the kilowatt-hours are going. [Anurag Chugh’s] house has the three phases coming from the electrical distribution box tidily organized: One for the lighting and fans, one for household appliances, and one for the hot water supply. To monitor and analyze the electrical fingerprint of his house, [Anurag] installed a 3 phase energy meter and hooked it up to the internet.

Continue reading “Meter All The Phases: Three Phase Energy Meter With OpenWrt”

BeagleBone Green, Now Wireless

Over the past few years, the BeagleBone ecosystem has grown from the original BeagleBone White, followed two years later by the BeagleBone Black. The Black was the killer board of the BeagleBone family, and for a time wasn’t available anywhere at any price. TI has been kind to the SoC used in the BeagleBone, leading to last year’s release of the BeagleBone Green, The robotics-focused BeagleBone Blue, and the very recent announcement of a BeagleBone on a chip. All these boards have about the same capabilities, targeted towards different use cases; the BeagleBone on a Chip is a single module that can be dropped into an Eagle schematic. The BeagleBone Green is meant to be the low-cost that plays nicely with Seeed Studio’s Grove connectors. They’re all variations on a theme, and until now, wireless hasn’t been a built-in option.

This weekend at Maker Faire, Seeed Studio is showing off their latest edition of the BeagleBone Green. It’s the BeagleBone Green Wireless, and includes 802.11 b/g/n, and Bluetooth 4.1 LE.

Continue reading “BeagleBone Green, Now Wireless”