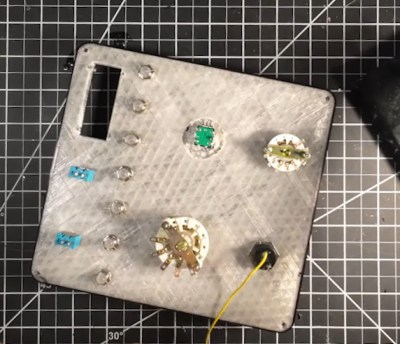
Pixel Graphics From An HD44780, By Cutting Wires

[Felipe Tavares] wasn’t satisfied with the boring default fonts on an HD44780-based display. And while you can play some clever tricks with user-defined characters, if you want to treat the display as an array of pixels, you’ve got to get out your scalpel and cut up a data line.

The hack builds on work from [MisterHW] who documented the bits going from the common display driver to the display, and suggested that by cutting the data line and sending your own bits, you could send arbitrary graphics. The trick was to make sure that they’re in sync with the display, though, which means reading the frame sync line in user code.

This done, it looks like [Felipe] has it working! If you can read Rust for the ESP32, he has even provided us with a working demo of the code that makes it work.

We can’t help but wonder if it’s not possible to go even lower-level and omit the HD44780 entirely. Has anyone tried driving one of these little LCD displays directly from a microcontroller, essentially implementing the HD44780 yourself?

Any way you slice it, this is a cool hack, and it opens up the doors to DOOM, or as [MisterHW] suggests, Bad Apple on these little displays . If you do it, we want to see it.

If your needs aren’t so exotic, the classic HD44780 display is a piece of cake to get working, and an invaluable tool in anyone’s toolbox.

Adafruit Badges Turned Electronic Invitations

Despite what you might have heard, even the most devout Hackaday readers may eventually find themselves getting married. Should you ever find yourself in a situation where you need to send out invitations for your big day, or any other major celebration for that matter, you could do worse than follow the example [Mokas] and their partner set with these memorable electronic wedding invitations.

Inspired by the electronic badges distributed at hacker cons, [Mokas] decided to use Adafruit’ EdgeBadge and PyBadge devices to create a similar interactive keepsake that would be a bit more exciting than a piece of paper. While it would have been enough to have the wedding information pop up on the screen when they were turned on, the final invites actually boot into a retro-style game where you walk around talking to characters to uncover information about the event and the venue.

The game was created in Microsoft MakeCode Arcade, with a sprinkling of original and commissioned sprites. Early versions of the game ended up being a bit much for the Adafruit badge’s to handle, but after doing a bit of research on creating games for computationally-constrained platforms, [Mokas] was able to optimize the performance. For those that didn’t get a physical invite (no doubt ours was simply lost in the mail), you can play the whole thing right in your browser.

It’s a very clever idea, and while using custom hardware would have allowed for a more bespoke package, we can’t blame [Mokas] for wanting to keep this one simple. Getting everything ready for your wedding is already enough stress — it’s hardly the time to spin up a new board.

For a similar reasons, another Adafruit offering was selected to power the couple’s e-ink baby development display.

A System Board For The 8008

Intel processors, at least for PCs, are ubiquitous and have been for decades. Even beyond the chips specifically built by Intel, other companies have used their instruction set to build chips, including AMD and VIA, for nearly as long. They’re so common the shorthand “x86” is used for most of these processors, after Intel’s convention of naming their processors with an “-86” suffix since the 1970s. Not all of their processors share this convention, though, but you’ll have to go even further back in time to find one. [Mark] has brought one into the modern age and is showing off his system board for this 8008 processor.

The 8008 predates any x86 processor by about six years and was among the first mass-produced 8-bit processors even before the well-known 8080. The expansion from four bits to eight was massive for the time and allowed a much wider range of applications for embedded systems and early personal computers. [Mark] goes into some of the details for programming these antique processors before demonstrating his system board. It gets power from a USB-C connection and uses a set of regulators and level shifters to make sure the voltages all match. Support for all the functions the 8008 needs is courtesy of an STM32. That includes the system memory.

For those looking to develop something like this, [Mark] has also added his development tools to a separate GitHub page. Although it’s always a good idea for those interested in computer science to take a look at old processors like these, it’s not always the easiest path to get original hardware like this, which also carries the risk of letting smoke out of delicate components. A much easier route is to spin up an emulator like an 8086 IBM PC emulator on an ESP32. Want to see inside this old chip? Have a look.

Continue reading “A System Board For The 8008”

The Long Road Towards Reverse Engineering The ESP32 Wi-Fi Driver

Although much of the software that runs on the ESP32 microcontroller is open source, the Wi-Fi driver is not. Instead, it uses a proprietary binary blob. This was no problem for [Jasper Devreker]’s reverse-engineering of the ESP32’s Wi-Fi stack so far until he came face to face with reverse-engineering the initialization of the Wi-Fi peripheral. As it turns out, there is a lot of work involved after you call esp_phy_enable in the Espressif binary blob, with the team logging 53,286 peripheral accesses during the initialization phase. In comparison, sending a Wi-Fi packet takes about ten calls.

Currently, the way that the initialization step is handled is by having the initialization routine in the binary blob do its thing by configuring the radio and other elements before killing the FreeRTOS task and replacing it with their own version. The team is actively looking for a clean approach for moving forward that will avoid simply writing everything from scratch. For the Wi-Fi MAC, existing code (e.g., FreeBSD’s stack) could be used, but the radio code is much more of a headache. Clearly, there’s still a lot more work to be done in order to get a fully open-source Wi-Fi MAC and stack for the ESP32, but having the community (that’s you) pitch in might speed things up if there’s demand for an open-source driver.

[Jasper’s] been working on this for a while. He’s even built a Faraday cage to make the task easier.

Is This The World’s Smallest Multichannel Voltmeter?

The instrument which probably the greatest number of Hackaday readers own is likely to be the humble digital multimeter. They’re cheap and useful, but they’re single-channel, and difficult to incorporate into a breadboard project. If you’ve ever been vexed by these limitations then [Alun Morris] has just the project for you, in the world’s smallest auto-ranging multichannel voltmeter. It’s a meter on a tiny PCB with a little OLED display, and as its name suggests, it can keep an eye on several voltages for you.

At its heart is an ATtiny1614 microcontroller on a custom PCB, but for us the part we most like lies not in that but in the prototype version made on a piece of protoboard. There’s considerable soldering skill in bending surface mount components to your will on this material, and though these aren’t quite the smallest parts it’s still something that must have required some work under the magnifier.

All of the code and hardware details can be found in the GitHub repository, and for your viewing pleasure there’s a video showing it in action which we’ve placed below.

Continue reading “Is This The World’s Smallest Multichannel Voltmeter?”

Mechanical 7-Segment Display Looks Clean

[Jens] wanted a subscriber counter for his YouTube channel. He could have gone with a simple OLED, LCD, or LED display, but he wanted something more tactile and interesting. So he built a mechanical 7-segment display instead!

Currently, [Jens]’s channel is in the four-digit subscriber range, so he planned to build a four-digit display. He started by searching for existing projects in this space, and came across the designs of [shiura] on Thingiverse. [shiura] had a 3D printed cam-driven 7-segment digit that runs on a single servo motor. Once armed with four of the digits, he hooked them up to a Pi Pico W to drive them all with four servo outputs. The Pico W is responsible for querying the channel subscriber count online, and updating the display in turn.

It’s a neat build, and [Jens] learned some things along the way—like how Super Lube seemed to ruin filament for him. Ultimately, the build came good, and it looks great. We’ve seen some other mechanical 7-segment builds before, too!

Continue reading “Mechanical 7-Segment Display Looks Clean”

This WiFi Filament Sensor Is Unnecessary, But Awesome

As desktop 3D printers have inched towards something resembling the mainstream, manufacturers have upped their game across the board. Even the quality of filament that you can get today is far better than what was on the market in the olden days, back when a printer made out of laser-cut birch wasn’t an uncommon sight at the local makerspace. Now, even the cheap rolls are wound fairly well and are of a consistent diameter. For most folks, you just need to pick a well-reviewed brand, buy a roll, and get printing.

But as with everything else, there are exceptions. Some people are producing their own filaments, or want to make sure their extrusion rate is perfectly calibrated. For those that need the capability, the WInFiDEL from [Sasa Karanovic] can detect filament diameter in real-time while keeping the cost and complexity as low as possible. Even better, with both the hardware and software released as open source, it makes an excellent starting point for further development and customization.

Continue reading “This WiFi Filament Sensor Is Unnecessary, But Awesome”