[Michael], [Tom], and a few other people on the Lucid Scribe Database project have been using off-the-shelf EEG equipment to invoke lucid dreaming. Yes, that’s where you take control of your dreams and become a god. This requires wearing an EEG setup while you sleep, and these products aren’t very comfortable sleeping wear. [Tom] decided to take apart a NeuroSky MindWave and turn it into something comfortable to wear all night.
The folks at the Lucid Scribe Database log their dreams with consumer-level EEG equipment, usually something made by NeuroSky. The NeuroSky MindWave is the smallest and cheapest EEG headset available, but it’s still a hard plastic device not conducive to sleeping.
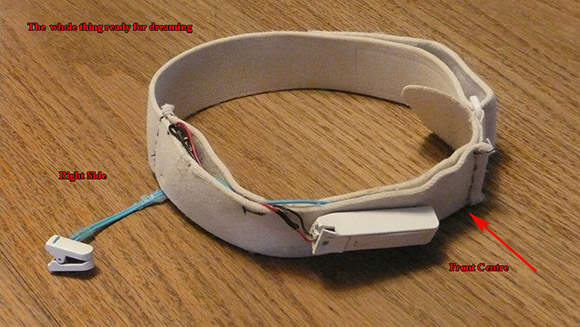
[Tom] removed all the guts and electronic goodies out of his MindWave and attached them to an elastic headband. The MindWave has two sensors – a forehead and ear lobe sensor. For the forehead sensor, [Tom] simply soldered a piece of wire to a penny and attached it to the elastic. The ear lobe sensor in the stock MindWave is a simple clip that was kept in the stock configuration for [Tom]’s mod.
Now that [Tom] has a much more comfortable EEG setup, he can get on with improving his lucid dreaming skills and even try communicating via Morse from inside a dream.