
Audio CDs were the ubiquitous audio format of the 1990s. Lesser known were the extensions to the format that packaged all kinds of interesting additional data into a musical release. Now, a new record from [Aizysse Baga] has brought back some of the most quirky and obscure CD features that time and industry long forgot.
[Aizysse Baga] worked with [Adelaide] on the Divacore record, which was to be released on a mini-CD. The original plan was to include additional CD+G data, featuring artwork to go with the music. CD+G, or CD+Graphics, was often used to display synchronized lyrics for karaoke releases, and stored data in formerly-unused subcodes next to the track start, track number, and running time data. This format allowed storing a slideshow of images with a resolution of 288 x 192 with a 16 color palette.
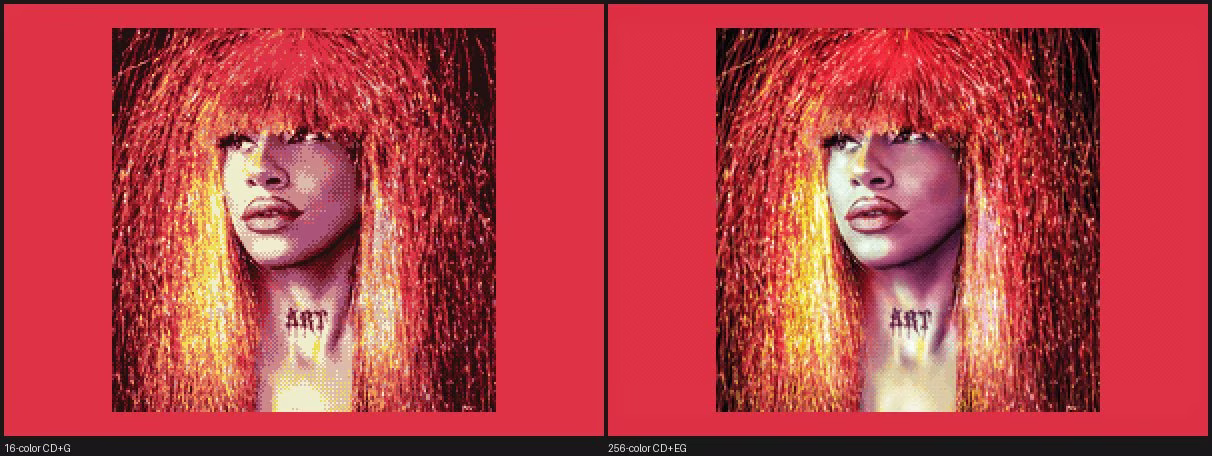
The duo got handy with art and some smart dithering to get great 16-bit artwork packed in to the audio CD release, with the aid of a custom Python encoder. CD-TEXT metadata was thrown in for good measure. Then, the existence of the more advanced CD+EG became apparent. This was a 256-color extension to the CD+G format that was backwards compatible to boot. It was a format that was barely ever implemented on any commercial releases, and very little hardware could even display it. Naturally, Divacore had to have it. Much work was done to understand the Red Book documentation on the standard and figure out how to implement even higher quality artwork for the record.
After so much work to understand and implement the CD+G and CD+EG data, the question was whether it would survive the CD reproduction process for the final release. Thankfully, the final discs came out perfectly, and the full 256-color CD+EG artwork can be seen in all its glory if you happen to play Divacore on a Sega Saturn or a super-obscure Victor VS-G2 or VS-G3. Throw it in a less-sophisticated karaoke machine or something like an Amiga CD32, and you’ll still get to see the 16-color versions for your trouble.
We love to see ancient formats brought back to life, particularly those that never got their time in the sun. If you’re working hard to resurrect something the mainstream media world has forgotten, let us know on the tipsline.


