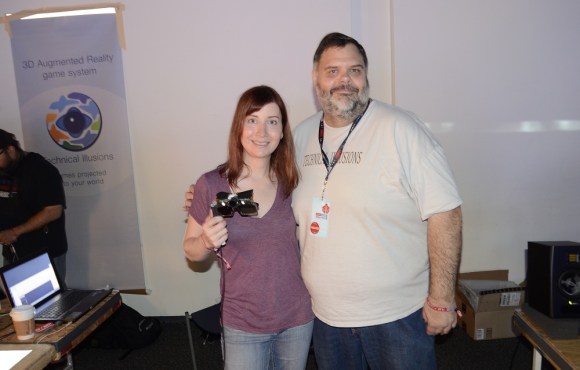
How To Use The Kenetis KL25Z Freedom Board As An HID Mouse

[Eric] is interested in turning this Freedom development board into an air mouse by using the onboard accelerometer. But he had to work through the particulars of the USB HID mouse class before he could get that done.

This Freescale FRDM-KL25Z is one of the awesome ARM boards we looked at a year ago. Can you believe you can get this thing for like thirteen bucks? We suppose the gotcha is that the CodeWarrior IDE meant for use with them is not entirely free. But there is a free trial, and [Eric] shows how much easier it is to tailor the USB stack for your needs with it.

Don’t worry though. If you’re like us and use Open Source For The Win he’s got you covered as well. When you’re done reading his HID mouse writeup head on over to his six-part tutorial for building a free toolchain for the Kenetis boards.

Building A Hard Drive Scratch Controller

hard-disk-scratch-controller

If you’re reading this blog then chances are you have a dead hard drive hanging out somewhere in your house. Here’s a weekend project that will put it back into use. [Andreas] took on the popular project which combines a hard drive and optical mouse to build a scratch controller.

The gist of the build is that you use an optical mouse sensor to track the movement of the platter. But [Andreas] made things harder on himself by not using the USB capability of the mouse and mapping it in software for his needs. Instead he plucked the sensor from the mouse, reading it using an Arduino. After much trial and error with the best way to coat the underside of the platter to play nicely with the sensor he managed to get it up and running. The controller issues commands using the MIDI protocol, forming a strong foundation for future upgrades which could lead to a full-blown DJ console hack.

Continue reading “Building A Hard Drive Scratch Controller”

LED Module Used To Display Load, Traffic, And Status Data For Your PC

cpu-monitoring-block

You’re going to like [Ivan’s] write-up for this LED computer status monitor. Of course he didn’t just show-and-tell the final product — if he had you’d be reading this in a Links post. But he also didn’t just detail how he put the thing together. Nope, he shared pictures and details of every iteration that got him here.

It started off with a tachometer. Yeah, that analog display you put on the dashboard of your car which reads out RPM. He wanted to make it into a USB device which would read out his CPU load. But that’s an awful lot of work when it can only display one thing at a time. So he decided to add an 8×8 LED module which would display the load for each individual core of his CPU. It looks great next to the illuminated tachometer. From there he added resolution by transitioning to an RGB module, which ended up sucking him into a coding project to extend the data pushed to his embedded hardware. In the end his ReCoMonB (Real Computer Monitoring Block) displays CPU load, RAM usage, several aspects of HDD activity, as well as the network up and down traffic.

We think he’s probably squeezed all that he can from this little display. Time to upgrade to a TFT LCD.

Continue reading “LED Module Used To Display Load, Traffic, And Status Data For Your PC”

A Custom Starcraft Keyboard

keybaord

What do you do if you’re looking for a project, but don’t know what to do? If you’re [gltovar], just look around at your hobbies. He’s been playing Starcraft for a while and finally decided to build a custom Starcraft keyboard.

[gltovar] came across an interesting keyboard layout known as TheCore. Ostensibly, this layout allows the player faster access to the commands most used when playing Starcraft. [gltovar] decided he needed a keyboard specifically designed for TheCore, and set about making one of his own design.

The keyboard matrix is designed around a 1×5 row of keys, each attached to a Teensy microcontroller acting as a USB device. Each of these rows are a separate circuit board, allowing [gltovar] to move the rows up and down ergonomically in a custom enclosure.

It’s everything [gltovar] wanted in a custom keyboard. Whether it improves his Starcraft game is another story entirely, but we’re sure he’s at least having fun.

Continue reading “A Custom Starcraft Keyboard”

USB Sniffing With The BeagleBoard-xM

[Matlo] wrote in to share his USB sniffing project using the BeagleBoard-xM. It builds on the Google Summer of Code project from 2010 that used the non-xM version of the hardware to build a pass through USB sniffer. [Matlo] couldn’t get it to work back then, but recently revisited the project. He’s cleaned up some scripts and generally made it a bit easier for others to pull off as well.

The ARM-based BeagleBoard seen above acts as man-in-the-middle. You connect your target USB device to the board and the board to a computer. The board emulates the target device, passing packets in either direction while also logging them. The captured data is in the correct format for display using WireShark, the de facto standard for making sense of captured communication packets.

This is great for figuring out how to use USB devices on non-standard systems, or vice versa.

An XBMC Controller Built For Grandma

10-finished-controller

Is your grandmother cool enough to use XBMC? Maybe it’s a testament to the functionality of the wildly popular home entertainment suite rather than the hipness of your elders. But indeed, [Brian’s] grandmother is an XBMC user who needed a controller with larger buttons to accommodate her. This is what he built. He sent us a set of photos and a description of the build, both of which you can see below. He was inspired to get in touch after reading about the custom controller which [Caleb] has been working on for [Thomas].

[Brian] didn’t get bogged down with electronics. He went with the simple, cheap, and popular solution of gutting a wireless keyboard. After tracing out the keys he needed he got rid of everything except the PCB. A wiring harness was crafted by soldering jumper wires to the PCB traces and terminating them with crimping slide connectors. The arcade buttons he used have terminals for the connectors which will make it simple to mate the electronics with the mechanics.

The enclosure is a little wooden hobby box. It originally had a lid with a mirror. [Brian] broke open the lid’s frame to replace it with a thin piece of plywood which hosts the buttons. Inside you’ll find a battery power source. These keyboards last a long time on one set of batteries so he just needs to remember to preemptively replace them from time to time. The finishing touch was to add decals so that granny can figure out what each button does.

Continue reading “An XBMC Controller Built For Grandma”