playing Super Hang-On with Paw Patroller

Playing Super Hang-On With Hacked Controller Gives Reason For Paws

There’s a thing that happens when you’re shopping at a second hand store. You know how it goes: You see an item that strikes your fancy, your mind immediately locks in, and the item just has to be yours. [Tom Tilley] experienced this when he saw a Paw Patrol kids toy at a local thrift store, and you can see the results of his holiday hacking sessions in the video below the break.

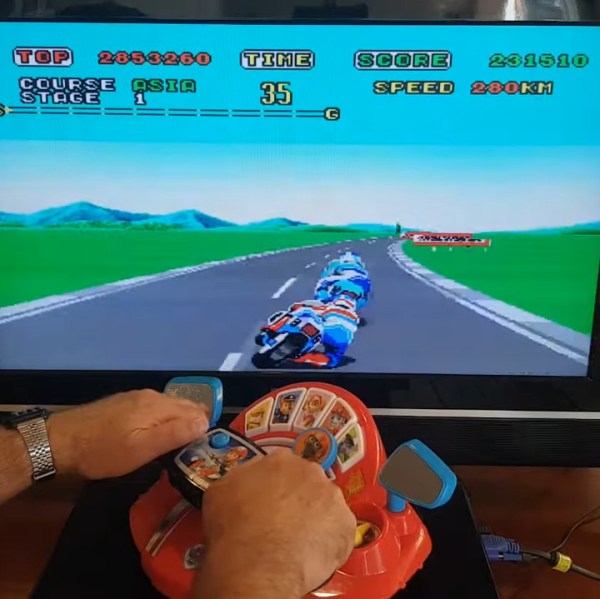
How did [Tom] put the Paw Patrol game to use? Looking like a motorcycle cockpit left him with few choices. Before long he’d flipped the game over over, pulled the innards, and hacked together what just might be the most perfect toy based interface we’ve seen lately.

Using a Raspberry Pi Pico controller and some careful surgery, [Tom] turned the Paw Patrol game into a controller for the 1987 Sega motorcycle race arcade game Super Hang-On. Watching [Tom] play is a blast, but just in case the whole thing is a losing prospect, it’s completely reversible as well!

Of course we were a little disappointed that Super Hang-On couldn’t make use of the paws button.

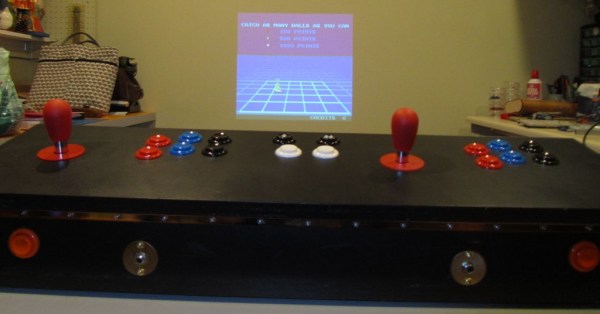
On the other end of the spectrum, here’s an actual car turned into a game controller. Got a hot controller hack to share? Be sure to let the Tip Line know!

Continue reading “Playing Super Hang-On With Hacked Controller Gives Reason For Paws”

MAME Frame

MAMEFrame – Sweet All In One Portable MAME System

Video game enthusiast [NEIN] loves MAME. The one thing he doesn’t like much about MAME is moving large heavy MAME cabinets around. So what do you do if you want to take your games on the road? [NEIN] decided to come up with a portable MAME solution that includes everything all in one box so there is virtually no set-up time to get playing. He calls it ‘The MAMEFrame‘.

It may appear that this is a standard 2-player DIY controller, however, it is anything but. The display is housed inside the encloure — a video projector that connects to the Raspberry Pi via an HDMI cable. [NEIN] opted to use a Raspberry Pi instead of a large PC to help keep things light and samll. It’s almost like the two were made for each other. The projector has a built in battery and USB port. The Raspberry Pi is powered by the 5 volts supplied from the projector’s USB port making this unit completely portable and wireless. Just plop it down on a table, point it at a wall and you’re ready to guide Pac-Man to level 256!

Did you know one of the very first Raspberry Pi hacks ever was a MAME build?

Continue reading “MAMEFrame – Sweet All In One Portable MAME System”

3D Printing An Arcade Controller

A keyboard and mouse simply can’t stand in for games originally meant to be played with a joystick and buttons. We are of course thinking of coin-op here and building your own set of arcade controls is a great project to give back some of the thrill of those classics. But these are not trivial builds and may push your comfort zone when it comes to fabrication. Here’s one alternative to consider: 3D printing an arcade controller housing.

3d-printed-arcade-controller-thumb
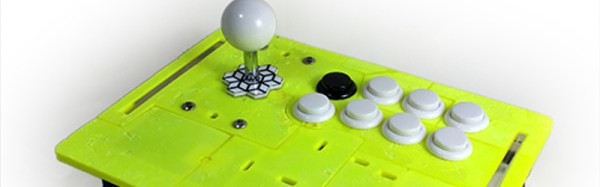
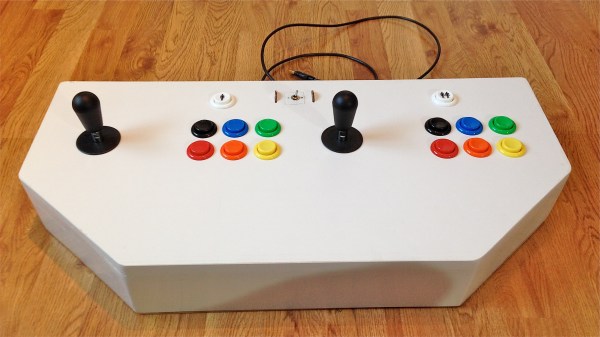
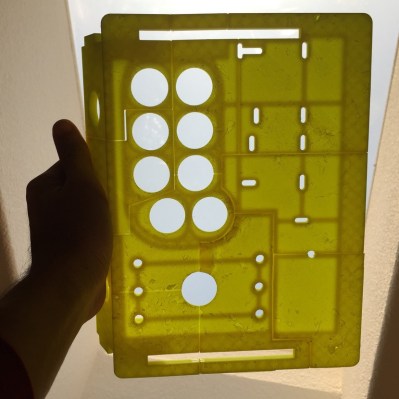
[Florian] already had experience building these using laser cut acrylic and MDF. This is his first foray into a 3D printing build method for the controller body. The top is too large to easily produce as a single piece on inexpensive printers. He broke it up into sections; eleven in total. When the printing is complete he chemically welds them together using a slurry of acetone and leftover ABS.

We think one possible extension of this technique would be to build a mounting system that would allow you to swap out segments (instead of welding them all) while you dial in the exact placement that you want for each component. You know, like when you decide that rectangular button pattern doesn’t fit your hand. That said, this looks like a beautiful and functional build. At the least it’s a great way to practice your 3D printing skills and you end up with a wicked controller at the end of it.

MAME Controller

MAME Now Available In The Palms Of Your Hand

Every kid dreams of having an arcade game at their house. When those kids grow up, they have a couple of options for getting that at-home arcade experience. They can either buy a one-game commercial game or build a multi-game MAME cabinet. Both options have the same disadvantage: they take up a bunch of space!

Arcade game-aholic, [lokesen], wanted to scratch his itch but do it with something a little less ‘big’ than a standard arcade cabinet. He came up with the only logical solution; a MAME computer stuffed inside an arcade controller.

A lot of thought went into the controller case, which is made from laser cut acrylic. It had to be large enough to allow a proper arcade-emulating spacing of the joystick and buttons as well as have room for a mini-ATX motherboard and 64gb SSD drive. The case also has provisions for a cooling fan and some exhaust vents. To finish off the case, wood grain veneer was applied to the sides.

[lokesen] chose this motherboard for a reason, it has several options of on-board video output; VGA, DVI and HDMI. Connecting this controller to any TV, monitor, or projector is a piece of cake.

A Raspberry Pi Arcade Stick

rpiArcadeStick

There are plenty of Raspberry Pi arcade builds out there, but rarely do we come across something as sleek as [Jochen Zurborg’s] RasPi Arcade Stick. The build combines everything you’d expect from other RasPi arcade projects, but manages to pack everything into the form factor of a portable stick modeled on the Neo Geo 4’s button layout. It may not be as small as the tiny MAME cabinet from last year, but it definitely delivers a more authentic arcade experience.

[Jochen] had previously developed an add-on PCB for the Pi called the PiJamma, which simplifies connections from the RasPi’s GPIOs by providing a JAMMA interface for the controller(s). The Pi and the PiJamma sit inside a custom-made acrylic enclosure and hook up to the buttons and joystick above. Rather than try to fit the Pi directly against a side panel for access to the various outputs, [Jochen] rerouted the USB, HDMI, and headphone jacks and arranged them into a tidy row on the back side of the box. The top piece of the enclosure consists of a sheet of aluminum wrapped in custom artwork, with an additional sheet of acrylic on top for protection. [Jochen] also modified each of the arcade buttons to include LEDs that illuminate the buttons’ acrylic holder, and the case itself appears to have been cut into slats on each side to provide better ventilation.

Check out his project blog for further details and for a huge gallery of progress photos, then see a quick video of the RasPi Arcade Stick after the break.

Continue reading “A Raspberry Pi Arcade Stick”

Custom Arcade Control Panel

Anybody can fire up an emulator and play arcade games of yesteryear, but if you want to capture more of the nostalgia, you should build a custom arcade control panel. [Quinn] started her build by narrowing down which games she was most interested in playing, and decided on a straightforward 2-player setup. The biggest challenge was finding joysticks that would allow for switchable 4-way or 8-way control: some games such as Ms. Pac Man were made for 4-way joystick input, and the added positions on a 8-way can lead to confused inputs and frustrated players.

[Quinn] found the solution with a pair of Ultimarc Servo Stik joysticks, which use a servo motor to swap between 4 and 8-way mode. The output from both the joysticks and the buttons feed into an iPac encoder, which converts the signal to emulate a USB keyboard. The panel was first mocked up on butcher paper, with dimensions borrowed from various games: the panel itself resembles Mortal Kombat 2, while the buttons are spaced to match X-Men vs Street Fighter 2. [Quinn] chose some spare melamine—plywood with a plastic coating—to construct the panel, drilled some holes and used a router to carve out space for the joysticks. A USB hub was added to power the servos and to make room for future additions, which [Quinn] will have no difficulty implementing considering that her electrical layout is enviably clean. To cap it all off, she fit two “coin slot” buttons: a quarter placed into a slot serves as a start button when pressed.

Be sure to see the videos after the break that demonstrate the coin buttons and the servos, then check out a different retro joystick hack for a tripod controller, or look to the future with the Steam Controller.

Continue reading “Custom Arcade Control Panel”

Open Source Makes This USB Arcade Controller Build A Breeze

[Jamie] built his own USB connected arcade controller. We’ve been seeing a lot of these lately, and they usually involve soldering buttons to a keyboard PCB. But [Jamie] decided to go a different route and use his own microcontroller. This method always gets a bit hairy when it comes to deciding how to connect it to a computer. Dealing with the USB stack used to be quite tricky, but the LUFA project is slowly taking the pain out of the process.

The Lightweight USB Framework for AVRs is an open source project that handles the hard work associated with USB capable AVR microcontrollers. [Jamie] knew that they already had a sample implementation of a hardware joystick. He’s not using one of the supported boards and so wasn’t able to just compile and go. But porting the code to work with his minimus board was simple enough. With the code in place, the physical build was quite simple. The buttons and joystick were mounted on the surface of an overturned drawer. Each is connected to one pin of the controller board and to ground. LUFA makes sure that the device enumerates as a joystick, and [Jamie] was gaming in no time.