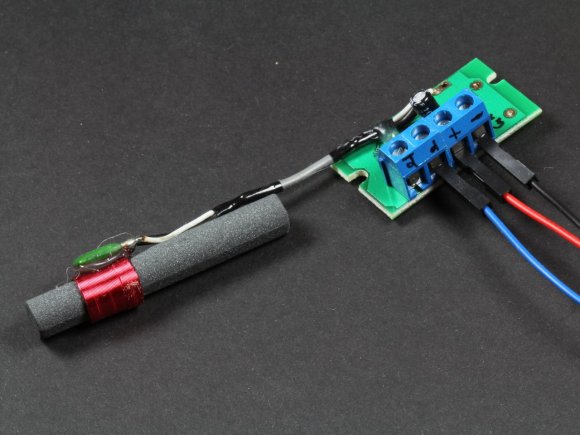
Teensy Board Used As An AM Radio Transmitter

[Angus McInnes] has been working on AM radio transmission techniques. He tried out a method of using a VGA port for the task but found the vertical blanking was audible. His latest experiments use a Teensy microcontroller board as an AM transmitter.

This is not a standalone solution, but rather a hardware extension for his laptop. This is because the microprocessor doesn’t have enough cycles to do much more than read bytes over USB and push their bits out one of the I/O pins.

To get a steady stream of data he’s using isochronous mode to push a steady data stream via the USB connection. Bulk transfer is another option but [Angus] found that it caused some jitter in the audio. Each byte is fed to the AVR SPI hardware once every eight clock cycles. His transmission can be picked up from across the room, but that’s the limit since the AVR doesn’t put out that strong of a signal. But it should be a rather trivial exercise to build a simple amplifier.

More Small Radio Modules For Your Wireless Needs

In the never-ending pursuit of cheap wireless communication for your microcontroller projects, [kiu] came up with a small board that allows for serial communication via a 433MHz radio link.

[kiu]’s transceiver uses an RFM12 wireless module available online for just a few dollars. Alongside this module is an ATMega8 and a USB to serial FTDI chip. When [kiu] plugs this board into his computer, he’s able to run a terminal, connect to this board, and receive and transmit hex values at 115,200 bps from another one of these boards.

According to [kiu]’s BOM, 10 boards only cost him 180 Euros, or about $225 USD. Considering off-the-shelf solutions such as an XBee could easily cost twice as much, we’re thinking [kiu] did a very nice job here.

[kiu] put all the board files, schematics, and code up on his GitHub, ready for your perusal. A very cool build, and very useful for a high altitude balloon, rocket, or wireless sensor build.

Controlling A Quadcopter With A Homebrew Remote

When [Matt] started building his multirotor helicopter, he was far too involved with building his craft than worrying about small details like how to actually control his helicopter. Everything worked out in the end, though, thanks to his homebrew RC setup built out of a USB joystick and a few XBees.

After a few initial revisions and a lot of chatting on a multirotor IRC room, [Matt] stumbled across the idea of using pulse-position modulation for his radio control setup.

After a few more revisions, [Matt] settled on using an Arduino Pro Mini for his flight computer, paired with a WiFly module. By putting his multicopter into Ad-hoc mode, he can connect to the copter with his laptop via WiFi and send commands without the need for a second XBee.

Now, whenever [Matt] wants to fly his multicopter, he plugs the WiFly module into his MultiWii board, connects his laptop to the copter, and runs a small Python script. It may not be easier than buying a nice Futaba transmitter, but [Matt] can easily expand his setup as the capabilities of his copter fleet grows.

Video of [Matt]’s copter in flight after the break.

Continue reading “Controlling A Quadcopter With A Homebrew Remote”

Very Inexpensive RF Module Tutorial

Let’s say you need a way to make a project wireless, but don’t have the scratch for a ZigBee or its ilk. You could use IR, but that has a limited range and can only work within a line of sight of the receiver. [Camilo] sent in a project (Spanish, translation) to connect two devices via a wireless serial connection. As a small bonus, his wireless setup is cheap enough to create a wireless network of dozens of sensors.

[Camilo] used the TLP434A transmitter/receiver combination to get his wireless project off the ground. These small devices only cost about $5, but being so inexpensive means the hardware designer needs to whip up their own communications protocol.

For a microcontroller, [Camilo] chose a Freescale MC9S08QC, a pleasant refrain from the AVR or PIC we normally see. After making a small board for his transmitter, [Camilo] had a very small remote control, able to send button presses or other data to a remote receiver.

After the break, you can see a short demo video [Camilo] posted of his wireless transmitter turning on an LED attached to his receiver. Unfortunately, this video was filmed with a potato, but all the schematics and code is on his web site for your perusal.

Continue reading “Very Inexpensive RF Module Tutorial”

Real Time GPS Decoding With Software Defined Radio

In case the Realtek RTL2832u-based USB TV tuner dongle isn’t useful enough, the folks behind a project to get a software defined GPS receiver off the ground successfully plotted GPS data in real-time with this very inexpensive radio.

Previously, we’ve seen these dongles grab data from GPS satellites – useful if you’re building a GPS-based clock – but this build required hours of data collection to plot your location on a map.

The folks working on the GNSS-SDR project used an RTL2832 USB TV tuner and a Garmin active GPS antenna to track up to four GPS satellites in real-time and plot a location accurate to about 200 meters.

The Google Earth plot for this post shows the data collected by the GNSS-SDR team; the antenna was fixed at the red arrow for the entirety of the test, and the  yellow lines represent a change in the calculated location every 10 seconds. Amazing work, and only goes to show what this remarkable piece of hardware is capable of.

Wireless Sensors Without A Microcontroller

While cruising the Internet one day, [Raj] found a really cool pair of RF transmitters and receivers manufactured by Dorji Applied Technology. These modules – the DRF5150S and DRF4432S – work just like any other ISM band transmitter receiver pair with the addition of inputs for analog and digital input pins. [Raj] put together a tutorial for using these radio modules, perfect if you need a very simple wireless connection for your next project.

[Raj]’s tutorial for using the Dorji sensor modules shows the transmitter has two operating modes. The first mode is a simple data transmitter, connected to a microcontroller through a UART connection. The ‘sensor’ mode doesn’t require a separate chip; the on-board STM8L151 microcontroller reads analog values on two pins and sends them over the air to the DRF4432S receiver module.

After programming the transmitter to function as a wireless sensor with an app released by Dorji, [Raj] plugged the transmitter into a breadboard with a battery and digital thermometer. The receiver module is plugged into a USB -> UART module, and data is pulled down from the sensor in a terminal.

[Raj] wrote a small app in Processing to display the data coming from the sensor. He has a wonderful animated thermometer showing the temperature reading of the sensor, the battery voltage and the strength of the wireless signal. Pretty easy, and a very helpful tutorial if you need an easy way to build a wireless sensor.

Decoding NOAA Weather Radio With An Arduino

The National Oceanic and Atmospheric Administration is responsible for broadcasting the signals used in weather radios. They use a protocol called Specific Area Message Encoding (SAME) and [Ray Dees] recently published an Arduino library that lets you decode the SAME message packets.

He doesn’t provide a method of tuning the radio signal, but at first you can use the audio samples he points to. The actual broadcasts happen on one of seven frequencies between 162.400 MHz and 162.550 MHz but the tones are also broadcast on TV and Radio alerts. Once you have the audio it is fed into a pair of XR-2211 Tone decoders. This provides just three interface pins for the Arduino to watch.

The annoying noise that grabs your attention at the beginning of a weather alert, or test of the alert system is actually what the SAME data packets sound like. From those tones this system will be able to decode what type of alert is being issued, and the geographic locations it affects. If you interested in more info about SAME head over to the Wikipedia article on the topic.