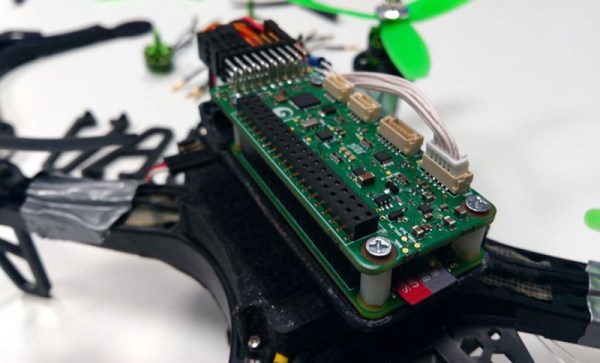
Raspberry Pi Sense HAT Super Weather Dashboard

[InitialState] posted a great multipart tutorial about building what he calls a “Hyper-local Weather Dashboard.” In plain language, he created a Raspberry Pi-based web page that fuses weather data from Wunderground along with locally sensed weather data.

The tutorial has thee parts. The first part covers reading data from Wunderground using their developer’s API (you’ll need an API key; a free one is good for 500 queries a day). The second part covers using the Pi Sense HAT to measure local temperature, humidity, and pressure. The final part ties it all together using producing the hyper-local weather dashboard (whatever that really means).

We talked about the Sensor HAT earlier (and there’s more info in the video, below). Seems like those lights could do something, although that wouldn’t do you any good over a web interface. This is a good-looking project (and tutorial) and easy enough that it would be a good place to start
experimenting with the Raspberry Pi.

Continue reading “Raspberry Pi Sense HAT Super Weather Dashboard”

Raspberry Pi Powers The Desk Of The Future

Recent science fiction movies always show people sitting at stylish semi-transparent desks that have all kinds of strange and wonderful gadgets in them. Our desks look like something your grandfather might have sat at. [Frederick Vandenbosch] must have seen those same movies so as part of contest he decided to build the desk of the future.

The desk is as much a furniture project as an electronics project, but it does have a Raspberry Pi, a scavenged laptop LCD, embedded touch sensors and LEDs, a wireless charger, and a built-in sound system. In addition, it uses a Gertbot and some stepper motors that it uses to raise and lower the screen in and out of the desk (watch the video below to see how that looks).

[Fredrick] used Python to get the major functions of the desk programmed. We couldn’t help but think of all the things you could do with an easily programmable desk surface: show stock quotes (or sports scores), notify about e-mail, or other things. Although it doesn’t look like it would be simple for a simple user to add those things, if you were a handy programmer, they look like they’d be in reach.

We’ve seen some desks before, but nothing quite like this. We couldn’t help but wonder if you could add some Minority Report-style goodness to [Frederick’s] already impressive desk.

Continue reading “Raspberry Pi Powers The Desk Of The Future”

An Intel Atom CPU In The Raspi Form Factor

For years now, people have been trying to stuff an Intel processor on a credit card sized board. An x86 board that can fit in your pocket is an intriguing device – after all, that’s what Gumstix, the forerunner of the Raspberry Pi, were. Efforts to put x86 on a dev board have included the Minnowboard, the Intel Galileo and Edison, and even the Intel Compute Stick. These have not seen the uptake you would expect from a small x86-powered board, but that tide may soon turn. The UP board is exactly what you would expect from a Raspberry Pi-inspired board with a real Intel processor.

The feature set for the UP board is impressive for a credit card sized board; it’s powered by a quad-core Intel Atom x5-Z8300 CPU running at 1.84 GHz. The board comes equipped with 1GB of RAM, 16GB of eMMC Flash, Gigabit Ethernet, five USB 2.0 ports (one on a pin header) and one USB 3.0 port. Up also includes a real-time clock, HDMI, the same 40-pin GPIO pin connector found in the Raspberry Pi Model B Plus, and DSI and CSI connectors for the Raspberry Pi camera and touch screen.

To be fair to all the previous attempts at making a board built around an x86 chip that borrows heavily from the Raspberry Pi, there haven’t been many chips out there that have been suitable for credit card-sized applications. Only in the last year or so has Intel released chips suitable for an x86 single board computer, and the growing market of Windows 10 tablets bears this out. While it remains to be seen if the UP board will be a success, more than a few people will pick one of these up for a miniature Skype box.

Raspberry Pi Tablet Based On Sailfish OS

There are so many hacks in this project it’s hard to know where to start. So let’s start at the SailPi tablet which is a Raspberry Pi running the Sailfish OS on an LCD touch screen powered by a cell phone battery pack. The design looks more like a high-tech sandwich with the Pi in the middle than a tablet. Despite the appearance it works, at that’s what counts. COs98UBWsAAQNh5The creator, [Aleksi Suomalainen] expended a lot of effort pulling all the pieces together on this project.

The Sailfish OS project is targeted at creating a new OS for mobile devices, especially cell phones. It is open source which invites developers to contribute to the project. The touch screen user interface is designed for ease of use by gestures from one finger on the hand holding the phone.

[Aleksi] ported Sailfish to a Pi 2 during a hacking week. He’s shared the code for it on his blog. During the hack week he played with accessing the GPIO on the Pi to flash an LED. To get you up and running quickly he provided an image you can load onto an SD.

It appears the Pi is finding a niche for OS hackers in addition to the hardware hackers using the GPIO.

Don’t miss the demo after the break to see the OS running on the Pi. Continue reading “Raspberry Pi Tablet Based On Sailfish OS”

FPGAs For The Raspberry Pi

FPGA development has advanced dramatically in the last year, and this is entirely due to an open-source toolchain for Lattice’s iCE40 FPGA. Last spring, the bitstream for this FPGA was reverse engineered and a toolchain made available for anything that can run Linux, including a Raspberry Pi. [Dave] from Xess thought it was high time for a Raspberry Pi FPGA board. With the help of this open-source toolchain, he can program this FPGA board right on the Raspberry Pi.

The inspiration for [Dave]’s board came from the XuLA and StickIt! boards that give the Raspberry Pi an FPGA hat. These boards had a problem; the Xilinx bitstreams had to be compiled on a ‘real’ PC and brought over to the Raspberry Pi world. The new project – the CAT Board – brings an entire FPGA dev kit over to the Raspberry Pi.

The hardware for the CAT Board is a Lattice iCE-HX8K, 32 MBytes of SDRAM, a serial configuration flash, LEDs, buttons, DIP switches, grove connectors, and SATA connectors (although [Dave] is just using these for differential signals; he doesn’t know if he can get SATA hard drives to work with this board).

Despite some problems with his board house, [Dave] eventually got his FPGA working, or at least the bitstream configuration part, and he can blink a pair of LEDs with a Raspberry Pi and programmable logic. The Hello World for this project is done, and now the only limit is how many gates are on this FPGA.

Continue reading “FPGAs For The Raspberry Pi”

See Who’s Calling With Caller Pi-D

One of the hardest things in life is watching your parents grow old. As their senses fail, the simplest things become difficult or even impossible for them to do.

[kjepper]’s mom is slowly losing her sight. As a result, it’s hard for her to see things like the readout on the caller ID. Sure, there are plenty of units and phones she could get that have text-to-speech capabilities, but the audio on those things is usually pretty garbled. And yes, a smartphone can natively display a picture of the person calling, but [kjepper]’s mom isn’t technologically savvy and doesn’t need everything else that comes with a smartphone. What she needs is a really simple interface which makes it clear who’s calling.

Initially, [kjepper] tried to capture the caller ID data using only a USB modem. But for whatever reason, it didn’t work until he added an FSKDTMF converter between the modem and the Pi. He wrote some Node.js in order to communicate with the Pi and send the information to the screen, which can display up to four calls at once.  To make a mom-friendly interface, he stripped an old optical mouse down to the scroll wheel and encased it in wood. Mom can spin the wheel to wake the system up from standby, and click it to mark the calls as read. Now whenever Aunt Judy calls the landline, it’s immediately obvious that it’s her and not some telemarketer.

[via r/DIY]

Open Source FPGA Pi Hat

Over on Hackaday.io, [Dave Vandenbout] has posted the CAT board, a Raspberry Pi daughterboard hat that features a Lattice FPGA, 32 MB of RAM, EEPROM, and a few Grove and PMOD connectors. The CAT takes advantage of the open source tool chain available for Lattice including the Python-based MyHDL (although, you could just use Verilog directly, if you prefer) and Icestorm. One interesting point: you can run the tool chain on the Raspberry Pi, resulting in a self-contained and largely portable FPGA development environment.

Continue reading “Open Source FPGA Pi Hat”