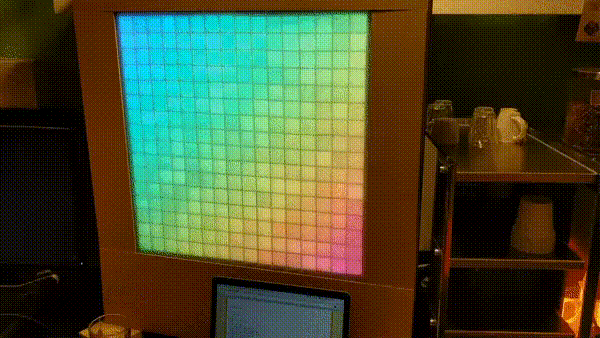
Two days at a company sponsored hackathon? Sounds like fun to us! And productive too – the end result for [GuuzG] and two of his workmates from their company’s annual “w00tcamp” was this festive and versatile 16×16 pixel mega display.
From the sound of it, [GuuzG] and his mates at q42.com are not exactly hardware types, but they came up with a nice build nonetheless. Their design was based on 16 WS2812 LED strips for a 256 pixel display. An MDF frame was whipped up with cross-lap joints to form a square cell for each pixel. Painted white and topped with a frosted Plexiglass sheet, each RGB pixel has a soft, diffuse glow yet sharply defined borders. Powered by a pair of 5A DIN rail DC supplies and controlled by a Raspberry Pi, the finished display is very versatile – users can draw random pixel art, play the Game of Life, or just upload an image. [GuuzG] and company are planning to add Tetris, naturally, and maybe a webcam for fun.
We’ve seen lots of uses for the ubiquitous WS2812 LEDs, from clocks to Ambilight clones to ground-effect lighting for an electric skateboard. But if you’re in the mood for a display that doesn’t use LEDs, there’s always this multithreading display.
[via Reddit]


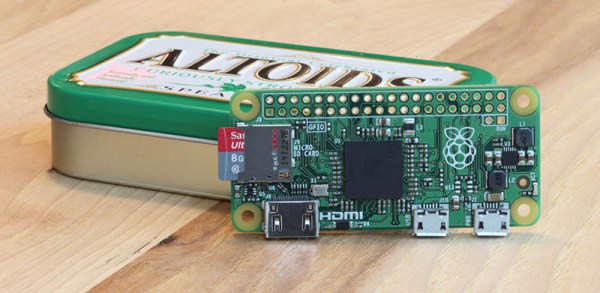
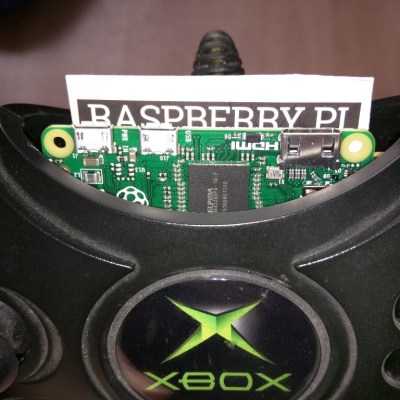 Thanks to its small size it’s actually a fairly straight forward hack with minimal modification to the controller in order to make it fit. In fact, you only need to remove the memory card holder from the controller and snip one bit of plastic in order to make it fit right in the middle — awesome.