New Video Series: Raspberry Pi Pico And RP2040 Deep Dive With Uri Shaked

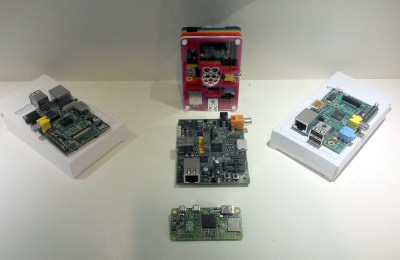
In case you’ve been living under a rock that doesn’t have internet access, the Raspberry Pi Foundation got into the silicon sales and microcontroller game all at once this year with the Raspberry Pi Pico. It’s small, it’s capable, and it costs a measly $4. Surely you have one or two of them by now, right? But how much do you know about what it can do?

Or maybe you don’t have one yet, but it’s on your list. In either case, you can get started learning about them right away because [Uri Shaked]’s Raspberry Pi Pico and RP2040 Deep Dive course has recently been freed from the hallowed halls of HackadayU. He even built an emulator to go with it. [Uri] is a great instructor, and we’re sure that goes double if you ever need a salsa dance teacher, which he has also mastered.

This class was held for five weeks beginning in May 2021, with each session being roughly an hour long. The only prerequisite is a basic understanding of bitwise math, but there are resources for that on the class IO page linked above.

Each class is incredibly well-organized and informative. In the first class, [Uri] begins building a living document that includes the class agenda, links to all resources used and mentioned, code examples, and assembly instructions where applicable. It’s basically a syllabus plus a whole lot more. [Uri] also spends a lot of time in the incredibly thorough 649-page data sheet for the RP2040, and a little bit of time in the much shorter Getting Started guide. If you think the data sheet is inaccessible, you’ll likely change your tune by the end of the first class after you’ve seen [Uri] use and peruse it.

Continue reading “New Video Series: Raspberry Pi Pico And RP2040 Deep Dive With Uri Shaked”

Raspberry Pi Server Cluster In 1U Rack-Mount Case

[Paul Brown] wants to take advantage of off-site server colocation services. But the providers within [Paul]’s region typically place a limit of 1A @ 120V on each server. Rather than search out commercial low-power solutions, [Paul] embraced the hacker spirit and built his own server from five Raspberry Pi 4b single board computers.

The task involves a little bit more than just mounting five Pi4s in a chassis and calling it done. There is an Ethernet switch connecting all the modules to the network, and each Pi has a comparatively bulky SSD drive + enclosure attached. By far the most annoying part of the assembly is the power supply and distribution cabling, which is further complicated by remote controlled power switching relays (one of the computers is dedicated to power management and can shut the other four modules on and off).

Even if you’re not planning on building your own server, check out the thoroughly documented assembly process and parts list — we particularly liked the USB connector to screw terminal breakout connector that he’s using for power distribution. For all the detailed information, assembly instructions and photos, we think a top-level block diagram / interconnection drawing would be very helpful for anyone trying to understand or replicate this project.

There are a lot of connections in this box, and the final result has a messy look-and-feel. But in fairness to [Paul]’s craftsmanship, there aren’t many other ways to hook everything together given the Raspberry Pi form-factor. Maybe a large and costly PCB or using CM4 modules instead of Raspberry Pi boards could help with cable management? In the end, [Paul] reckons he shelled out about $800 for this unit. He compares this expense with some commercial options in his writeup, which shows there are some cheaper and more powerful solutions. But while it may be cheaper to buy, we understand that strong urge to roll your own.

We’ve written about many Pi cluster projects in the past, including this one which contains a whopping 750 Raspberry Pis. Have you ever used a colocation service, and if so, did you use a DIY or an off-the-shelf server?

Smart Mirror Talks To 3D Printers

As time goes by, it’s only getting easier to make a magic mirror. You know, a mirror connected to the internet that shows information like news, weather, or whatever you want, right there on top of your stunning visage. In [Forsyth Creations]’ case, that data includes 3D printer activity on the network — something that’s way more relevant to daily life than say, headlines about Kim Jong Un’s weight loss progress. The build video is embedded below.

Thanks to projects like [MichMich]’s MagicMirror, everything is done with modules, including really useful things such as OctoMirror that let you keep an eye on your 3D printer(s) using OctoPrint.

The electronics are pretty simple here — [Forsyth Creations] used the guts of an old monitor for the display and a Raspberry Pi to serve up the modules as a web page. The only tricky part is power, because the LCD is going to need so much more voltage than the Pi and the absolutely necessary LEDs around the edge, but a couple of buck converters do the trick.

After stripping the monitor of all of its unnecessary plastic, [Forsyth Creations] cut rear and front frames to support the electronics. That isn’t a piece of mirror glass, it’s actually one-way acrylic which is lighter and somewhat cheaper. [Forsyth Creations] designed and printed some corner support brackets that double as leveling screw holders to get the acrylic panel dialed in just right, and you can get these for yourself from GitHub. We think this would be a good early woodworking project or something for a long weekend. [Forsyth Creations] built this in three days on an apartment balcony using a minimum of tools.

We especially admire that once it was done, he hung it up with a French cleat. Those are so useful.

Continue reading “Smart Mirror Talks To 3D Printers”

Analog Camera Goes Digital

The digital camera revolution swept through the world in the early 2000s, and aside from some unique situations and a handful of artists still using film, almost everyone has switched over to digital since then. Unfortunately that means that there’s a lot of high quality film cameras in the world that are gathering dust, but with a few pieces of equipment it’s possible to convert them to digital and get some more use out of them.

[befinitiv]’s latest project handles this conversion by swapping in a Raspberry Pi Zero where the film cartridge would otherwise be inserted into the camera. The Pi is attached to a 3D-printed case which mimics the shape of the film, and also houses a Pi camera right in front of the location where the film would be exposed. By removing the Pi camera’s lens, this new setup is able to take advantage of the analog camera’s optics instead and is able to capture images of relatively decent quality.

There are some perks of using this setup as well, namely that video can be broadcast to this phone over a wireless connection to a computer via the Raspberry Pi. It’s a pretty interesting build with excellent results for a remarkably low price tag, and it would be pretty straightforward to interface the camera’s shutter and other control dials into the Raspberry Pi to further replicate the action of an old film camera. And, if you enjoy [befinitiv]’s projects of bringing old tech into the modern world, be sure to check out his 80s-era DOS laptop which is able to run a modern Linux installation.

Continue reading “Analog Camera Goes Digital”

Hands On With The Raspberry Pi POE+ HAT

There’s a lot happening in the world of Pi. Just when we thought the Raspberry Pi Foundation were going to take a break, they announced a new PoE+ HAT (Hardware Attached on Top) for the Pi B3+ and Pi 4, and just as soon as preorders opened up I placed my order.

Now I know what you’re thinking, don’t we already have PoE HATs for the Pis that support it? Well yes, the Pi PoE HAT was released back in 2018, and while there were some problems with it, those issues got cleared up through a recall and minor redesign. Since then, we’ve all happily used those HATs to provide up to 2.5 amps at 5 volts to the Pi, with the caveat that the USB ports are limited to a combined 1.2 amps of current.

PoE vs PoE+
$20 for either of them. Choose wisely.

The Raspberry Pi 4 came along, and suddenly the board itself can pull over 7 watts at load. Combined with 6 watts of power for a hungry USB device or two, and we’ve exceeded the nominal 12.5 watt power budget. As a result, a handful of users that were trying to use the Pi 4 with POE were hitting power issues when powering something like dual SSD drives over USB. The obvious solution is to make the PoE HAT provide more power, but the original HAT was already at the limit of 802.3af PoE could provide, with a maximum power output of 12.95 watts.

The solution the Raspberry Pi Foundation came up with was to produce a new product, the PoE+ HAT, and sell it along side the older HAT for the same $20. The common name for 802.3at is “PoE+”, which was designed specifically for higher power devices, maxing out at 30 watts. The PoE+ HAT is officially rated to output 20 watts of power, 5 volts at 4 amps. These are the output stats, so the efficiency numbers don’t count against your power budget, and neither does the built-in fan.

Continue reading “Hands On With The Raspberry Pi POE+ HAT”

PlayStation Games On The GBA, With A Few Extra Steps

It might seem impossible, but what you’re looking at is a Sony PlayStation game being played on a Nintendo Game Boy Advance. The resolution is miserable and the GBA doesn’t have nearly enough buttons to do most 3D games justice, but it’s working. There’s even audio support, although turning it on will slow things down considerably.

How does it work? The trick is that creator [Rodrigo Alfonso] is actually emulating the PlayStation on a Raspberry Pi and simply using Nintendo’s handheld as an external display and controller. We say “simply”, but of course, it’s anything but. The GitHub page for the project goes into impressive detail on how the whole thing works, but the short version is that the video data is sent from the Linux framebuffer to a small program running on the GBA over the handheld’s serial port using SPI. In testing he was able to push 2.56 Mbps through the link, which is a decent amount of bandwidth when you’ve only got to keep a 240 × 160 screen filled.

Perhaps the best part is that you don’t even need a flash cart to try it at home. [Rodrigo] is using a trick we’ve seen in other GBA projects, where the program is actually transferred to the handheld over the link cable at boot time.

Nintendo introduced this “multiboot” feature so multiplayer games could be played between systems even if they didn’t all have a physical cartridge, but now that hackers have cracked the code, it means you can run arbitrary code on a completely unmodified console; though it does get wiped as soon as you power it off.

[Rodrigo] provides all the information and software you need to try it at home, you just need a Raspberry Pi, a Game Boy Advance, and Link Cable you don’t mind cutting up; far less hardware than is required by the similar project to run DOOM on the NES. Since he’s tied everything into the popular RetroPie frontend, we imagine it would even work when emulating earlier 2D consoles; which would be a much better fit for the GBA’s display and limited inputs.

Raspberry Pi Cameras Stand In For Stereo Microscope

Handling tiny surface mount components and inspecting PCBs is a lot easier with a nice stereo microscope, but because of their cost and bulk, most hobbyists have to do without. At best they might have a basic digital microscope, but with only one camera, they can only show a 2D image that’s not ideal for detail work.

The team behind [Stereo Ninja] hopes to improve on the situation by developing a stereoscopic vision system that puts tiny objects up on the big screen in three dimensions. Utilizing the Raspberry Pi Compute Module, a custom carrier board that enables the use of both MIPI CSI camera interfaces, and a 3D gaming monitor, their creation combines the capabilities of a traditional stereo microscope with the flexibility of a digital solution.

With two Raspberry Pi cameras suspended over the work area, and the addition of plenty of LED light, Stereo Ninja is able to generate the 3D image required by the monitor. While the camera’s don’t have the same magnification you’d get from a microscope, they’re good enough for enlarging SMD parts, and looking at a big screen monitor certainly beats hunching over the eyepiece of a traditional microscope. Especially if you’re trying to show something to a group of people, like at a hackerspace.

Of course, not everyone has a large 3D gaming monitor on their workbench. In fact, given how poorly the tech went over with consumers the last time it was pushed on us, we’d wager more hackers have stereo microscopes than 3D displays. Which is why the team’s next step is to have the Raspberry Pi generate the signals required by the shutter glasses, allowing Stereo Ninja to show a three dimensional image on 2D monitors; bringing this valuable capability to far larger audience than has previously been possible.

Continue reading “Raspberry Pi Cameras Stand In For Stereo Microscope”