Nautical navigation has a long history of innovation, from the compass and chronometer to today’s computer-driven autopilot systems. That said, the poor compatibility of electronics with saltwater has consequently created a need for rugged, waterproof computers, a category to which [Matti Airas] of Hat Labs has contributed with the open-source HALPI2.
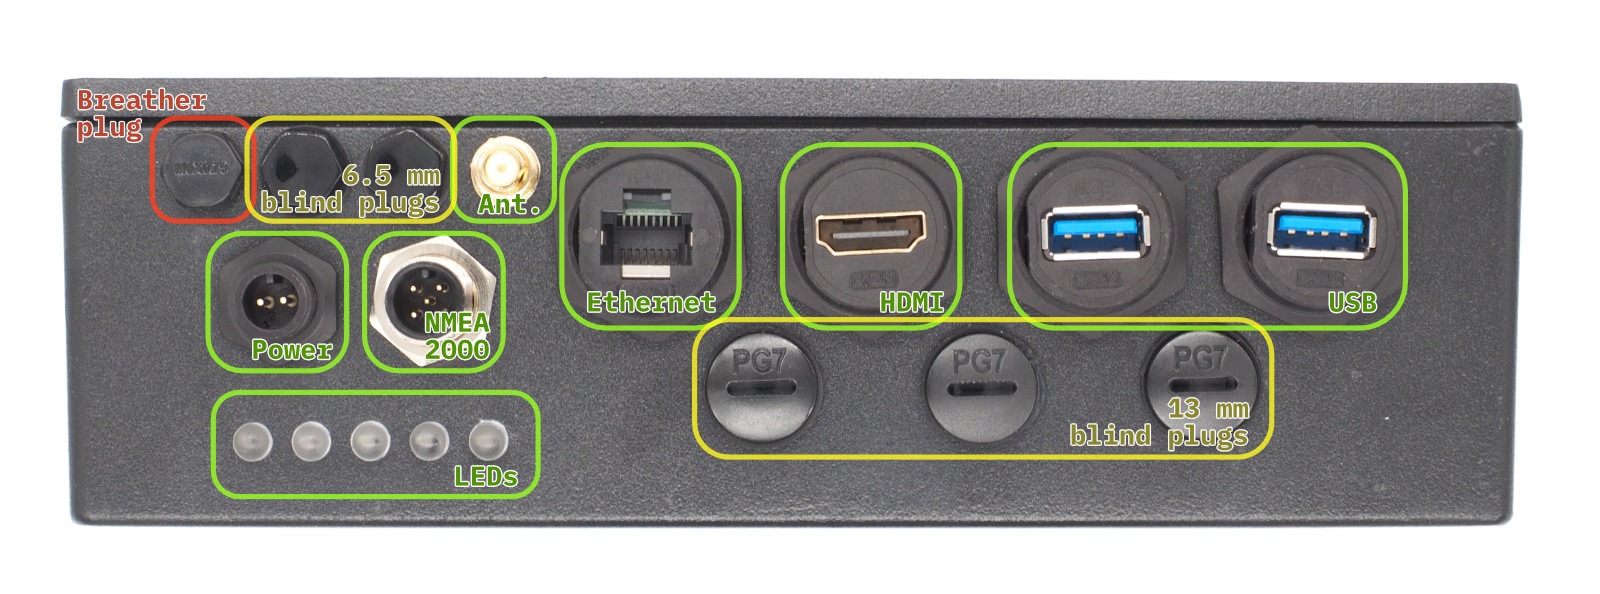
Powered by the Raspberry Pi Compute Module 5, the electronics are housed in a heavy duty enclosure made of aluminium, which also serves as a heat sink, and closes with a waterproof seal. It has a wide variety of external connectors, all likewise waterproofed: power, HDMI, NMEA 2000 and NMEA 0183, Ethernet, two USB 3.0 ports, and an external WiFi or Bluetooth antenna. The external ports are plugged into the carrier board by short extension cables, and there are even more ports on the carrier board, including two HDMI connectors, two MIPI connectors, four USB ports, and a full GPIO header. The case has plugs to install additional PG7 or SP13 waterproof connectors, so if the existing external connectors aren’t enough, you can add your own.
Besides physical ruggedness, the design is also resistant to electrical damage. It can run on power in the 10-32 volt range, and is protected by a fuse. A supercapacitor bank preserves operation during a power glitch, and if the outage lasts for more than five seconds, can keep the system powered for 30-60 seconds while the operating system shuts down safely. The HALPI2 can also accept power over NMEA 2000, in which case it has the option to limit current draw to 0.9 amps.
The design was originally created to handle navigation, data logging, and other boating tasks, so it’s been configured for and tested with OpenPlotter. Its potential uses are broader than that, however, and it’s also been tested with Raspberry Pi OS for more general projects. Reading through its website, the most striking thing is how thoroughly this is documented: the site describes everything from the LED status indicators to the screws that close the housing – even a template for drilling mounting holes.
Given the quality of this project, it probably won’t surprise you to hear this isn’t [Matti]’s first piece of nautical electronics, having previously made Sailor HATs for the ESP32 and the Raspberry Pi.


