A sliced digital file of a marker light enclosure. Background is a white and grey grid and object itself is a series of print path lines in red, orange, and green.

3D Printing Hard-To-Find Vintage Vehicle Parts

When I was growing up, my dad and I restored classic cars. Combing junkyards for the pieces we needed was a mixture of interesting and frustrating since there was always something you couldn’t find no matter how long you looked. [Emily Velasco] was frustrated by the high price of parts even when she was able to find them, so she decided to print them herself. She wrote an excellent tutorial about designing and 3D printing replica parts if you find yourself in a similar situation.

All four marker lights on [Velasco]’s 1982 Toyota pickup were on their way to plastic dust, and a full set would run her $160. Instead of shelling out a ton of cash for some tiny parts, she set out to replicate the marker lamps with her 3D printer. Using a cheap marker lamp replacement for a more popular model of pickup as a template, she was able to replace her marker lamps at a fraction of the cost of the options she found online. Continue reading “3D Printing Hard-To-Find Vintage Vehicle Parts”

Fixing A 30-year Old Roland Bug

The Roland CM-500 is a digital synthesizer sound module released in 1991 that combines two incredibly powerful engines into one unit. However, in 2005 enthusiasts of the Roland MT-25 (one of the engines that went into the CM-500) noticed a difference between the vibrato rate on the MT-25 and the CM-500, rendering it less useful as now midi files would need to be adjusted before they sounded correct. Now thirty-something years later, there is a fix through the efforts of [Sergey Mikayev] and a fantastic writeup by [Cloudschatze].

They reached out to Roland Japan, who decided that since the device’s lifecycle had ended, no investigation was warranted. That led the community to start comparing the differences between the two systems. One noticeable difference was the change from an Intel 8098 to an 80C198. In theory, the latter is a superset of the former, but there are a few differences. First, the crystal frequency is divided by three rather than two, which means the period of the LFO would change even if the crystal stayed the same. Changing the 12 MHz crystal out for 8 MHz gave the LFO the correct period, but it broke the timings on the MIDI connection. However, this is just setting the serial baud rate divisor, which requires changing a few bytes.

Replace the ROM chip with a socket so you can slot your newly flashed PDIP-28 64kx8 ROM into a quick desoldering. Then swap the crystal, and you’ll have a machine that matches the MT-25 perfectly. The forum post has comparison audio files for your enjoyment. Finally, if you’re curious about other fixes requiring an inspiring amount of effort and dedication, here’s a game installer that was brought back from the dead by a determined hacker.

Hackaday Prize 2022: An Old (and Distinguished) Camera Learns New Tricks

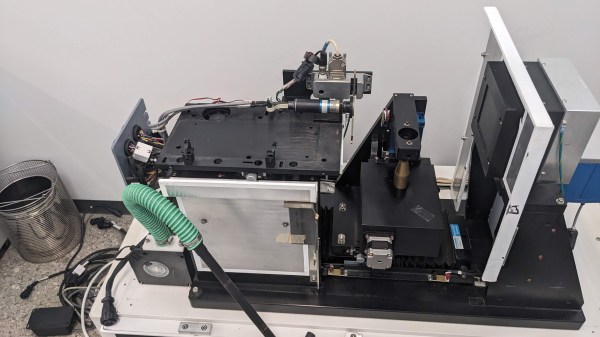
In the 1950s the major Hollywood studios needed impressive cinematic technologies for their epic movies, to both see off the threat from television, and to differentiate themselves from their competitors. For most of them this meant larger screens and thus larger frame film, and for Paramount, this meant VistaVision. [Steve Switaj] is working on one of the original VistaVision cameras made for the studio in the 1950s, and shares with us some of the history and the work required to update its electronics for the 2020s.

VistaVision itself had a relatively short life, but the cameras were retrieved from storage in the 1980s because their properties made them suitable for special effects work. This mostly analog upgrade hardware on this one had died, so he set to and designed a PIC based replacement. Unexpectedly it uses through-hole components for ease of replacement using sockets, and it replaces a mechanical brake fitted to the 1980s upgrade with an electronic pull back on the appropriate reel motor.

The whole thing makes for an interesting delve into some movie history, and also a chance to see some tech most of us will never encounter even if we have a thing for movie cameras.

On the left, an image of a COB on the multimeter's PCB. On the right, a QFP IC soldered to the spot where a COB used to be, with pieces of magnet wire making connections from the QFP's pins to the PCB tracks.

Epoxy Blob Excised Out Of Broken Multimeter, Replaced With A QFP

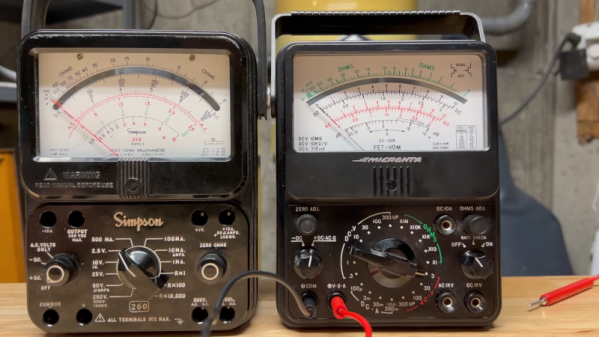
The black blobs on cheap PCBs haunt those of us with a habit of taking things apart when they fail. There’s no part number to look up, no pinout to probe, and if magic smoke is released from the epoxy-buried silicon, the entire PCB is toast. That’s why it matters that [Throbscottle] shared his journey of repairing a vintage multimeter whose epoxy-covered single-chip-multimeter ICL7106 heart developed an internal reference fault. When a multimeter’s internal voltage reference goes, the meter naturally becomes useless. Cheaper multimeters, we bin, but this one arguably was worth reviving.

[Throbscottle] doesn’t just show what he accomplished, he also demonstrates exactly how he went through the process, in a way that we can learn to repeat it if ever needed. Instructions on removing the epoxy coating, isolating IC pins from shorting to newly uncovered tracks, matching pinouts between the COB (Chip On Board, the epoxy-covered silicon) and the QFP packages, carefully attaching wires to the board from the QFP’s legs, then checking the connections – he went out of his way to make the trick of this repair accessible to us. The Instructables UI doesn’t make it obvious, but there’s a large number of high-quality pictures for each step, too.

The multimeter measures once again and is back in [Throbscottle]’s arsenal. He’s got a prolific history of sharing his methods with hackers – as far back as 2011, we’ve covered his guide on reverse-engineering PCBs, a skillset that no doubt made this repair possible. This hack, in turn proves to us that, even when facing the void of an epoxy blob, we have a shot at repairing the thing. If you wonder why these black blobs plague all the cheap devices, here’s an intro.

We thank [electronoob] for sharing this with us!

TRS-80 Model II Lives Again

A lot of people had a Radio Shack TRS-80 Model I. This was a “home computer” built into a keyboard that needed an external monitor or TV set. Later, Radio Shack would update the computer to a model III which was a popular “all in one” option with a monitor and even space for — gasp — floppy disks. But the Model II was not nearly as common. The reason? It was aimed at businesses and priced accordingly. [Adrian] got a Model II that was in terrible shape and has been bringing it back to life. You can see the video of how he’s done with it, below.

The Model II was similar to the older “Trash 80” which had been used — to Radio Shack’s surprise — quite often by businesses. But it had more sophisticated features including a 4MHz CPU — blistering speed for those days. It also had an 80×25 text display and a 500K 8-inch floppy drive. There were also serial and printer ports standard.

There were a few interesting features. The floppy drive’s spindle ran on AC power and if the computer was on, the disk was spinning. In addition, there was bank switching so you could go beyond 64K and also you didn’t have to share your running memory with the video display. In theory, the machine could go beyond 64K since half the memory was bank switchable. In practice, the early models didn’t have enough expansion space to handle more than 64K physically.

Continue reading “TRS-80 Model II Lives Again”

Troubleshooting Barcodes: A Lesson In Critical Thinking

We’ve all been there. Something that is known to work doesn’t work out in the field. But back at home base, it works fine. How do you fix it? Of course, there’s no one right answer to that question, but [Benji York] had a particularly satisfying round of troubleshooting some errant barcodes and even came up with a very creative solution.

Here’s the setup: a customer couldn’t read some barcodes sent from [Benji’s] company. Yet when the bad barcodes returned, they were fine. They looked fine, too. In a Twitter post, [Benji] challenges you to see if you can tell what’s wrong.

Continue reading “Troubleshooting Barcodes: A Lesson In Critical Thinking”

Small Engine Failure Leads To Impromptu Teardown

When the 6.5 HP (212 cc) Harbor Freight Predator engine in his kid’s go-kart gave up the ghost after some particularly hard driving, [HowToLou] figured it would be a good time to poke around inside the low-cost powerplant for our viewing pleasure. As a bonus, he even got it up and running again.

The shattered rod, and its replacement.

For an engine that has a retail price of just $160 USD, we’ve got to admit, the inside of the Predator doesn’t look too shabby. Admittedly, [HowToLou] determined that the cause of the failure was a blown connecting rod, but he also mentions that somebody had previously removed the engine’s governor, allowing it to rev up far beyond the nominal maximum of 3,600 RPM. No word on who snuck in there and yanked the governor out, but we’re betting it wasn’t the 7-year old driver…

Replacing the connecting rod meant taking most of the engine apart, but for our education, [HowToLou]  decided to take it a bit further and remove everything from the engine. After stripping it down to the block, he re-installs each piece while explaining its function. If you’ve ever wanted to see what makes one of these little engines tick, or perhaps you’ve got a Predator 212 cc in need of a repair or rebuild, the presentation is a fantastic resource.

Incidentally, this isn’t the first time we’ve seen the go-kart in question — back in June, we covered the unique electric reverse that [HowToLou] came up with for it.