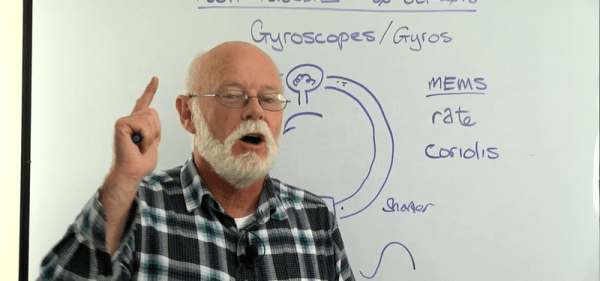
It wasn’t long ago that a gyro — or gyroscope — was an exotic piece of electronics gear. Most of us only saw them as children’s toys that would balance on your finger. That’s changed, though, thanks to microelectronics. Now your game controller, your phone, and your drone all probably use little ICs that are actually three-axis gyroscopes. Ever wonder how they work and what they do? [RCModelReviews] has a video that covers three kinds of gyros: old mechanical gyros, modern MEMS gyros, and even an exotic laser-based gyro. (YouTube, embedded below.)
Gyroscopes allow you to detect orientation by detecting linear forces on a rotating element. They are used in everything from spacecraft to submarines. The device has many origins dating back to antiquity. But the modern gyro showed up around 1800 or so. The children’s toy appeared in 1917 and is still made today.
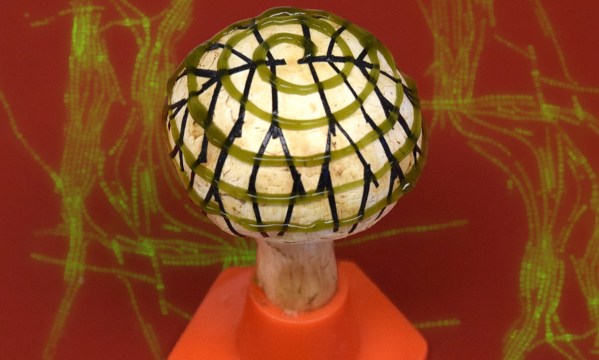
Of all the fictional cyborgs who turn against humanity to conquer the planet, this is as far from that possibility as you can get. These harmless mushrooms seem more interested in showing off their excellent fashion sense with a daring juxtaposition of hard grid lines with playful spirals. But the purpose of this bacteria-fungus-technology hybrid is to generate electricity. The mushrooms are there to play nurse to a layer of cyanobacteria, the green gel in the photo, while the straight black lines harvest electricity.
Cyanobacteria do not live very long under these kinds of conditions, so long-term use is out of the question, but by giving the cyanobacteria somewhere it can thrive, the usefulness grows. The interplay between bacterial and supportive organics could lead to advances in sensors and hydrogels as well. At some point, we may grow some of our hardware and a green thumb will be as useful as a degree in computer science.
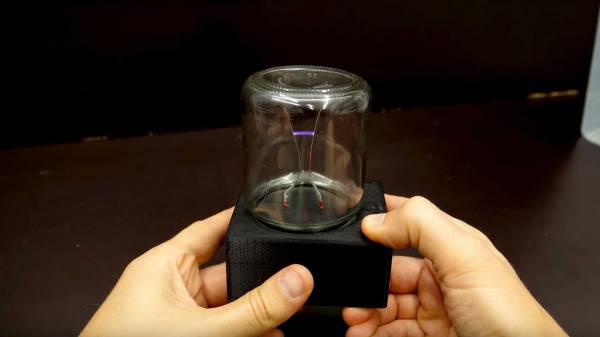
File this one away for your mad scientist costume next Halloween: [bitluni]’s Pocket Jacob’s Ladder is the perfect high voltage accessory for those folks with five dollars in parts, a 3D printer, and very big pockets.
[bitluni]’s video shows you all the parts you’ll need and guides you through the very simple build process. For parts, you’ll require a cheap and readily-available high-voltage transformer, a battery holder, some silver wire for the conductors, and a few other minor bits like solder and a power switch.
Once the electronics are soldered together, they’re stuffed inside a 3d printed case that [bitluni] designed with FreeCAD. The FreeCAD and STL files are all available on Thingiverse. We’re not sure what type of jar [bitluni] used to enclose the electrodes. If your jar isn’t a match, you’ll have to get familiar with FreeCAD or start from scratch with your favorite CAD package.
Either way, we enjoy the slight nod toward electrical safety and the reuse of household objects for project enclosures.
Like any complex topic, electromagnetic theory has its own vocabulary. When speaking about dielectrics we may refer to their permittivity, and discussions on magnetic circuits might find terms like reluctance and inductance bandied about. At a more practical level, a ham radio operator might discuss the impedance of the coaxial cable used to send signals to an antenna that will then be bounced off the ionosphere for long-range communications.
It’s everyday stuff to most of us, but none of this vocabulary would exist if it hadn’t been for Oliver Heaviside, the brilliant but challenging self-taught British electrical engineer and researcher. He coined all these terms and many more in his life-long quest to understand the mysteries of the electromagnetic world, and gave us much of the theoretical basis for telecommunications.
[NileRed] admits that while ferrofluid has practical uses, he simply wanted to play with it and didn’t want to pay the high prices he found in Canada. A lot of the instructions he found were not for making a true ferrofluid. He set out to create the real thing, but he wasn’t entirely successful. You can see the results — which aren’t bad at all — in the video below.
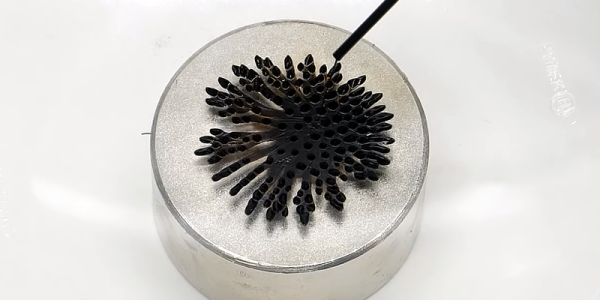
We’ve always said you learn more from failure than success. The process of creating ferrofluid involves two key steps: creating coated nanoparticles of magnetite and removing particles that are too large or improperly coated. After the first not entirely satisfactory attempt, [NileRed] tried to purify the material using solvents and magnets to create better-quality particles. Even the “bad” material, though, looked fun to play with along with a powerful magnet.
You’ll see that the material is clearly magnetic, it just doesn’t spike like normal ferrofluid. [NileRed] had commercial ferrofluid for testing and found that if he diluted it enough, it behaved like his homemade fluid. So while not conclusive, it seems like he diluted the batch too much.
We hope to see a better batch from him soon. The base material he used for the first patch was homemade — he covers that in a different video. However, for the second batch, he is going to start with commercial ferric chloride — what we know as PCB etchant.
Even though the experiment was not entirely successful, we enjoyed seeing the process and watching the performance of both the homemade batch and the commercial ferrofluid. He’s getting a lot of advice and speculation in the video comments, and it is very possible a Hackaday reader might be able to help, too.
In the 1970s, the Soviet Union decided to dig a hole for science. Not just any hole, the Kola Superdeep Borehole reached a depth of over 12 kilometers, the deepest at the time and the second deepest today by just a few meters. Since this was one of the few holes dug this deep that wasn’t being drilled for oil, the project was eventually abandoned. [Dmitry] was able to find some core samples from the project though, and he headed up to the ruins of the scientific site with his latest project which produces musical sounds from the core samples.
The musical instrument uses punched tape, found at the borehole site, as a sort of “seed” for generating the sounds. Around the outside of the device are five miniature drilling rigs, each holding a piece of a core sample from the hole. The instrument uses the punched tape in order to control the drilling rigs, and the sound that is created is processed by the instrument and amplified, which creates some interesting and rather spooky sounds. The whole thing is controlled by an Arduino Mega.
Not only does the project make interesting sounds from a historically and scientifically significant research station and its findings, but the project has a unique and clean design that really fits its environment at the abandoned facility. The other interesting thing about this project is that, if you want to make the trek, anyone can go explore the building and see the hole for themselves. If you’re wondering about the tools that could be used to make a hole like this, take a look at this boring project.
In the 1966 science fiction movie Fantastic Voyage, medical personnel are shrunken to the size of microbes to enter a scientist’s body to perform brain surgery. Due to the work of this year’s winners of the Nobel Prize in Physics, laser tools now do work at this scale.
Arthur Ashkin won for his development of optical tweezers that use a laser to grip and manipulate objects as small a molecule. And Gérard Mourou and Donna Strickland won for coming up with a way to produce ultra-short laser pulses at a high-intensity, used now for performing millions of corrective laser eye surgeries every year.
Here is a look at these inventions, their inventors, and the applications which made them important enough to win a Nobel.