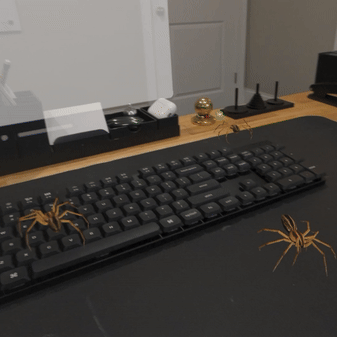
It Isn’t WebAssembly, But It Is Assembly In Your Browser

You might think assembly language on a PC is passe. After all, we have a host of efficient high-level languages and plenty of resources. But there are times you want to use assembly for some reason. Even if you don’t, the art of writing assembly language is very satisfying for some people — like an intricate logic puzzle. Getting your assembly language fix on a microcontroller is usually pretty simple, but on a PC there are a lot of hoops to jump. So why not use your browser? That’s the point of this snazzy 8086 assembler and emulator that runs in your browser. Actually, it is not native to the browser, but thanks to WebAssembly, it works fine there, too.

No need to set up strange operating system environments or link to an executable file format. Just write some code, watch it run, and examine all the resulting registers. You can do things using BIOS interrupts, though, so if you want to write to the screen or whatnot, you can do that, too.

The emulation isn’t very fast, but if you are single-stepping or watching, that’s not a bad thing. It does mean you may want to adjust your timing loops, though. We didn’t test our theory, but we expect this is only real mode 8086 emulation because we don’t see any protected mode registers. That’s not a problem, though. For a learning tool, you’d probably want to stick with real mode, anyway. The GitHub page has many examples, ranging from a sort to factorials. Just the kind of programs you want for learning about the language.

Why not learn on any of a number of other simulated processors? The 8086 architecture is still dominant, and even though x86_64 isn’t exactly the same, there is a lot of commonalities. Besides, you have to pretend to be an 8086, at least through part of the boot sequence.

If you’d rather compile “real” programs, it isn’t that hard. There are some excellent tutorials available, too.

Tired Of Web Scraping? Make The AI Do It

[James Turk] has a novel approach to the problem of scraping web content in a structured way without needing to write the kind of page-specific code web scrapers usually have to deal with. How? Just enlist the help of a natural language AI. Scrapeghost relies on OpenAI’s GPT API to parse a web page’s content, pull out and classify any salient bits, and format it in a useful way.

What makes Scrapeghost different is how data gets organized. For example, when instantiating scrapeghost one defines the data one wishes to extract. For example:

from scrapeghost import SchemaScraper
scrape_legislators = SchemaScraper(
schema={
"name": "string",
"url": "url",
"district": "string",
"party": "string",
"photo_url": "url",
"offices": [{"name": "string", "address": "string", "phone": "string"}],
}
)

The kicker is that this format is entirely up to you! The GPT models are very, very good at processing natural language, and scrapeghost uses GPT to process the scraped data and find (using the example above) whatever looks like a name, district, party, photo, and office address and format it exactly as requested.

It’s an experimental tool and you’ll need an API key from OpenAI to use it, but it has useful features and is certainly a novel approach. There’s a tutorial and even a command-line interface, so check it out.

Your Fuji Digital Camera Is Hackable

There was a time when a digital camera was a surprisingly simple affair whose on-board processor didn’t have much in the way of smarts beyond what was needed to grab an image from the sensor and compress it onto some storage. But as they gained more features, over time cameras acquired all the trappings of a fully-fledged computer in their own right, including full-fat operating systems and the accompanying hackability opportunities.

Prominent among camera manufacturers are Fujifilm, whose cameras it turns out have plenty of hacking possibilities. There’s something of a community about them, with all their work appearing in a GitHub repository, and a cracking April Fool in which a Fujifilm camera appears able to be coaxed into running DOOM.

Correction: We’ve since heard from creator [Daniel] who assures us that not only was the DOOM hack very much real, but that he’s released the instructions on how to run the classic shooter on your own Fujfilm X-A2.

Fujifilm cameras past 2017 or so run the ThreadX real-time operating system on a variety of ARM SoCs, with an SQLite data store for camera settings and some custom software controlling the camera hardware. The hackability comes through patching firmware updates, and aside from manipulating the built-in scripting language and accessing the SQLite database, can include code execution.

Don’t have a Fujifilm? They’re not the only hackable camera to be found.

Spice Up The Humble 16×2 LCD With Big Digits

The 16×2 LCD display is a classic in the microcontroller world, and for good reason. Add a couple of wires, download a library, mash out a few lines of code, and your project has a user interface. A utilitarian and somewhat boring UI, though, and one that can be hard to read at a distance. So why not spice it up with these large-type custom fonts?

As [upir] explains, the trick to getting large fonts on a display that’s normally limited to two rows of 16 characters each lies in the eight custom characters the display allows to be added to its preprogrammed character set. These can store carefully crafted patterns that can then be assembled to make reasonable facsimiles of the ten numerals. Each custom pattern forms one-quarter of the finished numeral, which spans what would normally be a two-by-two character matrix on the display. Yes, there’s a one-pixel wide blank space running horizontally and vertically through each big character, but it’s not that distracting.

Composing the custom patterns, and making sure they’re usable across multiple characters, is the real hack here, and [upir] put a lot of work into that. He started out in Illustrator, but quickly switched to a spreadsheet because it allowed him to easily generate the correct binary numbers to pass to the display for each pattern. It seems to have really let his creative juices flow, too — he came up with 24 different fonts! Our favorite is the one he calls “Tron,” which looks a bit like the magnetic character recognition font on the bottom of bank checks. Everyone remembers checks, right?

Hats off to [upir] for a creative and fun way to spice up the humble 16×2 display. We’d love to see someone pick this up and try a complete alphanumeric character set, although that might be a tall order with only eight custom characters to work with. Then again, if Bad Apple on a 16×2 is possible…

Continue reading “Spice Up The Humble 16×2 LCD With Big Digits”

Opening Up ASIC Design

The odds are that if you’ve heard about application-specific integrated circuits (ASICs) at all, it’s in the context of cryptocurrency mining. For some currencies, the only way to efficiently mine them anymore is to build computers so single-purposed they can’t do anything else. But an ASIC is a handy tool to develop for plenty of embedded applications where efficiency is a key design goal. Building integrated circuits isn’t particularly straightforward or open, though, so you’ll need some tools to develop them such as OpenRAM.

Designing the working memory of a purpose-built computing system is a surprisingly complex task which OpenRAM seeks to demystify a bit. Built in Python, it can help a designer handle routing models, power modeling, timing, and plenty of other considerations when building static RAM modules within integrated circuits. Other tools for taking care of this step of IC design are proprietary, so this is one step on the way to a completely open toolchain that anyone can use to start building their own ASIC.

This tool is relatively new and while we mentioned it briefly in an article back in February, it’s worth taking a look at for anyone who needs more than something like an FPGA might offer and who also wants to use an open-source tool. Be sure to take a look at the project’s GitHub page for more detailed information as well. There are open-source toolchains if you plan on sticking with your FPGA of choice, though.

Screenshot of the demonstration video that shows the desktop being unlocked with face recognition, with a camera feed and a terminal showing how the software works.

Open-Source FaceID With RealSense

RealSense cameras have been a fascinating piece of tech from Intel — we’ve seen a number of cool applications in the hacker world, from robots to smart appliances. Unfortunately Intel did discontinue parts of the RealSense lineup at one point, specifically the LiDAR and face tracking-tailored models. Apparently, these haven’t been popular, and we haven’t seen these in hacks either. Until now, that is. [Lina] brings us a real-world application for the RealSense face tracking cameras, a FaceID application for Linux.

The project is as simple as it sounds: if the camera’s built-in face recognition module recognizes you, your lockscreen is unlocked. With the target being Linux, it has to tie into the Pluggable Authentication Modules (PAM) subsystem for authentication, and of course, there’s a PAM module for RealSense to go with it, aptly named pam_sauron. This module is written in Zig, a modern C-like language, so it’s both a good example of how to create your own PAM integrations, and a path towards doing that in a different language for once. As usual, there’s TODOs, like improving the UX and taking advantage of some security features RealSense cameras have, but it’s nevertheless a fun and self-sufficient application for one of the F4XX-series RealSense cameras in case you happen to own one.

Ever since the introduction of RealSense we’ve seen these cameras used in robotics and 3D scanning, thanks at least in part due to their ability to be used in Linux. Thankfully, Intel only discontinued the less popular RealSense cameras, which didn’t affect the main RealSense lineup, and the hacker-beloved depth cameras are still available for all of our projects. Wondering about the tech behind it? Here’s a teardown of a RealSense camera module intended for laptop use.

Generating Instead Of Storing Meshes

The 64kB is a category in the demoscene where the total executable size must be less than 65,536 bytes, and at that size, storing vertexes, edges, and normal maps is a waste of space. [Ctrl-Alt-Test] is a French Demoscene group that has been doing incredible animations for the last 13 years. They’ve written an excellent guide on how they’ve been procedurally generating the meshes in their demos.

It all starts with cubes. By stacking them, overlaying them, reusing them, and tiling them you can get better compression than raw vertexes. Revolution was the next trick, as it uses just a few points, plotting it via Catmul-Rom splines, and revolving around an axis. The numbers are pairs of 32-bit floats and before compression, a detailed pawn on a chess board can weigh in at just 40 bytes. Just these few techniques can take you surprisingly far (as seen in the picture above).

They later worked on deforming cubes and placing them into a semi-randomized column, which happened to look a lot like plants. This isn’t the first generated vegetation we’ve seen, and the demoscene technique focused more on getting the shape and setting the mood rather than being accurate.

Signed distance fields are another useful trick that allows you to generate a mesh by implementing a signed distance function and then running a marching cubes algorithm on it. In a nutshell, a signed distance function just returns the distance to the closest point on a surface from a given point. This means you can describe shapes with just a single mathematical equation. As you can imagine, this is a popular technique in the demoscene world because it is so space efficient in terms of code and data. [Ctrl-Alt-Test] even has a deep dive into one of their projects, Immersion, with a breakdown of where the space is allocated.

There are plenty of other tips and tricks here, such as generating textures and developing a C++ hot reload system for faster iteration. It’s just incredible that the executable that plays the whole video is smaller than just a JPEG screenshot of the video. It’s a reminder that the demoscene is still fascinating with new tricks and experiences even as the hardware stays the same. Continue reading “Generating Instead Of Storing Meshes”