Improvised Metal Lathe

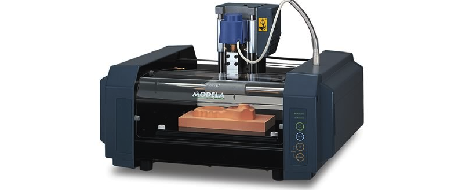
[McKGyver] needed a few parts manufactured. Instead of going the normal route – finding friends with machine tools or paying a machine shop, he improvised a rudimentary metal lathe.

As much as we love 3D printers, they’re not the be-all, end-all solution for everything. Sometimes, you need to get a little dirty and do it the old-fashioned way. [McKGyver] needed a way to produce aluminum shaft couplers to join stepper motors to lead screws. A 1940s grinding wheel was used for the headstock. Since [McKGyver] only needed couplers of one size, he made a jig out of wood to attach the aluminum blanks to the spindle. A drill and a focuser from a photographic enlarger makes up the tailstock of the improvised lathe. The use of a camera focuser is pretty clever. Unless the equipment has been damaged, it’s guaranteed to move in a straight line. A small laser was used to align the drill.

The finished couplers were concentric to 0.005″. A ‘passable precision’ for his application, and a clever build that doesn’t involve moving a thousand pound South Bend lathe.

[Dino] Builds A Simple Non-contact Voltage Detector

homemade_voltage_detector

[Dino] is back with another installment of his Hack a Week series, and in this episode he is taking on what he promises will be the last transistor-based project – at least for a little while.

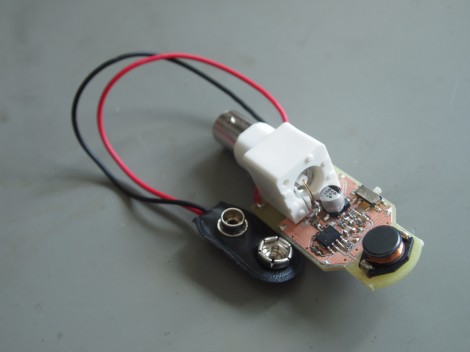
In the video embedded below, he shows off a homemade voltage detector circuit that he constructed using a trio of BC547 NPN transistors. The circuit is pretty simple though very useful all the same. At one end, the device has a small copper strip, which is connected to the base of the first transistor. The emitter of that transistor is daisy chained to the base of the second transistor and so on, until reaching the indicator LED.

As noted by one of [Dino’s] viewers, the circuit functions as follows:

“The front end copper strip forms one side of a capacitor, and then when you bring it near a voltage potential a super tiny current flows between air dielectric of the “cap”. This is mega amplified with the high gain BC547′s and viola, the LED lights up.”

Since the small bit of current is amplified many times over, the LED lights up even when very small voltages are present. While we might not necessarily trust our lives to [Dino’s] voltage detector, we’re sure it would come in handy now and again.

Continue reading “[Dino] Builds A Simple Non-contact Voltage Detector”

PIC LC Meter Improvements Add Li-Ion Battery And Charging Circuitry

[Trax] needed an LC meter and decided to use a tried-and-true design to build his own. The only problem was that he didn’t want to be tied to a bench supply or power outlet, which meant a bit of auxiliary design was in order. What he came up with is the battery-powered LC meter you see above.

The core of the original [Phil Rice] design remains the same, with slight modifications to drive a different model of character LCD. The code is mostly unchanged, but some calibration routines became necessary after [Marko] noticed bugs in the behavior after power cycling. Now the device will perform what amounts to a hardware reset about 700ms after powering on or changing between inductance and capacitance measuring functions. The project box is quite small, and to get everything to fit [Marko] sourced the Lithium Ion battery from a Bluetooth headset. He needs 5V for the LCD screen so he used a TPS61222 boost converter. To top off the battery he’s included a MAX1811 single-cell Li-ion charger, which has a couple of status LEDs visible through the case as seen above.

[Thanks Marko]

8 Breadboard Hacks To Make Life Easier

If you like messing around with electronics, one of the best tools you can have on hand is a solderless breaboard. These handy little chunks of plastic just let you “plug n play” so you can quickly develop a circuit before committing it to solder and fiberglass. Handy as they are, they do have their downsides such as:  stuff not fitting, split up power rails, running out of jumpers or just taming what can quickly become a birds nest of a mess.

Luckily the folks over at [Proto Stack] have published a handy article giving us 8 Breadboard Hacks. While anyone that has used breadboads for any length of time will have probably figured most of these out, its still good knowledge for any newcomers to the sometimes aggravating world of plastic and jumpers.

Also we know there are more hacks you can do to make your lives easier and would love to hear them in the comments.

Toaster Oven Forgoes Pop-Tarts, Reflows Solder

For SMD work, solder paste and a heat gun is great. Heat guns aren’t the cheapest thing, so [Karel] decided to make cheap reflow oven out of a toaster oven. With a PCB taken from a laminator temperature control board, the build was fairly successful, so [Karel] decided to add a thermistor to his oven.

There was a problem with placing this thermistor near the board: solder melts in a reflow oven, so [Karel] needed to figure how to connect the thermistor to the control board outside the oven. The solution was crimping thin copper tubing to the thermistor leads and passing that tube through the wall of the oven. Epoxy was used to avoid an electrical short. A low tech solution, but very effective. After applying some solder paste and going in the oven, this board looks very clean. There are a few solder bridges, but nothing a wick can’t take care of.

[Karel] is now working on an update to the temperature controller that controls the oven over a serial connection. Check out the video of a few temperature cycles after the break.

Continue reading “Toaster Oven Forgoes Pop-Tarts, Reflows Solder”

An Open-Source Rotational Casting Machine

[Aurelio] wrote in to tell us about the smartCaster, an “Open source automatic roto-casting machine.”  For those of you not familiar with roto-casting, or rotational molding, it’s a process whereby something to be formed is placed into a mold and then melted while spinning.  This item is often plastic, but it can be another material such as plaster of Paris or even chocolate.

Naturally, having something made using this process is generally very expensive and generally requires a high volume of parts to be made. The smartCaster Kickstarter project aims to change this. Although in the prototype stage currently, [Aurelio] claims to need only $1571 to finish his project and make it ready for the prospective at-home rotational molder.

Although it’s a much different tool than we see here most of the time, for the right project (custom Easter Bunnies anyone?) it could be quite useful. Check out a video of the prototype in action after the break. Continue reading “An Open-Source Rotational Casting Machine”

Upverter: It’s Like Github For Hardware

If there’s one thing we’ve noticed about hardware hackery and electronics project, it’s that all the resources to build a project are scattered about the Internet on forums, blogs (heh), and personal web pages. Enter Upverter. The fellows who started Upverter had the same observation, and after some Y Combinator funding, launched what they hope to be “The Github of electronics” and the “Google Docs of hardware design.”

Upverter has the features we would expect – forking, versioning, and integration with Github for a project’s code. Already there’s a few cool projects, like a PIC programmer, a TV-B-Gone, and a tiny version of Conway’s Game Of Life.

We’re not ready to wave the banner of an Upverter fanboy quite yet. There’s quite a number of components available in the schematic editor, but from our experience the component library could use some refinement both by weeding out duplicates and increasing the number of parts. We’d also like to put a zoom control for the schematic view on our wish list. Upverter doesn’t have a PCB editor either, but from this post from a VC rag, the team is working on one. While this is really just nitpicking – Upverter launched less than 24 hours ago – we’ll be happy to see the some projects roll in on the tip line that are hosted on Upverter.

EDIT: link to the Google cache, because we probably Slashdotted it. It’s up for now.