Metalworking has always been very much a “mixed method” art. Forging, welding, milling, grinding; anything to remove metal or push it around from one place to another is fair game when you’ve got to make something fast. Adding in fancy new tools like CNC plasma cutting and computer-aided drafting doesn’t change that much, although new methods often do call for a little improvisation.
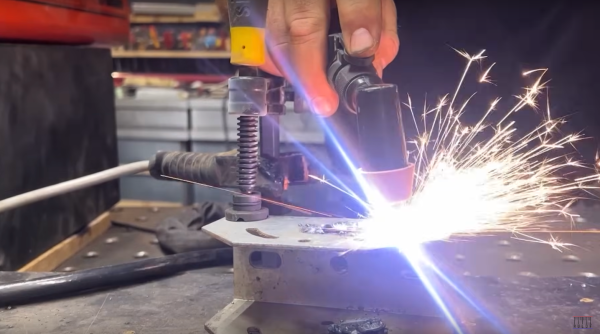
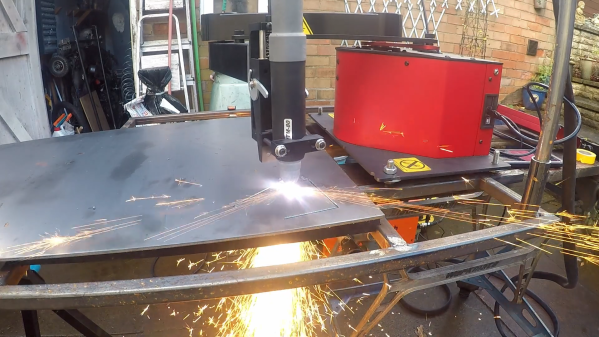
Getting several methodologies to work and play well together is what [tonygoacher] learned all about while trying to fabricate some brackets for an electric trike for next year’s EMF Camp. The parts would have been perfect for fabrication in a press brake except for the 4 mm thickness of the plate steel, which was a little much for his smallish brake. To make the bending a little easier, [tony] made a partial-thickness groove across the plasma-cut blank, by using a reduced power setting on the cutter. This worked perfectly to guide the brake’s tooling, but [tony] ran into trouble with more complicated bends that would require grooves on both sides of the steel plate.
His solution was to 3D print a couple of sacrificial guide blocks to fit the bed of the press brake. Each guide had a ridge to match up with a guide groove, this allowed him to cut his partial grooves for both bends on the same side of the plate but still align it in the press brake. Yes, the blocks were destroyed in the process, but they only took a few minutes to print, so no big deal. And it’s true that the steel tore a little bit when the groove ended up on the outside radius of the bend, but that’s nothing a bead of weld can’t fix. Good enough for EMF is good enough, after all.
The brief video below shows the whole process, including [tony]’s interesting SCARA-like CNC plasma cutter, which we’re a little in love with now. This isn’t the first time we’ve seen 3D prints used as tools in metalworking, of course, but we picked up some great tips from this one. Continue reading “Plasma Cutting And 3D Printing Team Up To Make Bending Thick Sheet Steel Easier”