Making Custom Gradient Markers At Home

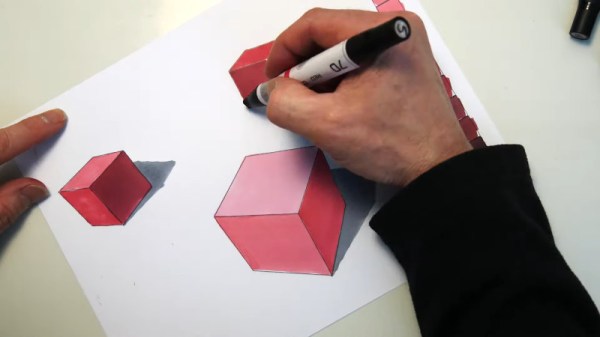
When doing high-end industrial illustration work, smooth gradients add a lot of production value to the final product. However, markers designed to do this well can be difficult to lay your hands on. [Eric] decided to create his own set of custom gradient markers, using commonly available supplies.

Starting with some existing markers that have dried out, the fabric ink reservoir inside is removed. A new one is created using tampons wrapped in heat-shrink, to replicate the construction of the original. Alcohol-based ink is required for smooth gradients, and [Eric] suggests using a heat gun to harvest the ink from a ballpoint pen, if store-bought is not available. The ink is then mixed with denatured alcohol to dilute it and injected into the fabric reservoir using a syringe. Each marker gets a slightly different ink mix to hit a range of lightness values for making smooth gradients.

It’s a tidy way of creating your own gradient markers in whatever color you may find useful. As a plus, the materials to do so are cheap and easy to obtain. We could even imagine 3D-printed marker bodies being an option, though nibs might prove a touch more difficult. We’ve seen [Eric]’s work before too, like this well-illustrated guide to using cardboard in product design. Video after the break.

Continue reading “Making Custom Gradient Markers At Home”

Now This Is A Maker’s PCB Shaker

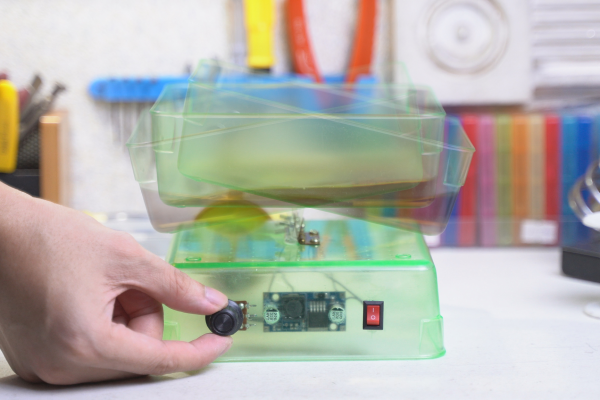
Anyone who has ever etched their own PCB knows that the waiting is the hardest part. Dissolving copper in ferric chloride takes time, much like developing a Polaroid picture. And although you really should not shake a fresh Polaroid to speed up development, the PCB etching process thrives on agitation. Why wait an hour when you can build a simple PCB shaker and move on to drilling and/or filling in 10 minutes?

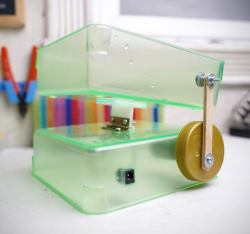
We love that [ASCAS] was probably able to build this without reaching past the the spare parts box and the recycling bin. There’s no Arduino or even a 555 — just a 12 VDC geared motor, a DC-DC buck converter, and an externalized pot to control the speed of the sloshing.

It’s hard to choose a favorite hack here between the hinge used to rock this electric seesaw and the crankshaft/armature [ASCAS] made from a sandwich spread lid and a Popsicle stick. Everything about this build is beautiful, including the build video after the break.

Did you know that unlike ferric chloride, copper chloride can be recharged and reused? Here’s a one-stop etching station that does just that.

Continue reading “Now This Is A Maker’s PCB Shaker”

Solder To Aluminum

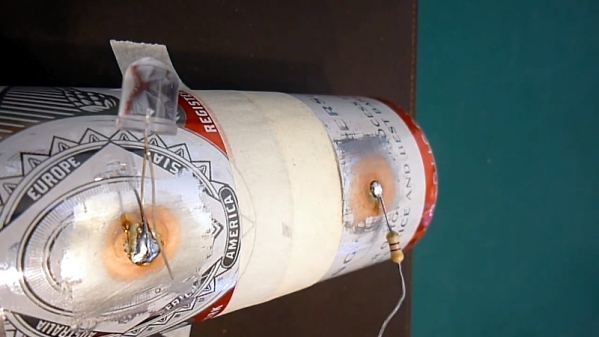
If you’ve ever tried to solder to aluminum, you know it isn’t easy without some kind of special technique. [SimpleTronic] recently showed a method that chemically plates copper onto aluminum and allows you to solder easily. We aren’t chemists, so we aren’t sure if this is the best way or not, but the chemicals include salt, copper sulfate (found in pool stores), ferric chloride as you’d use for etching PCBs, and water.

Once you have bare aluminum, you prepare a solution from the copper sulfate and just a little bit of ferric chloride. Using salt with that solution apparently removes oxidation from the aluminum. Then using the same solution without the salt puts a copper coating on the metal that you can use for soldering. You can see a video of the process below.

Continue reading “Solder To Aluminum”

Soon… Inkjet Your Circuit Boards

Printed circuit board fabrication — especially in basements and garages — have been transformed by the computer revolution. Before that, people would use a permanent marker or little decals to layout circuit boards prior to etching. Sometimes, they’d do it on film and use a photo process, but they did make decals that you applied directly to the board to resist the etch. Now a team from Georgia Tech, University of Tokyo, Carnegie Mellon, and the University of Nebraska has brought things full circle. Their process inkjet prints silver traces on a substrate that they can then transfer to a circuit board — no etching required.

They start with a standard Epson inkjet with cartridges that have silver-bearing ink. The patterns print on a transfer paper that ensures the particles fuse so there’s no sintering step required to make sure the traces are all conductive. A sticky backing is applied and peels the pattern off the transfer paper. You can see more in the video below.

Continue reading “Soon… Inkjet Your Circuit Boards”

Dremel Workstation’s New Job: Applying Threaded Inserts With Cheap Soldering Iron

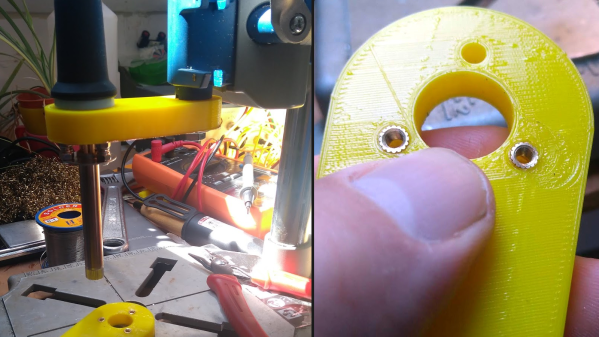
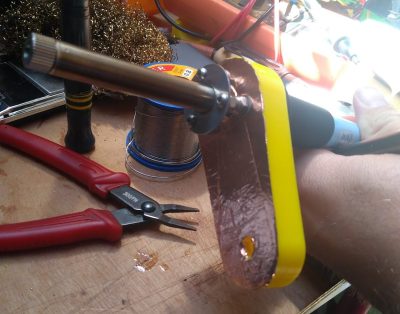
Dremel has been helping people fit square pegs into round holes for years, and [concretedog] saw that the Dremel 220 Workstation — a piece of hardware similar to a drill press — could be convinced to hold a cheap soldering iron just as easily as it holds a rotary tool. A soldering iron makes an effective thermal insert tool, and the job of heating and pressing the threaded metal rings into plastic is made much easier when it can be done similar to operating a drill press. With a few modifications and a 3D-printed adapter, the thermal insert rig was born.

Whenever one is working around a design that already exists, it pays to be flexible and adjust to the unexpected. The Dremel 220 has a holder intended to clamp a rotary tool, and the original plan was to simply design and print an adapter so a soldering iron could sit in place of the rotary tool. That plan changed upon realizing that the entire rotary tool holder disconnected from the tool’s frame with a single bolt. It made much more sense to make the soldering iron replace the rotary tool holder, instead.

The resulting modified soldering iron is mounted via standoffs to a 3D-printed adapter with a copper foil heat shield. [concretedog] admits it’s not ideal from a heat management perspective, but it makes a fine prototype that seems to work well for light duty. The next step would be a metal version.

If you’re intrigued by threaded heat-set inserts, you can learn all about how to use them from Joshua Vasquez’s guide to the handy things. And should you prefer to make your own DIY press from 3D printed parts and off-the-shelf hardware, we have that covered as well.

Vernier Calipers And Micrometer Screw Gauges, Measuring Without Compromise

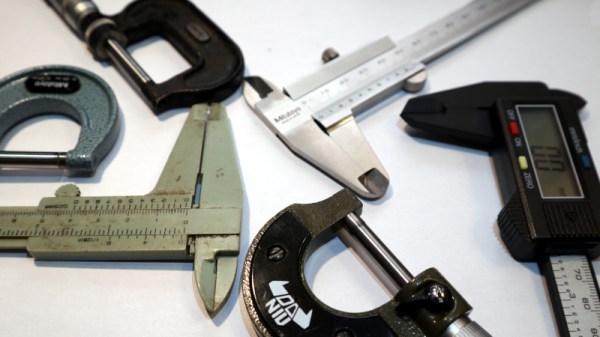
I needed a temperature controller module recently, so off I went to Banggood to order one. As one does I found myself browsing, one thing led to another, and I bought a micrometer screw gauge. While micrometers are pretty expensive devices, reflecting their high precision engineering and construction, this micrometer cost me only about £8, or just under $10, definitely in the spirit of our long-running series of reviewing very cheap tools in search of a diamond in the rough. But perhaps more importantly, this is also the cue for an examination of high precision dimensional measurement. So I’ve assembled a collection of micrometers and vernier calipers of varying quality, and it’s time to dive in and measure some very small things.

Some of you will be metrology enthusiasts with an array of the finest devices available, but I am guessing that many of you will not. The ubiquitous precision measurement device in our community appears to be the digital caliper, a sliding clamp with an LCD display, an instrument that can be had in its most basic form for a very small outlay indeed. For the purposes of this piece though we’re not looking at digital devices but their analogue precursors. If you want a feel for metrology and you’d like some of those heritage tools that parents pass onto their kids then it’s time to learn something about the vernier caliper and the micrometer. Continue reading “Vernier Calipers And Micrometer Screw Gauges, Measuring Without Compromise”

Adjustable Jig Eases PCB Stencil Alignment Process

PCB stencils make application of solder paste a snap, but there’s a long, fussy way to go before the paste goes on. You’ve got to come up with some way to accurately align the stencil over the board, which more often than not involves a jury-rigged setup using tape and old PCBs, along with a fair amount of finesse and a dollop of luck.

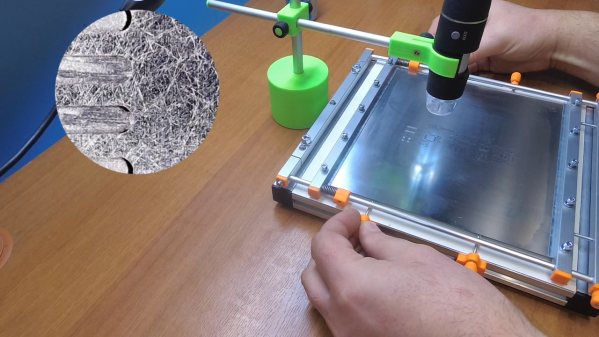
Luckily, [Valera Perinski] has come up with a better way to deal with stencils. The Stencil Printer is a flexible, adjustable alignment jig that reduces the amount of tedious adjustment needed to get things just so. The jig is built mostly from aluminum extrusions and 3D-printed parts, along with a bunch of off-the-shelf hardware. The mechanism has a hinged frame that holds the stencil in a fixed position above a platen, upon which rests the target PCB. The board is held in place by clamps that ride on threaded rods; with the stencil flipped down over the board, the user can finely adjust the relative positions of the board and the stencil, resulting in perfect alignment. The video below is mainly a construction montage, but if you skip to about the 29:00 mark, you’ll see the jig put through its paces.

Granted, such a tool is a lot more work than tape and spare PCBs, but if you do a lot of SMD work, it may be worth the effort. It’s certainly less effort than a solder-paste dispensing robot.

Continue reading “Adjustable Jig Eases PCB Stencil Alignment Process”