Prepare To Brake: Quick Intro To Metal Bending

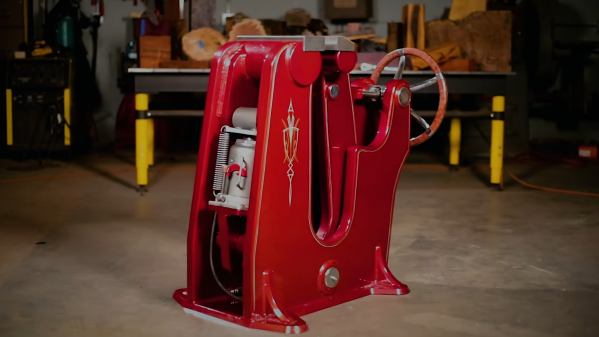
If you want to bend metal to make shapes, you might use equipment like a brake. But if you don’t have one, no worries. You can still do a lot with common tools like a vise and torches. [Bwrussell] shows you how. He welds together a die to use as a bending jig and makes a set of table legs.

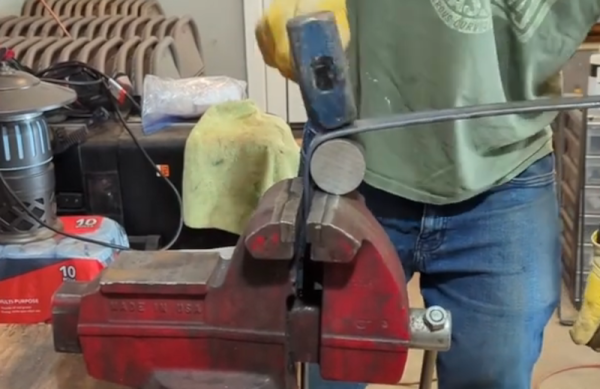
You might think that putting metal in a vise and bending it isn’t exactly brain surgery. It isn’t, but there is more to it than that. Starting with a bending plan and the creation of the jigs, clamping and bending is only part of it. You can see a little bit of the action in the video below.

Speaking of planning, the design was in Fusion 360’s sheet metal workflow. To facilitate the bends, the build uses two torches. A MAPP torch gets very hot, and a propane torch makes sure that a larger area stays hot. There are quite a few tips you can pick up in this post, even if you aren’t making table legs.

Fusion 360 does a lot of the design work, but if you want a quick lesson on what happens when you bend metal, we can help. Want to make your own metal brake?

Continue reading “Prepare To Brake: Quick Intro To Metal Bending”

Machining With Electricity Explored In The Hack Chat

As a Hackaday reader, it’s safe to assume you’ve got a better than average understanding of electricity. There’s also an excellent chance you’re familiar with machining, and may even have a lathe or old mill in the workshop. But combining the two, and actually machining a piece of metal with electricity, isn’t something that many home gamers can boast first-hand experience with.

Daniel Herrington

Of course, that doesn’t mean there isn’t an interest. To help answer the burning (or at least, sparking) questions from the community, CEO and founder of Voxel Innovations Daniel Herrington stopped by this week’s Hack Chat to talk about the cutting edge of both electric discharge machining (EDM) and the closely related field of electrochemical machining (ECM). While his company uses the technology to produce components at incredible scales, Daniel got his start tinkering in the garage like so many of us, enabling him to provide both a professional and hobbyist prospective on the technologies.

Naturally, the first big question to be addressed was the difference between EDM and ECM. Put simply, electric discharge machining uses high-voltage to literally blast away material from the workpiece. The resulting finish is generally rough, and progress through the material tends to be slow, but it’s relatively simple to implement.

In contrast electrochemical machining could be thought of as a sort of reverse electroplating process, as the material being removed from the workpiece is dissolved and transferred to the cathode — though in practice the flow of pressurized electrolyte keeps it from actually plating the negatively charged tool. ECM is a faster process than EDM and allows for an exceptionally smooth surface finish, but is considerably more challenging from a technical perspective. Continue reading “Machining With Electricity Explored In The Hack Chat”

3D Printed Circular Prototype Performance Prop Captivates Circus Spectators

When mathematically inspired maker [Henry Segerman] conspired with circus performer and acrobat [Marcus Paoletti] to advance the craft of acrobatics in round metal objects (such as cyr wheels and German Wheels), they came up with a fascinating concept that has taken shape in what [Henry] calls the Tao-Line.

Similar performance devices go in a straight line or can be turned on edge, but the Tao-Line is far more nimble. This is because the Tao-Line is not a continuous cylinder, but rather is made up of numerous circular shapes that allow the Tao-Line to be turned and inverted at different points in its rotation.

While a circus prop might not be your average Hackaday fare, it’s noteworthy because the Tao-Line started off as a 3D printed prototype, which was then turned into the metal fabrication you see in the video below the break.  It’s an excellent example of how modeling complex shapes as a physical product- not just a 3D model on the screen- can be helpful in the overall design and construction of the full scale piece.

If you’re looking to build something that’s under the big top but not quite so over the top, you might enjoy this mixed-media digital clock. Thanks to [Keith] for the great tip. Be sure to submit send your cool finds via the Tip Line!

Continue reading “3D Printed Circular Prototype Performance Prop Captivates Circus Spectators”

Homemade Metal Band Saw

As the channel name implies, [Workshop From Scratch] is building a growing list of tools and machines from scratch. His latest edition is a heavy-duty metal band saw.

As with all his tools, the frame consists of thick welded steel components. The blade runs on a pair of modified belt pulleys and is driven by a motor with a worm gearbox. The blade tension is adjustable, and so are the pair of blade guides. To slowly lower the blade while cutting, [Workshop From Scratch] added a hydraulic piston with an adjustable valve to limit the lowering speed. When it reaches the bottom, a limit switch turns off the motor. The saw is mounted on a heavy steel table and can rotate at the base to cut at different angles. A heavy-duty vise, also built from scratch holds the workpieces securely in place.

Judging by the amount of steel he cuts for his projects, we imagine this saw will be a welcome addition to the shop. It’s impressive what he is able to build with just a drill, angle grinder, and welder. Many of the other tools used in the video, like the magnetic drill press and hydraulic vise are also his handiwork. Continue reading “Homemade Metal Band Saw”

Magnetic Motorized Plasma Cutter Track

Affordable plasma cutters are becoming a popular step up from an angle grinder for cutting sheet metal in the home workshop, but cutting long straight lines can be laborious and less than accurate. [Workshop From Scratch] was faced with this problem, so he built a motorized magnetic track for his plasma cutter.

Thanks to a pair of repurposed electromagnetic door looks and adjustable base width, the track can be mounted on any piece of magnetic steel. The track itself consists of a pair of linear rods, with the torch mounts sliding along on linear bearings. A lead screw sits between the two linear rods, and is powered by an old cordless drill with the handle cut off. Its trigger switch was replaced by a speed controller and two-way switch for direction control, and a power supply took the place of the battery. The mounting bracket for the plasma torch is adjustable, allowing the edge of the steel to be cut at an angle if required.

While limit switches on the end of the track might be a preferable option to prevent sliding base to hit the ends of the tracks, the clutch in the electric drill should be good enough to prevent damage if the operator is distracted.

[Workshop From Scratch] is really living up to the name of his YouTube channel, having built many of the other tools used in the video himself. Just a few examples are the XY-table, hydraulic adjustable workbench and  hydraulic shop crane. Continue reading “Magnetic Motorized Plasma Cutter Track”

Giant Blacksmith Vise From Start To Finish

In any proper workshop you want to be able to securely hold a workpiece, whether it’s a tiny PCB or a heavy piece of forged steel. [Jason Marburger] from Fireball Tool needed a really large heavy-duty vise, so he built himself a massive 1490 lbs / 676 kg floor-standing blacksmith vise from scratch.

Blacksmith vises are designed to take a lot of heavy abuse, such as holding heavy pieces of steel that are being hammered. [Jason]’s vise stands about 3 feet tall, and the main frame components were cut from 1 5/8 inch (41.3 mm) steel with a water jet cutter. The jaws are operated with a large hand wheel connected to a lead screw. Bearings on the lead screw allow the hand wheel to be spun like a flywheel, allowing it to be quickly opened and closed. The weight of the moving jaw keeps the lead screw under tension, eliminating any backlash. This allows for really fine control over the holding force, which [Jason] demonstrates by carefully clamping a tiny screw. With the hand wheel alone the vise can exert 12880 lb / 5800 kg, but a hydraulic lift was also added, boosting the force to 30000 lbs. The deep throat allows a large object to be clamped, and the jaws can also be offset to clamp something to the side of the vise.

The vise was beautifully finished with powder coating and pin striping, which will no doubt wear over time if it’s properly used, but the vise itself should last a few lifetimes. While this isn’t something you can really build in a home workshop, it is always inspiring to see what is possible with a bit more tools, knowledge and skill. The build is documented in a 4 part series (link in first paragraph), but we’ve added a short highlights reel below for your viewing pleasure.

Continue reading “Giant Blacksmith Vise From Start To Finish”

Heavy Metal Power Bank Uses Tool Batteries

At one time or another, most of us have seen a gadget for sale and thought we could build something similar for cheaper. Of course, we’re almost always wrong. Not about being able to build it, mind you. But when you add up the cost of the materials, the tool or two you almost inevitably end up buying, and the time spent chasing perfection, you’re lucky if you haven’t doubled the original price.

We’re not sure how much money [Taylor Hay] ended up saving by building his own portable power bank. But we do know it’s a gorgeous piece of hardware that’s certainly built far better than the average consumer gadget. The CNC-cut aluminum side panels look like something pulled out of a tank, and while we know some might balk at the 3D printed internal frame, we’re confident you could use this thing as an impromptu step stool without a problem.

Inside there’s 150 watt 240 VAC inverter, complete with a temperature-controlled fan to keep it cool under load. There are also four USB ports providing 2.1 A each, a standard 12 VDC accessory port, and a LED display that shows battery voltage and current being drawn. Rather than come up with his own battery pack, [Taylor] used a 3D printed interface that accepts an 18 V Milwaukee cordless tool battery. Naturally, the design could be adapted to take another brand’s cells if you were so inclined.

Around these parts, we know that a good project doesn’t have to be cheaper or even more practical than what’s already on the market. There’s an inherent value in building something exactly the way you want it that you simply can’t put a monetary price on.

Continue reading “Heavy Metal Power Bank Uses Tool Batteries”