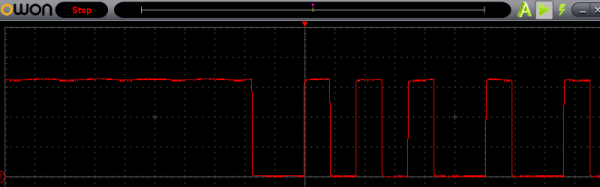
Do you have a touch-screen oscilloscope? Neither do we. But how cool would that be to pan left and right or expand either axis just like you do on your cellphone screen? [Igor] did just that, and the results (in the video below the break) look fantastic.
We’ve covered [Igor]’s previous round of hacking on his Siglent scope, where he bricked it by flashing the wrong firmware, and then fixed it by Frankensteining the screen into the box that the firmware wanted. But once he’d gotten the scope-hacking bug, he couldn’t quit.
A brief overview: an Arduino Nano reads the touchscreen and sends the commands to the scope to act accordingly. [Igor] initially wanted to simply use the COM port on the back to control, but his previous mis-flashing of the firmware had rendered that moot. Instead, he went after the data bus that interfaces with the keyboard unit, reverse engineered its protocol, and spoofed keypresses with custom code in the AVR.
As a side effect of all this, [Igor] could also write a script that controls the scope from his computer, and he ended up re-housing it all in the nice wooden front panel that you see now. It’s more than a step up from the previous covered-in-electrical-tape look, and the new functionality is very very cool. Kudos.

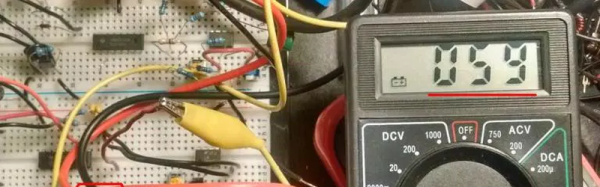
 As you might expect, a common digital meter’s current scales aren’t usually up to measuring nano- or pico-amps. [Danny’s] approach was not to use the ammeter scale. Instead, he measures the voltage developed across the input impedance of the meter (which is usually very high, like one megaohm). If you know the input characteristics of the meter (or can calibrate against a known source), you can convert the voltage to a current.