Custom Hybrid Drivetrain Powers Boat

Offloading acceleration and braking to an electric motor in a hybrid configuration allows the less efficient combustion engine run in a more narrow set of RPM and torque ranges. In some cases the motor is decoupled from the mechanical drivetrain entirely and used simply as a generator, where it can run at a single speed all the time. And this concept isn’t limited to passenger vehicles, either. [rctestflight] put this premise to the test using a small knockoff Honda motor as a generator for an electric boat.

This project builds on a previous version where he used a much smaller hobby motor to see if it could generate usable power, and that system powered a small autonomous boat as a proof-of-concept. Those motors aren’t really designed to be used in this sort of application though, so this build upgrades the internal combustion engine and pairs it with an electric skateboard motor that’s configured to run as a generator. The setup is capable of producing almost 800 watts for as long as the gasoline lasts, provided that the 3D printed parts all hold together and the other parts don’t vibrate off of the assembly.

Out on the lake at full throttle, the small generator can get the boat up to seven knots (13 kph) but at this speed [rctestflight] reports that the generator is “quite unpleasant” due to the noise and vibration. Instead, he ran it on a test bench at several RPM and torque points and documented the efficiency of the motor at each one, and then operated the boat mostly at the point he found it to be most efficient. For a hybrid drivetrain, that not only decreases noise and vibration, but also maintenance and fuel efficiency.

Although the energy density of fossil fuels is much better than batteries, a fuel-free long-distance option is still available if you’d rather equip your boat with solar panels instead.
Continue reading “Custom Hybrid Drivetrain Powers Boat”

Photographing Rocket Chute Deployment At 10 Km

For those who haven’t been following along, [BPS.space] aka [Joe] is on a journey to launch a home-built rocket past the Kármán line where it will officially reach outer space. But one does not simply launch a rocket to outer space on the first try. The process is long and involves not only building a series of rockets, but designing and building propellant mixtures, solving aerodynamic problems, gaining several model rocket certifications along the way, and a whole host of other steps. He’s also documenting the entire process on video as well, which involves some custom camera work like this rocket selfie camera which will take an image of his rockets at apogee.

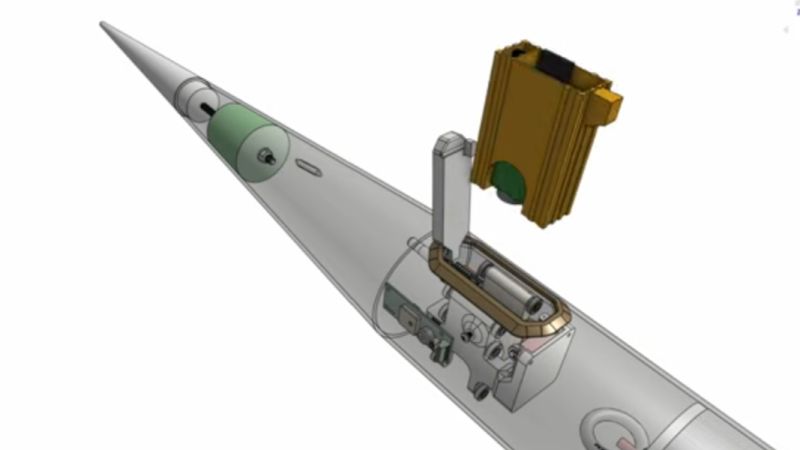
Like most problems in high-power rocketry, extremely tiny problems have a way of causing catastrophic failure, so every detail needs to be considered and planned for in the final design. For a camera that needs to jettison itself from the rocket at a precise moment after experiencing an incredible amount of forces, this is a complicated problem to solve. The initial design involves building a sled for a small deconstructed GoPro which uses springs and a servo to launch itself out of the rocket. The major problem with the design is that even the smallest torque on the sled will cause the camera to point in a random direction by the time it’s far enough from the rocket to take a picture. [Joe] tried a number of design iterations but could not get these torques to vanish.

One of the design limitations with this camera is that it won’t have any sort of parachute or tether itself to the rocket, so it will hit the ground at its terminal velocity. To keep that velocity down and improve survivability chances of the footage, the mass has to stay low. Eventually he settled on a semi-active control system by mounting a brass weight on a small motor, giving the camera module enough stability to stay pointed at the rocket long enough to take the video. Even though it hasn’t flown yet, admitting his first design wasn’t working at compromising on this solution which adds a bit of mass seems to be a good design change. We’ve been following along with his entire process so be sure to check out his actual rocket motor builds and teardowns as well.

Continue reading “Photographing Rocket Chute Deployment At 10 Km”

Torque Testing 3D Printed Screws

Unless you’ve got a shop with a well-stocked hardware bin, it’s a trip to the hardware store when you need a special screw. But [Sanford Prime] has a different approach: he prints his hardware, at least for non-critical applications. Just how much abuse these plastic screws can withstand was an open question, though, until he did a little torque testing to find out.

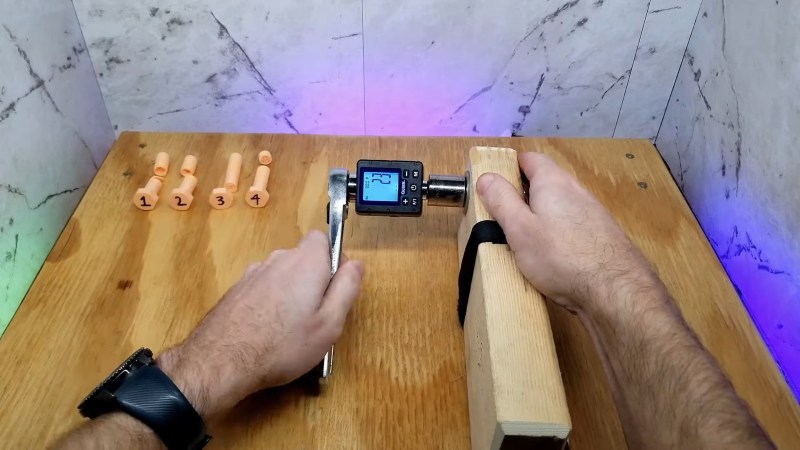
To run the experiments, [Sanford]’s first stop was Harbor Freight, where he procured their cheapest digital torque adapter. The test fixture was similarly expedient — just a piece of wood with a hole drilled in it and a wrench holding a nut. The screws were FDM printed in PLA, ten in total, each identical in diameter, length, and thread pitch, but with differing wall thicknesses and gyroid infill percentages. Each was threaded into the captive nut and torqued with a 3/8″ ratchet wrench, with indicated torque at fastener failure recorded.

Perhaps unsurprisingly, overall strength was pretty low, amounting to only 11 inch-pounds (1.24 Nm) at the low end. The thicker the walls and the greater the infill percentage, the stronger the screws tended to be. The failures were almost universally in the threaded part of the fastener, with the exception being at the junction between the head and the shank of one screw. Since the screws were all printed vertically with their heads down on the print bed, all the failures were along the plane of printing. This prompted a separate test with a screw printed horizontally, which survived to a relatively whopping 145 in-lb, which is twice what the best of the other test group could manage.

[Sanford Prime] is careful to note that this is a rough experiment, and the results need to be taken with a large pinch of salt. There are plenty of sources of variability, not least of which is the fact that most of the measured torques were below the specified lower calibrated range for the torque tester used. Still, it’s a useful demonstration of the capabilities of 3D-printed threaded fasteners, and their limitations.

Continue reading “Torque Testing 3D Printed Screws”

Electric Motors Run Continuously At Near-Peak Power

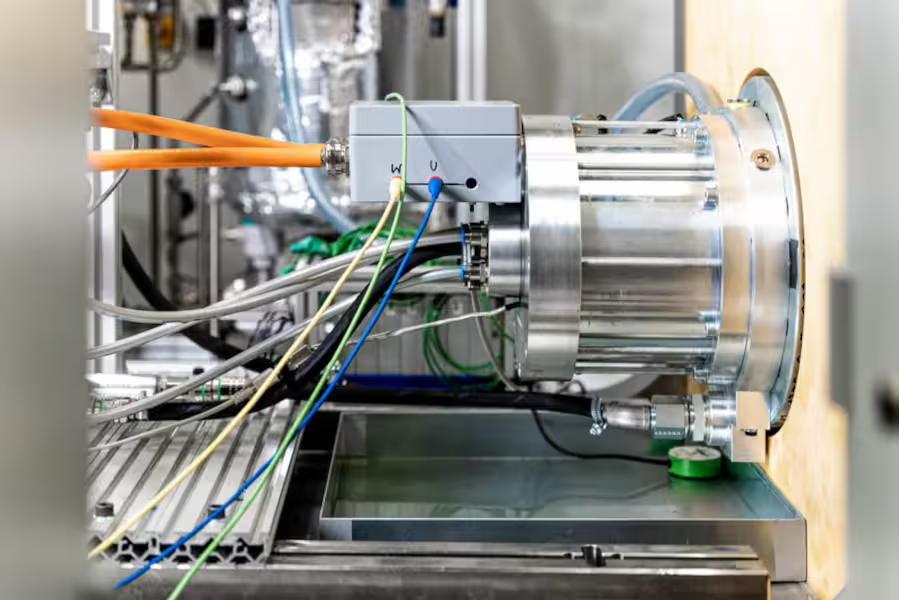
For a lot of electrical and mechanical machines, there are nominal and peak ratings for energy output or input. If you’re in marketing or advertising, you’ll typically look at the peak rating and move on with your day. But engineers need to know that most things can only operate long term at a fraction of this peak rating, whether it’s a power supply in a computer, a controller on an ebike, or the converter on a wind turbine. But this electric motor system has a unique cooling setup allowing it to function at nearly full peak rating for an unlimited amount of time.

The motor, called the Super Continuous Torque motor built by German automotive manufacturer Mahle is capable of 92% of its peak output power thanks to a unique oil cooling system which is able to remove heat and a rapid rate. Heat is the major limiter for machines like this; typically when operating at a peak rating a motor would need to reduce power output to cool down so that major components don’t start melting or otherwise failing. Given that the largest of these motors have output power ratings of around 700 horsepower, that’s quite an impressive benchmark.

The motor is meant for use in passenger vehicles but also tractor-trailer style trucks, where a motor able to operate at its peak rating would mean a smaller size motor or less weight or both, making them easier to fit into the space available as well as being more economically viable. Mahle is reporting that these motors are ready for production so we should be seeing them help ease the transportation industry into electrification. If you’re more concerned about range than output power, though, there’s a solution there as well so you don’t have to be stuck behind the times with fossil fuels forever.

Thanks to [john] for the tip!

3D Printed Tires, By The Numbers

What does it take to make decent tires for your projects? According to this 3D printed tire torture test, it’s actually pretty easy — it’s more a question of how well they work when you’re done.

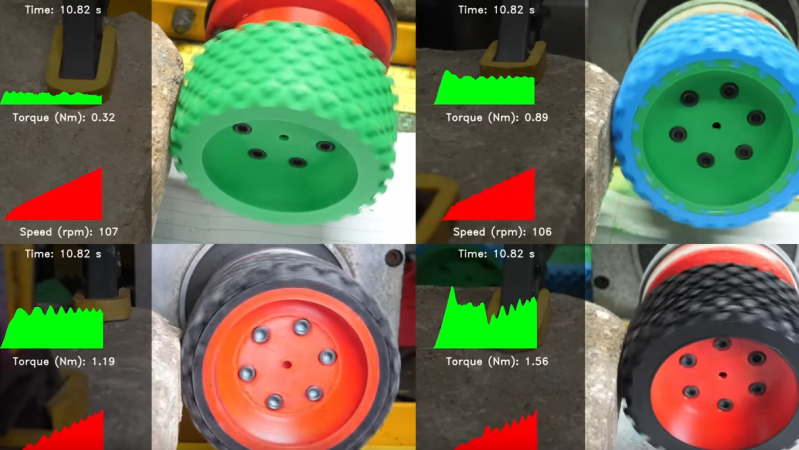
For the test, [Excessive Overkill] made four different sets of shoes for his RC test vehicle. First up was a plain PLA wheel with a knobby tread, followed by an exact copy printed in ABS which he intended to coat with Flex Seal — yes, that Flex Seal. The idea here was to see how well the spray-on rubber compound would improve the performance of the wheel; ABS was used in the hopes that the Flex Seal solvents would partially dissolve the plastic and form a better bond. The next test subjects were a PLA wheel with a separately printed TPU tire, and a urethane tire molded directly to a PLA rim. That last one required a pretty complicated five-piece mold and some specialized urethane resin, but the results looked fantastic.

Non-destructive tests on the tires included an assessment of static friction by measuring the torque needed to start the tire rolling against a rough surface, plus a dynamic friction test using the same setup but measuring torque against increasing motor speed. [Overkill] threw in a destructive test, too, with the test specimens grinding against a concrete block at a constant speed to see how long the tire lasted. Finally, there was a road test, with a full set of each tire mounted to an RC car and subjected to timed laps along a course with mixed surfaces.

Results were mixed, and we won’t spoil the surprise, but suffice it to say that molding your own tires might not be worth the effort, and that Flex Seal is as disappointing as any other infomercial product. We’ve seen other printed tires before, but hats off to [Excessive Overkill] for diving into the data.

Continue reading “3D Printed Tires, By The Numbers”

Putting Some Numbers On Your NEMAs

It’s official: [Engineer Bo] wins the internet with a video titled “Finding NEMA 17,” wherein he builds a dynamometer to find the best stepper motor in the popular NEMA 17 frame size.

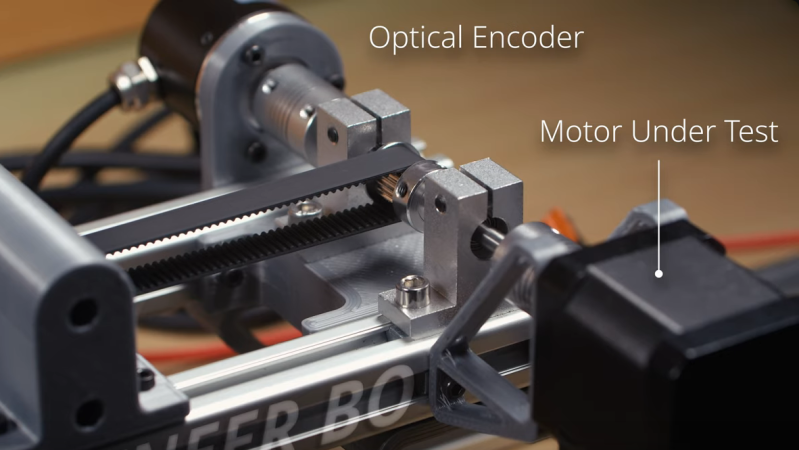
Like a lot of subjective questions, the only correct answer to which stepper is best is, “It depends,” and [Bo] certainly has that in mind while gathering the data needed to construct torque-speed curves for five samples of NEMA 17 motors using his homebrew dyno. The dyno itself is pretty cool, with a bicycle disc brake to provide drag, a load cell to measure braking force, and an optical encoder to measure the rotation of the motor under test. The selected motors represent a cross-section of what’s commonly available today, some of which appear in big-name 3D printers and other common applications.

[Bo] tested each motor with two different drivers: the TMC2209 silent driver to start with, and because he released the Magic Smoke from those, the higher current TB6600 module. The difference between the two drivers was striking, with lower torque and top speeds for the same settings on each motor using the TB6600, as well as more variability in the data. Motors did better across the board with the TBC6600 at 24 volts, showing improved torque at higher speeds, and slightly higher top speeds. He also tested the effect of microstepping on torque using the TBC6600 and found that using full steps resulted in higher torque across a greater speed range.

At the end of the day, it seems as if these tests say more about the driver than they do about any of the motors tested. Perhaps the lesson here is to match the motor to the driver in light of what the application will be. Regardless, it’s a nice piece of work, and we really appreciate the dyno design to boot — reminds us of a scaled-down version of the one [Jeremey Fielding] demonstrated a few years back.

Continue reading “Putting Some Numbers On Your NEMAs”

Bent Shaft Isn’t A Bad Thing For This Pericyclic Gearbox

With few exceptions, power transmission is a field where wobbling is a bad thing. We generally want everything running straight and true, with gears and wheels perfectly perpendicular to their shafts, with everything moving smoothly and evenly. That’s not always the case, though, as this pericyclic gearbox demonstrates.

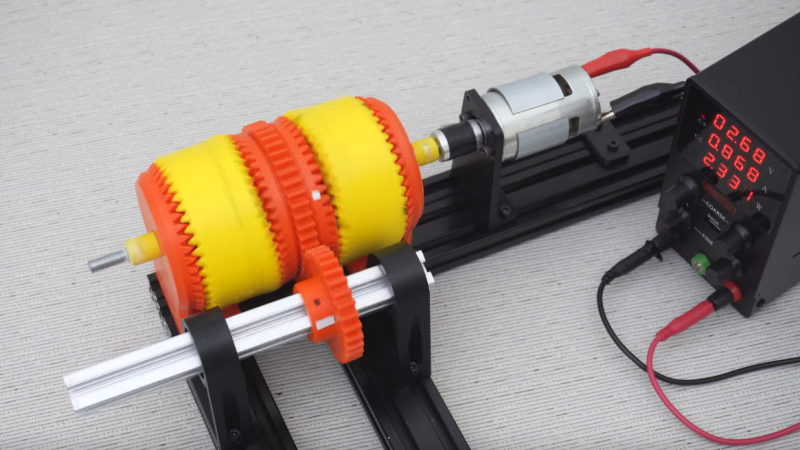
Although most of the components in [Retsetman] model gearboxes seem familiar enough — it’s mostly just a collection of bevel gears, like you’d see inside a differential — it’s their arrangement that makes everything work. More specifically, it’s the shaft upon which the bevel gears ride, which has a section that is tilted relative to the axis of the shaft. It’s just a couple of degrees, but that small bit of inclination, called nutation, makes the ring gear riding on it wobble as the shaft rotates, allowing it to mesh with one or more ring gears that are perpendicular to the shaft. This engages a few teeth at a time, transferring torque from one gear to another. It’s easier to visualize than it is to explain, so check out the video below.

Gearboxes like these have a lot of interesting properties, with the main one being gear ratio. [Retsetman] achieved a 400:1 ratio with just 3D printed parts, which of course impose their own limitations. But he was still able to apply some pretty serious torque. The arrangement is not without its drawbacks, of course, with the wobbling bits naturally causing unwelcome vibrations. That can be mitigated to some degree using multiple rotatins elements that offset each other, but that only seems to reduce vibration, not eliminate it.

[Retsetman] is no stranger to interesting gearboxes, of course, with his toothless magnetic gearboxes coming to mind. And this isn’t the only time we’ve seen gearboxes go all wobbly, either.

Continue reading “Bent Shaft Isn’t A Bad Thing For This Pericyclic Gearbox”