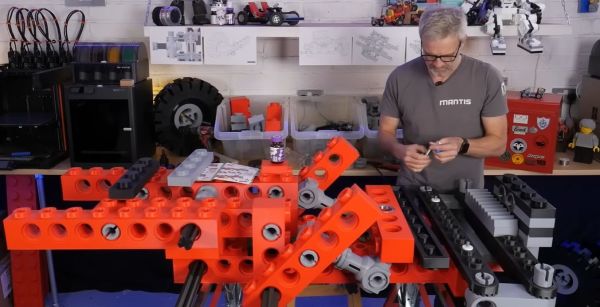
Building A Nerf-like Rocket Launcher With Airburst Capability

Nerf blasters typically fire small foam darts or little foam balls. [Michael Pick] wanted to build something altogether more devastating. To that end, he created a rocket launcher with an advanced air burst capability, intended to take out enemies behind cover.

Unlike Nerf’s own rocket launchers, this build doesn’t just launch a bigger foam dart. Instead, it launches an advanced smart projectile that releases lots of smaller foam submunitions at a set distance after firing.

The rocket launcher itself is assembled out of off-the-shelf pipe and 3D printed components.  An Arduino Uno runs the show, hooked up to a Bluetooth module and a laser rangefinder. The rangefinder determines the distance to the target, and the Bluetooth module then communicates this to the rocket projectile itself so it knows when to release its foamy payload after launch. Releasing the submunitions is achieved with a small microservo in the projectile which opens a pair of doors in flight, scattering foam on anyone below. The rockets are actually fired via strong elastic bands, with an electronic servo-controlled firing mechanism.

We’ve featured some great Nerf builds over the years, like this rocket-blasting robot.

Continue reading “Building A Nerf-like Rocket Launcher With Airburst Capability”

Building An Interferometer With LEGO

LEGO! It’s a fun toy that is popular around the world. What you may not realize is that it’s also made to incredibly high standards. As it turns out, the humble building blocks are good enough to build a interferometer if you’re so inclined to want one. [Kyra Cole] shows us how it’s done.

The build in question is a Michelson interferometer; [Kyra] was inspired to build it based on earlier work by the myphotonics project. She was able to assemble holders for mirrors and a laser, as well as a mount for a beamsplitter, and then put it all together on a LEGO baseboard. While some non-LEGO rubber bands were used in some areas, ultimately, adjustment was performed with LEGO Technic gears.

Not only was the LEGO interferometer able to generate a proper interference pattern, [Kyra] then went one step further. A Raspberry Pi was rigged up with a camera and some code to analyze the interference patterns automatically. [Kyra] notes that using genuine bricks was key to her success. Their high level of dimensional accuracy made it much easier to achieve her end goal. Sloppily-built knock-off bricks may have made the build much more frustrating to complete.

We don’t feature a ton of interferometer hacks around these parts. However, if you’re a big physics head, you might enjoy our 2021 article on the LIGO observatory. If you’re cooking up your own physics experiments at home, don’t hesitate to drop us a line!

Thanks to [Peter Quinn] for the tip!

Push Your Toy Train No More, With This Locomotive!

One of the most popular evergreen toys is also one of the simplest, wooden track with push-along trains. We all know the brand name, and savvy parents know to pick up the much cheaper knock-off because the kid won’t know the difference. But a really cool kid shouldn’t have to push their train around by hand, and thus [Lauri] has given the wooden track a real, powered, locomotive.

In the 3D printed chassis goes a small geared motor driving one axle, with an ESP32 and a motor driver taking care of the smarts. Power comes from an 18650 cell, which almost looks like the right scale for a fake steam boiler. The surprise with this train comes in the front axle, this machine has steering. We’re curious, because isn’t the whole point of a train that the track directs it where it needs to go? Or perhaps a little help is required in the absence of a child’s guidance when it comes to points. Either way, with remote control we guess there would be few kids who wouldn’t want one. We certainly do.

RC Cars With First Person Video, All With An ESP32

Those little ESP32-CAM boards which mate the WiFi-enabled microcontroller with a small parallel-interface camera module have been with us for years, and while they are undeniably cool to play with, they sometimes stretch the available performance in trying to process and stream video. [Mattsroufe] has made a very cool project with one of them, not only managing to stream video from a small model car, but also to control the steering and motor by means of servos and a little motor driver.

Sadly it’s not entirely a stand-alone device, as the ESP32 streams video to a web server with some Python code to handle the controls. The server can aggregate several of them on one page though, for perhaps a little real-life quad-screen Mario Kart action if you have enough of the things. We can see that this idea has plenty of potential beyond the mere fun of driving a toy car around though, but to whet your appetite there’s a demo video below.

We’ve seen enough of the ESP32-cam before, but perhaps more as a photographic device.

Continue reading “RC Cars With First Person Video, All With An ESP32”

Tensegrity construction with Adafruit led strands

The Jell-O Glow Tensegrity Toy You Didn’t Know You Needed

If you’re looking to add a pop of glowing whimsy to your workspace, check out this vibrant jiggly desk toy by [thzinc], who couldn’t resist the allure of Adafruit’s NOODS LED strands. [thzinc]’s fascination with both glowing LEDs and levitating tensegrity designs led to an innovative attempt to defy gravity once again.

The construction’s genius is all about the balance of tension across the flexible LED strands, with three red ‘arms’ and a blue ‘hanger’ arm supporting the central hub. [thzinc]’s early designs faced print failures, but by cleverly reorienting print angles and refining channel designs, he achieved a modular, sturdy structure. Assembly involved careful soldering, tension adjustments, and even a bit of temporary tape magic to perfect the wobbling equilibrium.

But, the result is one to applaud. A delightful, wobbly desk toy with a kind of a Jell-O vibe that dances to your desk’s vibrations while glowing like a mini neon sign. We’ve covered tensegrity constructions in the past, so with a little digging through our archives you’ll be able to find some unique variations to build your own. Be sure to read [thzinc]’s build story before you start. Feel free to combine the best out there, and see what you can bring to the table!

Continue reading “The Jell-O Glow Tensegrity Toy You Didn’t Know You Needed”

Modding A Toddler’s Ride-On For More Grunt

Kids love their Power Wheels and other ride-on electric cars. Indeed, [Ashwin]’s son was digging his little ATV, but soon found that some care was needed on the pedal. It had no proper throttle control, instead turning the motor hard on or off and scaring the poor kid in the process. The solution? A bit of an upgrade from some off-the-shelf electronics.

Inspiration came from—where else—the /r/PowerWheelsMods subreddit. The main tweak was to install an off-the-shelf soft-start circuit to stop the motor banging hard on when the accelerator was pushed. Instead, when the accelerator is pushed, the module gradually ramps up its PWM output to the motor to smooth out the acceleration curve. This would make the ATV much easier to ride.

Implementing this off-the-shelf solution did take some doing, though. The first attempt ended with a short circuit and a blown fuse. However, [Ashwin] wasn’t deterred—a trip back online to do some research did the trick. With some careful wiring that took into account the crude forward and reverse circuit, [Ashwin] had a much smoother running ride-on for his son.

While most of the mods we see for these little ride-ons are all about power and speed, we do appreciate the occasional attempt to make the things a bit safer for younger drivers. If you’re brewing up your own fancy kidmobile at home—don’t hesitate to let us know!

Hacked teddybear on a desk

Turning GLaDOS Into Ted: A Tale Of A Talking Toy

What if your old, neglected toys could come to life — with a bit of sass? That’s exactly what [Binh] achieved when he transformed his sister’s worn-out teddy bear into ‘Ted’, an interactive talking plush with a personality of its own. This project, which combines the GLaDOS Personality Core project from the Portal series with clever microcontroller tinkering, brings a whole new personality to a childhood favorite.

[Binh] started with the basics: a teddy bear already equipped with buttons and speakers, which he overhauled with an ESP32 microcontroller. The bear’s personality originated from GLaDOS, but was rewritten by [Binh] to fit a cheeky, teddy-bear tone. With a few tweaks in the Python-based fork, [Binh] created threads to handle touch-based interaction. For example, the ESP32 detects where the bear is touched and sends this input to a modified neural network, which then generates a response. The bear can, for instance, call you out for holding his paw for too long or sarcastically plead for mercy. I hear you say ‘but that bear Ted could do a lot more!’ Well — maybe, all this is just what an innocent bear with a personality should be capable of.

Instead, let us imagine future iterations featuring capacitive touch sensors or accelerometers to detect movement. The project is simple, but showcases the potential for intelligent plush toys. It might raise some questions, too.

Continue reading “Turning GLaDOS Into Ted: A Tale Of A Talking Toy”