Everybody and their grandmother is longboarding electric-style these days: here are some of the most recent developments in the world of kickless cruising.
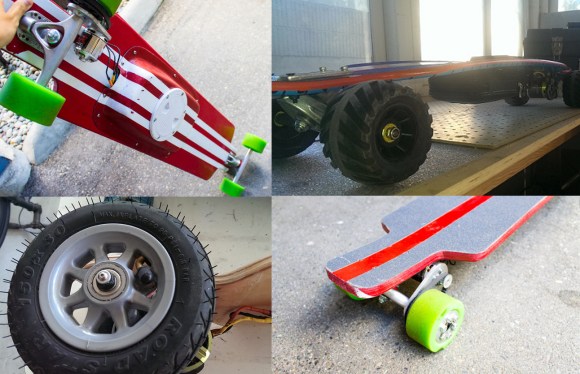
First up, [comsa42] has punched up an excellent step-by-step visual guide for first-time EV hopefuls, detailing the basics of a battery-powered longboard setup and thoroughly explaining the particulars behind component choices. His build is relatively straightforward: combine a board with a low(ish) kV outrunner motor, some LiPo batteries, an ESC (Electronic Speed Controller), a transmitter/receiver, and a few custom parts for gearing and mounting. This build should be commended not only for its simplicity but also for its frugality: [comsa42] estimates a final cost of around only $300, which is a staggering difference from commercial alternatives such as the Boosted Board and newcomer Marbel.
[comsa42’s] other significant contribution is a low-key and low-cost cover to house the electronics. He simply fiberglassed a small enclosure to protect the expensive internals, then mounted and painted it to blend seamlessly with the rest of the deck. You can find loads of other useful goodies in his guide, including CAD files for the motor mounts and for the wheel assembly.
But wait, there’s more! Stick around after the jump for a few other builds that ditch traditional wheels in favor of a smoother alternative. There’s also a smattering of videos, including comsa42’s] guide overview and some excellent cruising footage of the other board builds doing what they do best.