Wireless Base Station Eavesdrops On Robot Communications

wireless-base-station-evesdrops-on-robot-communications

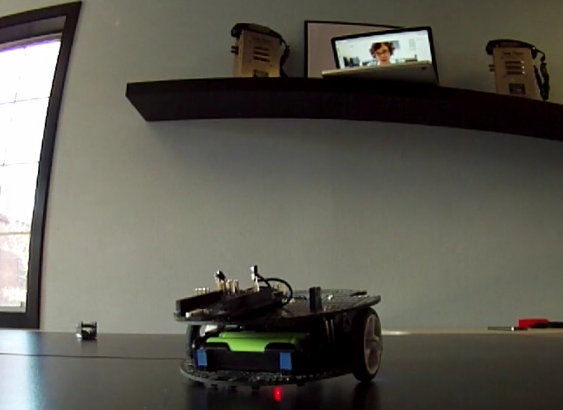
The good [Doctor Iguana] has been working on a pair of robots which communicate with each other using mRF24J40MA wireless transceivers. This presents a challenge in debugging, as he really didn’t have an easy way of monitoring those communications. His solution was to build his own base station which lets him use a computer to monitor what each robot is saying.

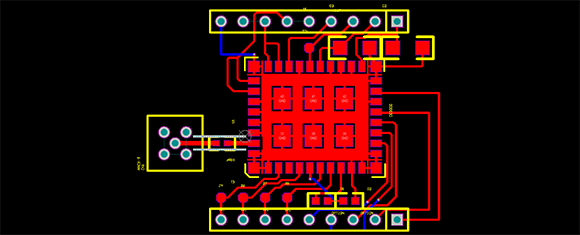
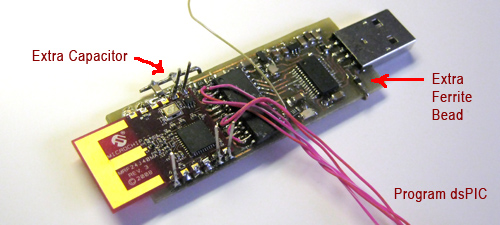
He spun his own board for the project. USB connectivity is provided by an FTDI chip, the FT232RL. This converts the USB communications in to serial for the dsPIC33 microcontroller. The FTDI chip comes with a fairly fine-pitch, but the footprint can still be fabricated using toner transfer if you’re fairly familiar with the process. [Dr. Iguana] took some close-up images of the unpopulated board which might make you a little nervous with the soldering iron. The other end of the board hosts the same Microchip wireless module as he used in his robots.

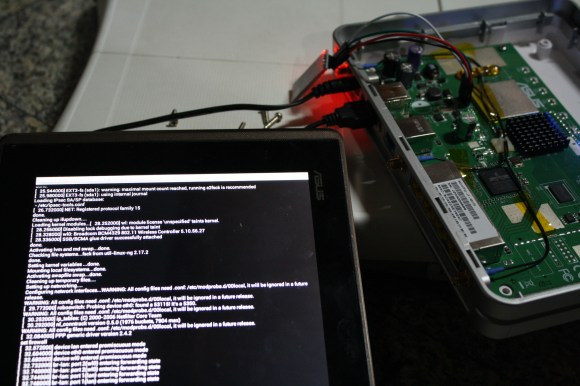
After a bit of rework (noted on the photo labels) he got this up and running. Now he can capture all of the wireless communications and see if problems are due to the sender or the receiver.

RF Switching Module Can Learn New Remotes

rf-remote-also-learns-by-itself

This breadboarded circuit is [Sergio’s] solution to controlling appliances wirelessly. Specifically he wanted a way to turn his pool pump on and off from inside the house. Since he had most of the parts on hand he decided to build a solution himself. What he ended up with is an RF base station that can learn to take commands from different remote devices.

The main components include the solid state relay at the bottom of the image. This lets the ATtiny13 switch mains voltage appliances. The microcontroller (on the copper clad square at the center of the breadboard) interfaces with the green radio frequency board to its left. On the right is a single leaf switch. This acts as the input. A quick click will toggle the relay, but a three-second press puts the device in learning mode. [Sergio] can then press a button on an RF remote and the device will store the received code in EEPROM. As you can see in the clip after the break, he even included a way to forget a remote code.

Continue reading “RF Switching Module Can Learn New Remotes”

Wireless Light Bulbs With A Slayer Exciter

slayer rocks
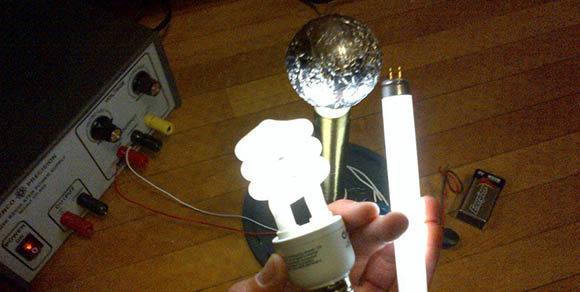
While playing chiptunes, creating lightning, and illuminating fluorescent tubes with a homebrew Tesla coil is awesome, they’re not exactly the safest electrical devices around, and certainly aren’t easy or cheap to build. There’s another option open if you’d like to play with strong electromagnetic fields; it’s called the Slayer exciter and is simple enough to light a few fluorescent bulbs wirelessly off a pair of 9 Volt batteries.

The circuit for the Slayer exciter is extremely simple – just a single power transistor, a few diodes, and a couple of resistors. The real power for this build comes from the custom-wound transformer made from more than 100 feet of magnet wire. After plugging the driver circuit into the transformer’s primary winding and connecting a metal ball (in this case a wooden ball covered in aluminum foil), it’s possible to light up a four Watt fluorescent tube with a pair of 9 Volts.

You can check out a video of the Slayer exciter after the break.

Continue reading “Wireless Light Bulbs With A Slayer Exciter”

Pinoccio Web Rover

web-rover

Before assuming that the title should be “web crawler,” just shush your shussins’ and check out the video after the break. The Pinoccio, as previously noted, is a board in development as a sort of web-enabled by default Arduino. This makes it perfect for a project like this one where a little rover is controlled from 10,000 Kilometers away, or around 6000 Miles for those of us that dwell in the US.

This setup uses a cell-phone accelerometer in Brazil to allow control of this robot in Nevada. Although close, the control isn’t quite real time, so that has to be accounted for. Something like this could be easily used for a telepresence ‘bot.

If you want to build your own, the assembly time is estimated at 1 hour. Instructions, as well as source code can be found on their page after the video. Although the Pinoccio board won’t be available until at least this summer, maybe this will give someone inspiration to try something similar in the mean time! Continue reading “Pinoccio Web Rover”

A Breakout Board For A Tiny WiFi Chip

A few weeks ago, we caught wind of a very tiny, very inexpensive WiFi chip  TI is producing. Everything required of an Internet connection – TCP/IP stack, configuration utilities, and your WEP, WPA, and WPA2 security tools is included in a single tiny chip, making this a very cool device for an Internet-connected microcontroller project. There’s only one problem: TI put this chip in a really, really weird package, and there aren’t any breakout boards for it.

That is, until now. [Vince] was convinced to spend some time in Altium to design a breakout board for this tiny WiFi chip. Now, if you can get your hands on a sample of the CC3000 from TI, you can breadboard out a circuit with the help of [Vince]’s design.

Included in [Vince]’s git are the board files for this breakout board, schematics, and the necessary parts if anyone has the inclination to make an Eagle library. If anyone wants to spin a few of these boards and put them up on a Tindie Fundraiser, that’d be fine by us, and [Vince] would probably appreciate that as well.

Pinoccio – An Ecosystem For The Internet Of Things

pinoccio-lead-scout-labelled

[Pinoccio] is currently an Indeigogo crowd-sourced project that aims use the real-world programmability of the Arduino through the internet using a wifi connection. One could rightly point out that this can already be done through the use of a wifi shield. Before ruling this device out, just “shush your shussins” and consider that it’s designed specifically for interfacing with “things” over the internet. This can replace several components (see 1:10 in the video after the break) and should be less of a hassle.

Additionally, with a shield on one of these devices, several other [Pinoccio] boards can communicate with the Internet using this as a hub in a mesh network. This is similar to how the many “smart” electrical meters work, with a grid router being a central hub for communications. Additionally, this board has a built in temperature sensor and a RGB (instead of a single-color) LED, so you can do some interesting stuff with it right out of the box. Assuming this project gets funded, which seems likely at this point, we’re excited to see the projects that get built using it! Continue reading “Pinoccio – An Ecosystem For The Internet Of Things”

Adding A Bluetooth Terminal To Your Router

bluetooth-router-terminal

This image shows an Android tablet monitoring the terminal of a router via Bluetooth. It makes it a snap to tweak your router from a multitude of devices as long as you’re within range (usually BT works up to about 30 feet or so). The only part that [Yohanes] needed to pull off the hack was a Bluetooth module which he picked up for a few dollars.

All routers will have serial connections somewhere on the board. His model (Asus RT-N16) even had the GND, RX, TX, and VCC pads labeled. He soldered a SIL pin socket to the port which accepts the pin header from the Bluetooth module. Before plugging that in he had to issue a few commands to the device to get it using the same baud rate and settings as the router’s serial port. With that taken care of he can now wirelessly monitor and control the device via the serial terminal.

The one issue which he did encounter is that the module is slower to boot than the router. This means that at power-up you will not see anything on the terminal until the router has already started to load the Linux kernel. If you don’t plan on doing any bootloader hacks this shouldn’t make any difference.