Resuming Failed 3D Prints Automatically

What happens to your 3D printer if the power goes out? What happens if there’s a jam in the nozzle? What happens if your filament breaks, runs out, or turns into a plate of spaghetti? For all these situations, the print fails, wasting plastic and time. For his Hackaday Prize entry, [robert] has come up with a tiny device that saves all those failed prints, and it does it without batteries or a UPS.

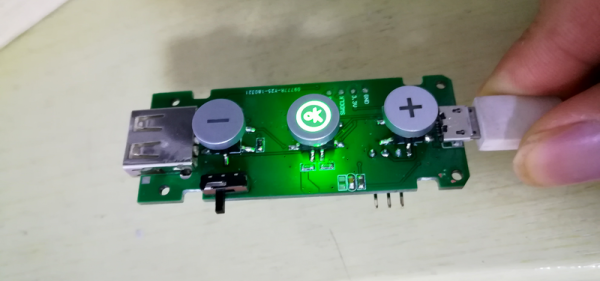
The idea behind [robert]’s box is to monitor all the G-code being sent to the printer, and allow a print to be resumed after a failure. The design is simple enough — just a USB mini port on one end, a USB A port on the other, and three buttons in between. This box logs the G-code, and if the printer happens to fail, the box will spring into life allowing you to resume a print from any Z position.

Already [robert] has tested this box on a number of printers including the Prusa i3, the Creality CR-10, and the ever-popular, explodey Anet A8. The project has already gone through a few hardware revisions and there is, of course, a fancy 3D printed enclosure for the board. It’s a great project, and one of the more interesting 3D printing tools we’ve seen in this year’s Hackaday Prize.

Up, Up, Up: $2,000 More Seed Funding For Hackaday Prize Entries

Getting a project off the ground often means an up-front investment in parts. Hackaday is upping our efforts to smooth out that obstacle for those who want to Build Something That Matters. Seed funding for the 2018 Hackaday Prize is simple, enter your Open Hardware design, share it far and wide so that a lot of people will show their admiration with a ‘like’ on the project page. If you’re in the Prize competition, you get a dollar for each like to help jump-start the build phase. If you haven’t entered, you get to encourage and reward the projects that inspire you most.

This year has started off like a rocket. We’ve already passed the $4,000 seed funding limit and you still have until a week from Monday to take part in this seed funding. With so much excitement around this first challenge, Supplyframe, Hackaday’s parent company, is raising the pot to a total of $6,000. That means there’s more up for grabs. Enter your project now. If you’ve already done that, polish up your presentation and show it around to your friends and on social media. Entries with the most likes will get a dollar for every like up to $200 max, or until we undoubtedly reach the new limit once again. Don’t delay, it’s time to Build Something that Matters!

Seed funding is a big deal as we found out with Alex Williams, the 2018 Grand Prize Winner. He mentioned that the money really helped him with early build costs, and the interest from the community inspired him to keep up development throughout the contest. Help us give away this extra funding and inspire the next generation of finalists by commenting on and upvoting great entries!

Recharging Drones On The Go With A Supercharger

If Techcrunch is to be believed, our skies will soon be filled with delivery robots, ferrying tacos and Chinese food and Amazon purchases from neighborhood-area dispatch stations to your front door. All of this is predicated on the ability of quadcopters to rapidly recharge their batteries, or at the very least swap out batteries automatically.

For their Hackaday Prize entry, [frasanz], [ferminduaso], and [david canas] are building the infrastructure that will make delivery drones possible. It’s a drone supercharger, or a robot that grabs a drone, swaps out the battery, and sends it off to deliver whatever is in its cargo compartment.

This build is a droneport of sorts, designed to have a drone land on it, have a few stepper motors and movable arms spring into action, and replace the battery with a quick-change mechanism. This can be significantly more difficult than it sounds — you need to grab the drone and replace the battery, something that’s easy for human eyes and hands, but much harder for a few sensors and aluminum extrusion.

To change batteries, the team is just letting the drone land somewhere on a platform that’s a few feet square. Arms then move it, pushing the drone to the center, and a second arm then moves in to swap the battery. The team is using an interesting locking cam solution to clamp the battery to the drone. It’s much easier for a machine to connect than the standard XT-60 connector found on race quads.

Is this the project the world needs? Quite possibly so. Drones are going to be awesome once battery life improves. Until then, we’ll have to live with limited flight times and drone superchargers.

Continue reading “Recharging Drones On The Go With A Supercharger”

A Victrola For The 21st Century

We’ve lost something tangible in our listening to music, as we made the move from physical media through MP3 players to streaming services on our mobile devices. A 12″ vinyl disc may be slightly cumbersome, but there is an undeniable experience to pulling it from the sleeve and placing it on the turntable. Would you like to recreate that? [Castvee8] would, because he’s created a 21st-century version of a wind-up gramophone, complete with a turntable and horn.

Under the hood is an Arduino-controlled MP3 player, while on the surface is a 3D-printed turntable and horn. On the turntable is placed a CD, and a lead screw moves the horn across it during play to simulate the effect of a real turntable. An Arduino motor controller shield drives the turntable and lead screw, and at the end of each song, the horn is automatically returned to the start of the CD as if it were a record.

The effect is purely aesthetic but should make for an unusual talking point if nothing else. Surprisingly this project is not the first of its type, in the past, we’ve shown you another one that played a real CD in the place of the record on the turntable.

Floor Mopping Robot Takes Cleanliness To The Next Level

While it’s nice to have a robot vacuum your floors for you, a vacuum can only clean your house so much. For a really deep clean, you’ll also need to run a mop over the hard floor surfaces. [Josh] took this to its logical conclusion and built a robot that can really scour his floors for his entry into this year’s Hackaday Prize.

The robot has the ability to spray the floor with a cleaning solution, and then drive over it and scrub the floors with a squeegee. Its designed in a way that allows it to get into tight corners without needing a special brush, and of course it has all the bells and whistles that other robots have, such as ultrasonic sensors, collision detection, and a brain that allows it to navigate a course and get the entire area cleaned.

There are many videos of the robot in action on the project site, showing its operation and testing various features of the device. It’s a pretty interesting take on the home robot, and since its Open Hardware you can build your own if you’re often frustrated by having to mop your own floors, or you could modify it to do things other than squeegee the floors clean.

Continue reading “Floor Mopping Robot Takes Cleanliness To The Next Level”

The Better RetroPie Handheld

The Raspberry Pi has become the best video game console on the planet. With RetroPi, anyone can play Super Mario 3, Doctor Mario, and even Doki Doki Panic. Adafruit’s PiGRRL Zero and [Wermy]’s reconfabulation of an old brick Game Boy to house a Raspi Zero and display have made the Raspberry Pi portable, along with all those retro games we love so dearly.

There’s a problem with these builds, though. They only use the Raspberry Pi Zero, and with that the limitations on emulation performance, and the Raspi 3 is far too big for a portable console. What’s the solution? It’s the greatest homebrew console ever created. For this year’s Hackaday Prize, [DeanChu] is building the Retro-CM3. It’s a retro handheld with a 3D printed enclosure, that’s powered by the Raspberry Pi Compute Module 3. Stand back, folks. We have a winner that will top the Raspberry Pi and 3D printing subreddits.

The key feature for this build is, of course, the raw processing power of the Raspberry Pi Compute Module 3. This is a Raspberry Pi 3 with 4 GB of eMMC stuffed onto a board that fits into an SODIMM socket. The pins on this device give you access to the GPIOs and the DSI connector. All you really need to turn this into an amazing vintage emulation console is a breakout board with a few buttons, power supply, and a display.

The extra components for this build include a 3.2 inch LCD using the DPI interface. There’s a speaker, and a 2000mAh battery. The real tricky part here is the custom PCB, breaking out the DPI pins on the Compute Module, adding a small speaker, and throwing a small STM32 to read the buttons. It’s an entire system, ready to be housed in a 3D printed enclosure.

This is, simply, the best Raspberry Pi portable you’ll ever see, at least until we get a Rasberry Pi Zero with the capabilities of the Pi 3. It’s an excellent use of the very small Compute Module, and one of the most polished Hackaday Prize entries we’ve seen thus far.

Because Building A Relay Computer Isn’t Hard Enough

For this year’s Hackaday Prize, we’re doing something special. We’re introducing achievements for Prize projects. Think of them as merit badges. If your Hackaday Prize project has multiple parts that come together into one unified, awesome whole, you get the Voltron achievement. If you’ve built a musical instrument that unexpectedly blows everyone’s minds, you get the Diva Plavalaguna Achievement. A select few entries will earn the Pickle Rick achievement. What’s this? It’s a jaw-dropping build that makes you shake your head in the totality of engineering perfection.

Here’s a project that nails this achievement. It’s a homebrew computer, made out of relays, that runs a custom instruction set. It’s built on Brainf*ck. It is, by far, the most absurd and amazing homebrew computer you’ve ever seen.

Several modules on a shelf, for scale.

First, the hardware. This CPU is built out of about 800 Soviet reed relays, RES64, RES55, and RES-43 relays, if you want some part numbers. These relays are mounted on logic cards connected to a backplane. Each backplane consists of thirty-two of these cards, and it takes two backplanes to build up a 16-bit full adder. The 16-bit instruction pointer and 16-bit address pointer each fit on half a backplane.

Moving up one level, the instruction set for this computer is based on Brainf*ck, with a few additions. The ‘+’ instruction adds to the current value, the ‘>’ instruction still increases the current memory address, but there are a few new instructions that make this CPU not an interminable world of suffering. There’s now a ‘write current data value to register’ commands, and logical XOR instructions.

Have relay-based computers been done before? Yes, and so have Brainf*ck ISAs. The combination is rarely seen, and we’ve never seen one that performs this well. Below, you can see a video of this computer counting at 500 operations per second (or 500 Hz from a frequency counter). This is really unimaginable with any other relay computer we’ve seen, and it’s all thanks to those really tiny Soviet tubes. If you want a Hackaday Prize project that’s jaw-dropping, here you go.

Continue reading “Because Building A Relay Computer Isn’t Hard Enough”