Portable Pi Teensy Thumboard

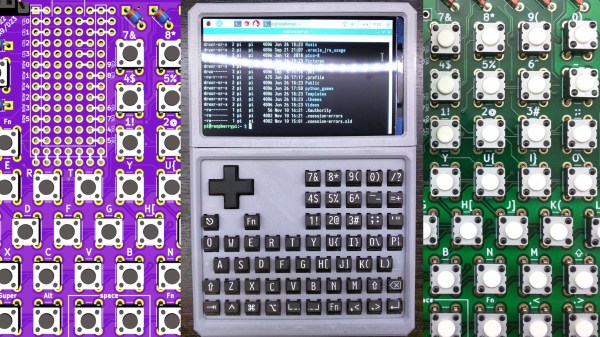
Even on the go, there is no substitute for a physical keyboard with buttons that move and click. Sure, you could solder a bunch of tactile switches to some perfboard, but how about going all out and making something robust as [Anthony DiGirolamo] did for his Teensy Thumboard. Everything is insertion-mount so it is an approachable project for anyone who knows the dangerous end of a soldering iron, and that also makes it easy to hack on.

Each pin of the Teensy has an adjacent empty hole tied to it for easy access, and the serial data pins are exposed at the top of the board. All the holes use standard 0.1″ (2.54mm) spacing. The I/O points used by the keyboard are labeled, and the rest of them can use the space under the controller where proto-board style holes add some extra space for an IMU or whatever sensors suit your slant.

Most impressive is the shell, which is freely available on Thingiverse, where you can also find a bill of materials with links to everything you will need in case you don’t have drawers full of those tactile switches.

If this looks familiar, you have probably seen the PocketCHIP, and it is no secret that this project is an homage to that versatile pocket computer. We appreciate this kind of love for PocketCHIP, especially since they are now a limited commodity.

All About Ham Satellites

How hard is it to build a ground station to communicate with people via a satellite? Probably not as hard as you think. [Modern Ham] has a new video that shows just how easy it can be. It turns out that a cheap Chinese radio is all you need on the radio side. You do, however, benefit from having a bit of an antenna.

It isn’t unusual for people interested in technology to also be interested in space. So it isn’t surprising that many ham radio operators have tied space into the hobby. Some do radio astronomy, others bounce signals off the moon or meteors. Still others have launched satellites, though perhaps that’s not totally accurate since as far as we know all ham radio satellites have hitched rides on commercial rockets rather than being launched by hams themselves. Still, designing and operating a ham radio station in space is no small feat, but it has been done many times with each generation of satellite becoming more and more sophisticated.

Continue reading “All About Ham Satellites”

Building An ESP8266 Doorbell On Hard Mode

It certainly seems as though it should be an easy enough project; all [Miguel De Andrade] wanted was to receive a notification when somebody was pressing his doorbell, and thought it would be a good project to get his feet wet in the wonderful world of ESP8266 hacking. But as fate would have it, not everything went according to plan. In the end he got it sorted out, but it’s an interesting look at how even the “easy” projects can call the gremlins out of hiding.

Arguably, the problems started when [Miguel] picked up an ESP-01 module from a local electronics retailer. While the convenience of buying the hardware in a brick and mortar store can’t be overstated, it did mean he was stuck with a slightly more spartan experience compared to the more common ESP “development boards”. Programming it externally with a Teensy ended up not being much of an obstacle, but it did mean he was stuck with only two GPIO pins.

At any rate, with ESP in hand, the next step was figuring out how the existing bell and intercom system even worked. Unfortunately, after some experimentation [Miguel] found there was a bit more going on there than he’d hoped. According to his multimeter, the one line from the intercom sits at approximately 5 VDC when it’s open, and drops down to 2.5 VDC when pressed. If that wasn’t bad enough, picking up the handset to answer the intercom sent the voltage up to a microcontroller-killing 12 VDC. To complicate maters further, the supply line for the intercom was 23 VAC, so he’d need to rectify that somehow if he wanted to avoid a separate power supply for the ESP.

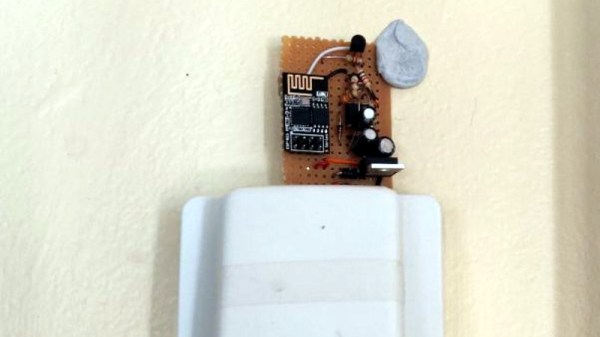
To turn this jumble of voltages into a nice clean 0 – 3.3 V signal for the ESP8266, he came up with a circuit based around the LM358 comparator that utilizes an LM117 regulator to power itself and the ESP at the same time. A couple of diodes are there to block the AC component from causing trouble, and an A2N2222A transistor is used as a buffer amplifier to boost the output of the comparator so it registers as a digital HIGH on the ESP. The circuit took a bit of fiddling to get sorted out, but in the end [Miguel] says it seems to get the job done.

You might think the problems were solved, but this is where it gets really annoying. The system would work fine for awhile, and then inexplicably go silent. In diagnosing the problem he realized that his circuit connected to GPIO_0 was inadvertently putting the ESP8266 into programming mode, since it was holding the pin LOW unless the intercom button was pressed. He assumed he could just move the circuit to the other GPIO pin, but as that one has the board’s LED on it, that caused its own problems. For now, [Miguel] hasn’t come up with a solution to this issue, and has learned to live with the fact that the system won’t come back up cleanly should it lose power for any reason.

If you’re looking for a slightly classier look than a scrap of perfboard stuck on the wall with what appears to be chewing gum, we’ve also seen the ESP8266 used in some more ornate doorbell setups. Of course if you still haven’t gotten your head wrapped around the whole Internet-connected button thing, you can always start with something a little easier.

Star Fox Comes To Arduboy

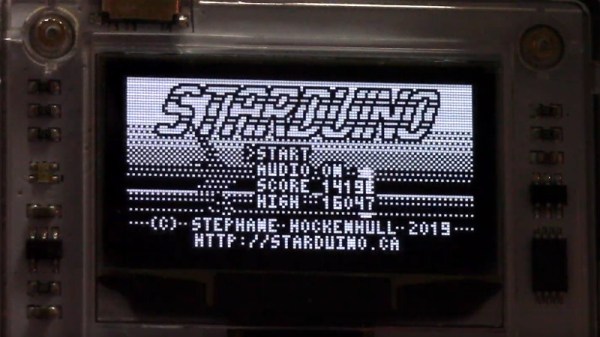
The original Star Fox for the SNES was a landmark game. With the Super FX chip built into the cartridge, it presented the first 3D accelerated home console experience. The series has spanned several consoles and over two decades. Now, it’s getting an (albeit unofficial) port to the Arduboy, thanks to [Stephane Hockenhull].

Impressively, the game fits in under 28KB, and [Stephane] hasn’t skimped on the development details. The process begun with setting up a basic 3D engine on the Arduboy, followed by some tests of various gameplay ideas. The final implementation bears a strong similarity to the original SNES gameplay. At this point, work moved out of the Arduino IDE into [Stephane]’s custom development environment to speed things along. A PC port was used to save time programming the flash every iteration.

The tricks used to pull this off are many and varied. There are neat hacks used to optimise the storage of the 3D model data, implement lightweight collision detection, and generate random levels. Everything was done in order to make the game fit into the smallest space possible.

Running smooth 3D graphics on a 16MHz 8-bit microcontroller is an impressive feat, and a testament to [Stephane]’s coding abilities. We can’t wait to see more 3D development on the platform. Meanwhile, if the Arduboy doesn’t quite have the look you want, there’s a solution for that too. Video after the break.

Continue reading “Star Fox Comes To Arduboy”

Towards Low Cost Biomedical Imaging

Medical imaging is one of the very best applications of technology — it allows us to peer inside of the human body without actually performing surgery. It’s non-destructive testing to the extreme, and one of the more interesting projects we’ve seen over the past year uses AC currents and an infinite grid of resistors to image the inside of a living organism. It’s called Spectra and it is the brainchild of [Jean Rintoul]. Her talk at the Hackaday Superconference is all about low cost and open source biomedical imaging.

We’ve seen some interesting medical imaging hacks in the Hackaday Prize over the years. There have been vein finders and even a CT scanner, but when it comes to biomedical imaging, the Spectra project is something different. Right now, it’s just good enough to image organs while they’re still inside your body, and there’s still a lot of potential to do more. Let’s take a closer look a how this works.

Continue reading “Towards Low Cost Biomedical Imaging”

Making An Ultrasonic Cutter For Post-processing Tiny 3D Prints

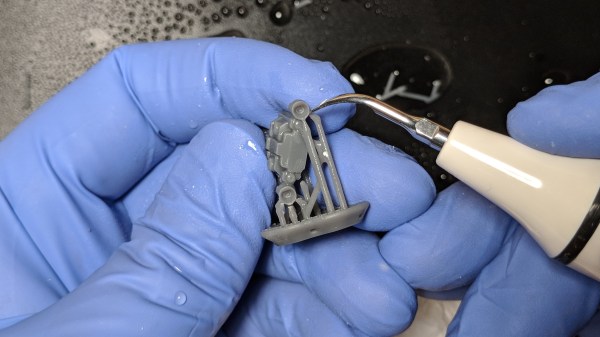
An ultrasonic knife is a blade that vibrates a tiny amount at a high frequency, giving the knife edge minor superpowers. It gets used much like any other blade, but it becomes far easier to cut through troublesome materials like rubber or hard plastics. I was always curious about them, and recently made my own by modifying another tool. It turns out that an ultrasonic scaling tool intended for dental use can fairly easily be turned into a nimble little ultrasonic cutter for fine detail work.

Cheap ultrasonic scaler. The blue disk is for adjusting power. Foot switch not shown.

I originally started thinking about an ultrasonic knife to make removing supports from SLA 3D prints easier. SLA resin prints are made from a smooth, hard plastic and can sometimes require a veritable forest of supports. These supports are normally removed with flush cutters, or torn off if one doesn’t care about appearances, but sometimes the density of supports makes this process awkward, especially on small objects.

I imagined that an ultrasonic blade would make short work of these pesky supports, and for the most part, I was right! It won’t effortlessly cut through a forest of support bases like a hot knife through butter, but it certainly makes it easier to remove tricky supports from the model itself. Specifically, it excels at slicing through fine areas while preserving delicate features. Continue reading “Making An Ultrasonic Cutter For Post-processing Tiny 3D Prints”

Controlling Non-Googley Devices With Google Assistant

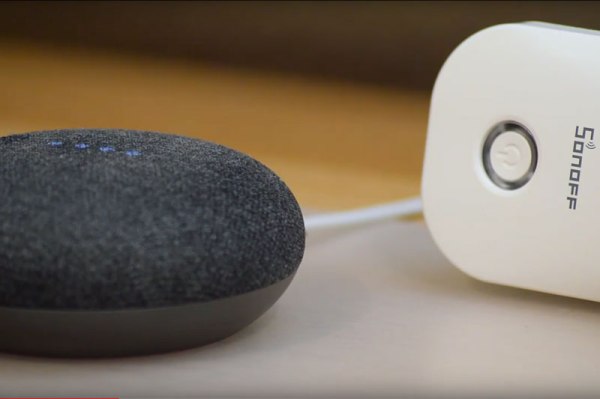
In the near future of the Smart Home, you will be able to control anything with your voice. Assuming that everything supports the Smart Home standard you chose, that is. If you have a device that supports one of the other standards, you’ll end up uselessly yelling at it. Unless you use gBridge. As the name suggests, gBridge is a bridge between Google Assistant devices and the rest of the smart home universe. It’s an open source project that is available as a Docker image can be run on a low power device in the home, or on a hosted service.

Fundamentally, gBridge is a Google Assistant to MQTT translator. Message Queuing Telemetry Transport (MQTT) is the messaging protocol that many smart home devices use, as it runs over TCP and doesn’t take much power to implement. We’ve covered how to bash around in MQTT and do much of this yourself here, but gBridge looks to be somewhat easier to use. It’s just come out of beta test, and it looks like it might be a good way to get into Smart Home hacking.

There are, of course, plenty of other ways of doing this, such as IFFFT, but [Peter Kappelt], the brains behind gBridge, claims that it is more flexible, as it offers support for the whole Google Assistant vocabulary, so you can do things like put devices into groups or do more conditional control (such as if the light level in the hallway rises above a certain amount, start recording with a camera) with non-Google devices. [Peter] is also looking to run gBridge as a hosted service, where he does the behind the scenes stuff to update servers, etc, in return for a small fee.

Continue reading “Controlling Non-Googley Devices With Google Assistant”